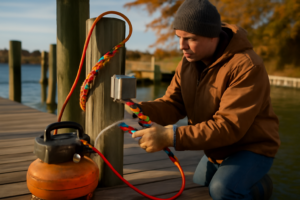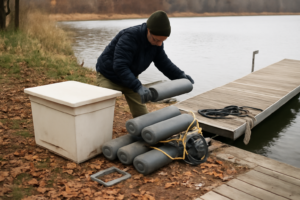
Right now, kneeling beside a section of piling I’m examining, I can see the spiral fractures running down the grain — the telltale signature of ice damage that nobody prepares for until it’s too late. Back in 2011, when an unusually harsh freeze gripped the Panhandle, I watched a client’s treated pine pilings split straight down the middle at the waterline. We’d done nothing to guard against ice damage that winter, banking on mild weather like we always do down here, and the repair bill landed at just over $4,200. That job changed how I think about freeze season. After two decades installing and fixing docks, seawalls, and boat lifts on my own place and neighbors’, and now guiding homeowners through these repairs themselves, I’ve put nearly every protective strategy to the test.
Let me be direct: the bulk of “ice piling protection” products on the market miss the actual problem entirely. They target surface-level symptoms while ignoring what really destroys pilings. The genuine culprit is static ice — a rigid sheet that locks around your pilings and then rises and falls with shifting water levels, functioning like a slow, relentless hydraulic press that forces wood apart from within. Once I grasped this mechanism, my entire approach flipped. Throughout this post, I’m laying out what genuinely protects pilings, where I’ve thrown away money on ineffective solutions, and the specific piece of equipment I now tell every dock owner to have in place before temperatures plummet.
Why Ice Destroys Dock Pilings (The Mechanics Matter)
Convention says ice damage results from expansion pressure — the frozen surface bearing down on the piling and crushing it from the outside. That scenario does occur, but it’s seldom the main destructive force. The genuine menace is the formation of ice sheets. When a broad, unyielding sheet develops across the water and water levels shift below it — whether from tidal movement or wind action — that sheet sends enormous vertical stress downward onto whatever structure it grips. A 4-inch-diameter treated pine piling might withstand roughly 1,500 to 2,000 pounds of sideways force when conditions are favorable. A moving ice sheet? That generates uplift stress regularly exceeding 20,000 pounds on each piling it attaches to.
I’ve removed pilings that looked stabbed — jagged, rotating splits extending 18 to 24 inches along the wood fiber. This pattern isn’t simple crushing. It’s shear fracture brought on by rotational forces from ice shift. Fiberglass and composite pilings resist this better than wood does, yet they’re far from bulletproof. I’ve documented permanent bending in even thick steel pipe pilings packed with concrete after intense ice episodes.
This comprehension restructures your whole protective approach. You’re not attempting to insulate material or encase it in layers. You’re aiming to stop a rigid, unbroken ice covering from establishing itself around the structure initially. That becomes your objective. Every other strategy ranks below that in importance.
Tactics I’ve Spent Money On That Didn’t Deliver
Let me spare you some unnecessary spending. Throughout my years I’ve experimented with foam piling covers, air-bubble insulating jackets, rubber bumpers repurposed as ice guards, and even an inflatable polystyrene ring system running roughly $180 per piling. Each proved ineffective at addressing the actual source of the problem. The foam covers break apart under pressure from moving ice and deliver virtually no structural benefit. The inflatable rings turned out to be the worst performers — they locked the ice in place instead of letting it slip away, which magnified the pulling force applied to two pilings I’d protected at a Pensacola marina location.
I also tested bubbler systems — the compressed-air kind deployed under floating docks to prevent surface freezing. They show decent results in tight, low-current boat slips, but they demand constant upkeep. You’re maintaining and unclogging tubing annually, fighting compressor icing, and the effective reach stays limited. In wide-open docks where water moves freely, those bubbles dissipate too quickly to make any real difference.
The reality is, my biggest financial blunder was simply crossing my fingers and wagering on a mild season. That’s what both my neighbor and I did in 2011. Repeating that error would be foolish. While the Gulf Coast experiences hard freezes far less regularly than northern regions, when they show up, dock owners down here remain caught off guard. Proactive steps become even more vital precisely because such events happen infrequently.
How to Protect Dock Pilings From Ice Damage: Methods That Actually Work
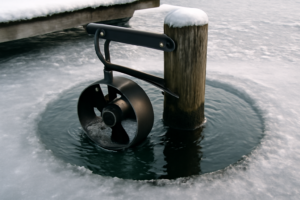
The most successful technique I’ve encountered — without question — is active thermal circulation using a specialized de-icer or circulation pump. The mechanism is elementary: frozen water can’t move. If you maintain active water flow around your pilings extending down to 2 or 3 feet beneath the surface, you interrupt ice’s capacity to bind into one connected layer. One connected layer never forms, then that layer stays immobilized. A stationary layer exerts zero uplift force against your pilings.
Positioning carries extraordinary importance. Orient your de-icer discharge so it angles upward, typically around 15 degrees from horizontal, and direct it to wash across the piling faces instead of running parallel alongside them. For an average 20-foot by 8-foot dock unit containing 6 pilings, a single 1-HP machine positioned with care manages the protection effectively in conditions short of prolonged extreme cold. A 3/4-HP version typically handles the job adequately for smaller structures or gentler climates.
Equally vital is operational timing. Launching your system after ice has already developed is fighting uphill — you’ll likely lose. Start circulation as soon as weather forecasts indicate sustained sub-28°F conditions lasting longer than one full day. Along the Gulf, this translates to keeping close watch on weather patterns from December straight through February and having equipment deployable at short notice.
Supplementary Physical Barriers on Your Pilings
Thermal circulation functions as your primary defense strategy. Incorporating an added physical layer makes practical sense, however, particularly in regions prone to recurrent severe freezing. My recommendation centers on flexible HDPE wrap applied both above and beneath the expected ice boundary — normally spanning from a foot below the lowest water line to roughly 18 inches above the maximum water elevation. While incapable of stopping a traveling ice mass, this does substantially curtail surface scarring and grinding damage.
When constructing in areas prone to winter ice, I specify composite or fiberglass pilings provided budget permits it. They command $80 to $150 more per unit installed compared to pressure-treated wood, yet the expenses saved over time justify the upfront outlay. During a 2018 installation near Niceville, I blended the two — composite pilings positioned at outer corners where ice concentrations peak and conventional treated timber for protected middle pilings — a split-material method that preserved project spending while maintaining critical durability where it counted.
The De-Icer Propeller That Reshaped How I Approach Winter Readiness
I’ve relied on Scott Aerator systems for years. Their de-icers are dependable machines — sturdy motors, solid construction, and manufactured stateside, which proves invaluable when you need replacement components fast. Over the previous twelve months, I started directing clients toward their replacement propeller models as an independent maintenance option, and outcomes have remained reliably positive enough that I’ve incorporated it into the cold-weather prep routine I recommend to everyone.
The Scott Aerator Aquasweep & Deicer Replacement Propeller comes in two sizes: 4 inches for 1-HP units and 5 inches for 1/2 and 3/4-HP units. That sizing distinction matters. A worn or damaged prop on a de-icer doesn’t just reduce efficiency — it throws off the thrust angle and can cause motor strain that shortens the unit’s lifespan significantly. I’ve seen guys run their units all winter on cracked or bent props and then wonder why their motor burned out. Replacing the propeller before freeze season is cheap insurance.
What draws my appreciation to this replacement blade is the engineering of the blade design. It propels water through a narrow, concentrated spray rather than dispersing it across a wide radius. That directed flow is precisely what you require for piling defense — you’re pushing warmer, subsurface liquid upward in a focused stream rather than stirring the whole water column around. On my personal installation, I swapped out the stock prop on my own 3/4-HP Scott system for this 5-inch model eighteen months back and observed notably better performance maintaining a clear ice-free zone during our harsh January stretch recently.
One important detail: this item functions as a replacement blade exclusively — the circulator apparatus comes packaged separately and requires independent purchase. Currently operating a Scott Aerator setup? This blade integrates directly. Starting completely fresh? You’ll need to acquire the complete de-icer package initially and maintain this propeller handy as a future swap-out or upgrade option.
Runner-Up Option for Budget-Conscious Dock Owners
If you’re running a Kasco de-icer, the Kasco Replacement Propeller for 1HP Lake & Pond De-icer is the equivalent upgrade. It’s a quality 4-blade replacement prop that fits Kasco’s 1-HP de-icer series, and it performs well. I’ve installed Kasco units on several projects and the build quality is solid. Honestly, both the Scott and Kasco systems do the job — your choice usually comes down to which brand your existing unit is. Don’t mix propellers between brands; the shaft diameter and blade pitch are not interchangeable.
Seasonal Maintenance Checklist Before Freeze Season
Readiness is typically where recreational dock builders stumble most. This is my exact procedure when I’m preparing clients as temperatures drop:
- Inspect pilings right at the waterline — Look for present fractures, length-wise fissures, or decomposed regions in the wooden material. Any timber exhibiting deeper than 1/4-inch fissuring requires examination prior to the season’s stress.
- Check de-icer blade condition — Swap out any blade showing chips, fractures, or warped geometry. Blade harm cuts circulation output by as much as 30% while putting extra strain on equipment bearings.
- Verify electrical security and GFCI safeguards — Dock-mounted electric systems must include GFCI groundbreaker mechanisms in compliance with NFPA 303 plus ABYC E-11 regulations. This requirement is non-negotiable and extends beyond equipment protection — it prevents electrical submersion fatalities.
- Test de-icer float submersion depth — The machine operates optimally suspended 18 to 24 inches underneath the surface for maximum warm-water retrieval. Modify the tether length as required.
- Eliminate obstructions around pilings — Organic matter or trash collected at the watermark encourages stronger ice bonding. Clear these away before thermometer readings drop.
- Verify local permitting rules — Certain regions require federal Army Corps clearance or municipal waterway agency authorization for dock-based electrical systems including de-icers. Confirm authorization before setting up new systems.
Completing this entire procedure typically consumes roughly 120 minutes on a typical home dock. That investment pays dividends compared to potential weeks of repairs and five-figure expense totals.
When to Call a Pro Instead of DIYing This
I champion DIY solutions, yet I acknowledge realistic boundaries to any project. Bring in a licensed contractor when any of these conditions surface:
- Pilings exhibiting structural instability — When a piling shifts, tilts beyond 2 inches of true, or displays gaps separating it from beam structures, you’re facing structural correction work, not fundamental winterization measures.
- Dock electrical infrastructure requires renewal — Installing new power circuits for circulation devices on docks demands professional electricians holding current NFPA 303 and regional marina electrical credentials. Waterfront electrical jobs are never an amateur undertaking. Period.
- Your property lies within a regulated waterway region — Docks positioned on federally-controlled navigable water demanding Army Corps oversight require Section 10 authorization to add systems. Finding a contractor versed in Corps paperwork prevents aggravation and penalties.
- Evaluating harm after a significant freeze — Following serious winter conditions, hire a specialist to inspect submerged piling sections prior to loading the structure. The exterior may look undamaged, but hidden interior deterioration exists frequently.
Recognizing project limitations shows maturity, not weakness. Docks that injure people are invariably the consequence of someone ignoring their skill ceiling and refusing outside expertise.
Final Thoughts: The Right System to Protect Dock Pilings From Ice Damage
Following twenty seasons of constructing, maintaining, and repairing docks from Destin to Apalachicola, my perspective boils down to this: to protect dock pilings from ice damage, energized thermal circulation surpasses every competing technique in both reliability and cost-efficiency. Coverings and rigid barriers contribute marginally to total protection, but circulating water remains your decisive factor. A dependable circulator equipped with a quality impeller — running right on schedule and set up correctly — secures most personal-use docks throughout anything except the harshest conditions.
The Scott Aerator replacement propeller is the upgrade I recommend most consistently. It’s straightforward to install, it fits a proven de-icer platform, and it ensures your unit is running at full efficiency when temperatures drop. If you’re running Kasco equipment, the Kasco 1-HP replacement prop is the equivalent choice.
Don’t sit idle waiting for severe weather alerts. Have your hardware evaluated today, replace any deteriorated parts immediately, and head into winter secure in the knowledge that your dock can withstand freezing conditions. I’ve observed what unfolds when homeowners delay. The tab arrives steep — and it’s the kind of expensive wake-up call people need only once.
Frequently Asked Questions
How much uplift force can ice sheets exert on dock pilings?
Ice sheets generate uplift stress regularly exceeding 20,000 pounds on each piling they grip. A 4-inch-diameter treated pine piling might withstand roughly 1,500 to 2,000 pounds of sideways force under favorable conditions, but moving ice sheets apply vastly greater rotational forces that cause spiral fractures along the wood grain.
What depth should a de-icer be positioned beneath the surface?
The de-icer operates optimally suspended 18 to 24 inches underneath the surface for maximum warm-water retrieval. You should also angle the discharge upward, typically around 15 degrees from horizontal, and direct it to wash across the piling faces rather than running parallel alongside them.
What size de-icer do I need for my dock pilings?
For an average 20-foot by 8-foot dock unit containing 6 pilings, a single 1-HP machine positioned with care manages the protection effectively in conditions short of prolonged extreme cold. A 3/4-HP version typically handles the job adequately for smaller structures or gentler climates.
When should I start running my dock de-icer before freeze season?
Start circulation as soon as weather forecasts indicate sustained sub-28°F conditions lasting longer than one full day. Along the Gulf, this translates to keeping close watch on weather patterns from December straight through February and having equipment deployable at short notice.
Sources and further reading
About This Article

Written by Trent Hollis. Waterfront homeowner turned DIY obsessive. After two decades tinkering with my own dock, seawall, and boat lift on the Gulf Coast, I share everything I've learned about waterfront construction, boat lift maintenance, and coastal living projects. More about this site.
Scope and limits. Trent is a waterfront homeowner, not a licensed marine contractor. Structural, electrical, and lift work should go to a licensed marine contractor, and most in-water work needs a permit before you start.
Verify this against a primary source
Specifics change, and your situation may differ from the one described here. These are the authorities worth checking directly:
- ABYC — marine electrical and construction standards
- U.S. Army Corps of Engineers — permitting for work in navigable waters
- NOAA Tides & Currents — tidal range and water level data for your site