Hurricane season along the Gulf Coast has a way of exposing what your dock really needs. When salt spray picks up and the wind tests every fastener you’ve installed, gaps in design become obvious — and nowhere is that clearer than at a fish cleaning station. Most DIYers bolt down whatever’s handy and hope it survives the season. After watching three purpose-built stations hold up while improvised setups fell apart, I can tell you the difference matters.
The mistake people make is treating a fish cleaning station like it’s just a table. What you’re actually building is a workstation engineered to handle salt air, direct UV, fish oils, constant moisture, and hard use — often compressed into a single afternoon. Miss the design details and you’ll be replacing pieces every year. Nail it, and you’ve got the hardest-working surface on your entire dock. I’ve taken three complete installations from concept through years of daily use, and what follows is exactly what those three projects taught me about what endures and what doesn’t.
Planning Your Fish Cleaning Station: Location, Size, and Code Considerations
Your first decision should be where the station lives on the dock. Most people assume the far end is the logical spot, reasoning that’s where fish cleaning belongs and won’t interfere with boat traffic. The problem with that logic: you’re now far away from your water source and you’ve got a long, messy drainage run back toward your shore connection. I’ve found the sweet spot is along the dock’s side, positioned about two-thirds of the way out. That location gives you easy access to utilities, keeps everything reasonably compact, and doesn’t create a dead zone at the end of your pier.
Dimensions deserve more thought than they typically get. Your working surface needs to be at least 24 inches front to back and 48 inches along the length — that’s minimum room to process a hefty flounder or a solid redfish without having the tail hanging into space. On my third installation, I went 30 by 54 inches, and that additional 6 inches in both directions made a measurable difference in comfort and functionality. For height, aim for 36 to 38 inches — the same as a kitchen counter. Anything lower and you’re bent over like you’re tying a shoe for hours after a productive morning on the water.
There’s a compliance layer most DIYers want to skip, but you shouldn’t. If your dock sits on navigable waters — and most Gulf Coast properties do — the Army Corps of Engineers likely has jurisdiction over structural additions. Contact your local Corps district office and confirm what approval, if any, your installation requires. On the utilities side, tying into an existing water line typically requires a licensed plumber in most coastal counties, even if it’s a simple valve connection. ABYC standards don’t directly cover dock cleaning stations, but their marine electrical guidelines kick in if you’re running power or lighting to the area. I’ve watched homeowners get hit with stop-work orders and significant fines for skirting these requirements. The permit paperwork takes time, but it costs nothing compared to dismantling an unpermitted installation.
Choosing the Right Materials for a Saltwater Environment
Standard galvanized fasteners taught me a harsh lesson on build number two: they’ll weep rust streaks down your dock for about eighteen months before corrosion accelerates and fasteners fail. That one mistake cost me a complete reinstall and a customer who was understandably annoyed. Since then, every single fastener I use is 316 marine-grade stainless steel. The price premium is steep — roughly three times what galvanized costs — but there’s legitimately no substitute if you want a station that lasts.
For the supporting frame, your realistic options are either powder-coated aluminum or Schedule 40 PVC pipe. Aluminum has superior strength and looks more polished, but requires welding skills most DIYers don’t have. PVC is genuinely durable for this application and far more accessible — a solo builder with basic tools can handle it without much struggle. The actual work surface should be HDPE, which is high-density polyethylene. Commercial kitchens use it for cutting boards because it resists odors, won’t crack in freeze cycles, and doesn’t warp the way marine plywood does when exposed to Gulf humidity month after month. A quality ½-inch HDPE sheet in 24-by-48 dimensions will run you $60 to $80 when you source it from a plastics distributor.
Your drain setup needs to be a 1½-inch PVC standpipe fitted with a removable screen cap on top. That screen keeps scales and viscera from migrating downstream and creating blockages. Wherever possible, route your drain line toward shore rather than directly into your marina slip or the surrounding water. Discharging fish processing waste into the water column violates most marina operating agreements and creates genuine environmental consequences. A sealed bucket collection system or a gravity line running to a shore-based disposal point keeps everyone content and keeps your marina neighbors from having words with you.
Fastener and Hardware Checklist
- 316 stainless steel lag bolts, minimum ⅜-inch in diameter, for all primary frame connections
- Stainless carriage bolts with locking nuts featuring nylon inserts, required for all through-bolted joints
- HDPE or nylon washers positioned under fasteners that contact your work surface material
- Wire rope with PVC coating or stainless chain for securing any hand tools to the station
- Marine-rated silicone sealant — avoid standard caulk products intended for residential drywall
How to Build Fish Cleaning Station Dock Structure Step by Step
What follows is the installation sequence I’ve refined across three complete builds. This walkthrough assumes you’re mounting to an existing dock with either composite or treated lumber decking, and that a water supply line already reaches the dock location. A skilled DIYer with basic tools should budget a full weekend — roughly 12 to 14 hours split across layout, fabrication, and finishing work. Material expenditure typically falls between $200 and $350 depending on whether you assemble from component parts or purchase a pre-engineered station frame kit.
Step 1: Frame the Support Structure
My preferred design uses a pair of vertical legs with a horizontal crossbeam connecting them at the top, plus one diagonal brace per side for lateral support. Cut your legs from 2-inch schedule 40 aluminum square tubing, each piece 38 inches tall above the deck surface. Secure the base of each leg to the dock decking with ⅜-inch stainless lag bolts driven into the structural joists below — never rely on fasteners that only engage the decking surface itself. If your joist direction doesn’t align with your preferred bolt locations, sister a 2×6 pressure-treated joist to the underside of the deck to provide adequate fastening depth.
Step 2: Mount the Work Surface
Your HDPE sheet connects to the top frame member using ¼-inch stainless bolts that pass through pre-drilled holes. When drilling those holes in the HDPE, make them slightly oversized — roughly 5/16 inch diameter for a ¼-inch bolt — because HDPE expands and contracts significantly as temperatures fluctuate throughout the year. Tight holes in plastic eventually cause stress cracking, a mistake I learned on build two when a $75 sheet became unusable after a single winter. Insert HDPE or nylon washers under each bolt head and nut to eliminate direct metal-on-plastic contact, and leave minimal gap at each fastener point.
Step 3: Install the Drain, Water Supply, and Accessories
Locate your drain opening toward the back edge of the HDPE surface, not in the middle. Rear-mounted drainage clears your actual work zone and naturally directs liquids away from the operator. Thread a 1½-inch PVC female adapter (bonded with marine-grade PVC cement) through your 2-inch drain hole from underneath, then install your standpipe with removable screen cap. For water delivery, a simple setup using a ½-inch brass ball valve, short coil of reinforced hose, and spray nozzle attachment is sufficient. Mount that hose on a stainless clip hook bolted or welded to the frame itself. While you’re building, add a stainless hook for hanging knives and a paper towel dispenser bracket — these finishing touches convert an empty table into a genuinely useful station.
The 48-Incher That Finally Stopped Me From Redesigning Every Three Years
My first two custom builds looked impressive until weather or regular use exposed gaps in planning. I kept adjusting details, chasing problems, essentially rebuilding the same station with incremental changes each season. At some point, I stopped fighting the saltwater environment and started designing with it. A commercial-grade cleaning station engineered specifically for marine docks eliminates that constant revision cycle.
What works
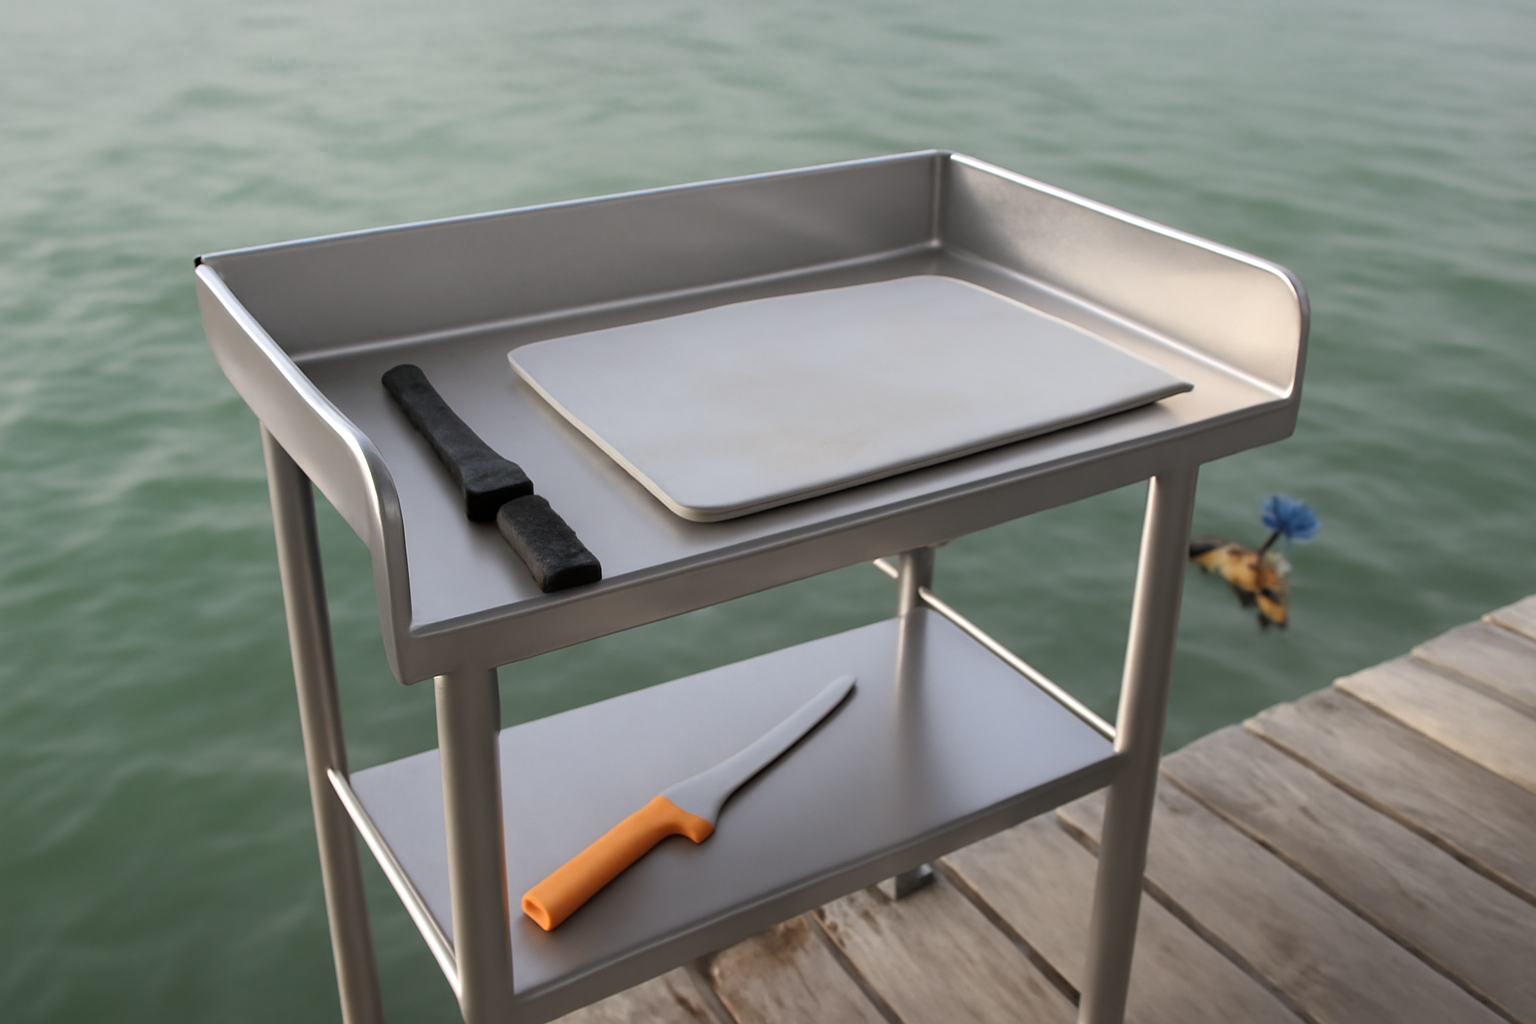
- Stainless construction combined with integrated drain design handles saltwater exposure and daily pressure washing without developing corrosion or wood deterioration — no more plywood sagging by your second season.
- At 48 inches in length, you have sufficient room to process large redfish and bigger specimens without jamming your cutting board, yet the width stays narrow enough that reaching across doesn’t kill your back or cost you mechanical advantage.
- Mounting hardware and fastening patterns are dock-specific, eliminating improvisation and the uncertainty of whether your bolts will survive winter’s freeze-thaw cycles.
What doesn’t
- Compared to throwing some plywood on a sawhorse, the upfront cost is substantial, which means you need genuine commitment to a permanent dock installation rather than treating it as temporary seasonal gear.
- Pre-drilled mounting holes follow standard dock bolt spacing, so non-standard pier framing means you’re drilling additional holes and fabricating custom brackets.
I hesitated for a full season, worried I was overthinking a simple task and throwing money at a problem I could build myself—until I caught myself hand-scrubbing mold off my second homemade station at midnight before a charter trip. That’s when I ordered the Magma Products T10-449B-HDP 48″ Tournament Series Dock Cleaning Station and never looked back.
Frequently Asked Questions
Where should I position a fish cleaning station on my dock?
Position it along the dock’s side, about two-thirds of the way out. That location gives you easy access to utilities, keeps everything compact, and doesn’t create a dead zone at the far end. Avoid the far end because you’ll be far from your water source with a long, messy drainage run back to shore.
What size work surface do I need for cleaning large fish?
Your working surface needs to be at least 24 inches front to back and 48 inches along the length—minimum room to process a hefty flounder or redfish without the tail hanging into space. I went 30 by 54 inches on my third build, and that extra 6 inches in both directions made a measurable difference in comfort and functionality.
Can I use galvanized fasteners on a Gulf Coast dock?
No. Standard galvanized fasteners weep rust streaks for about eighteen months before corrosion accelerates and they fail. Every fastener must be 316 marine-grade stainless steel. The price premium is steep—roughly three times what galvanized costs—but there’s no substitute if you want a station that lasts.
What material should the work surface be made from?
Use HDPE, which is high-density polyethylene. It resists odors, won’t crack in freeze cycles, and doesn’t warp the way marine plywood does when exposed to Gulf humidity. A quality ½-inch HDPE sheet in 24-by-48 dimensions will run you $60 to $80 from a plastics distributor.
Sources and further reading
About This Article

Written by Trent Hollis. Waterfront homeowner turned DIY obsessive. After two decades tinkering with my own dock, seawall, and boat lift on the Gulf Coast, I share everything I've learned about waterfront construction, boat lift maintenance, and coastal living projects. More about this site.
Scope and limits. Trent is a waterfront homeowner, not a licensed marine contractor. Structural, electrical, and lift work should go to a licensed marine contractor, and most in-water work needs a permit before you start.
Verify this against a primary source
Specifics change, and your situation may differ from the one described here. These are the authorities worth checking directly:
- ABYC — marine electrical and construction standards
- U.S. Army Corps of Engineers — permitting for work in navigable waters
- NOAA Tides & Currents — tidal range and water level data for your site