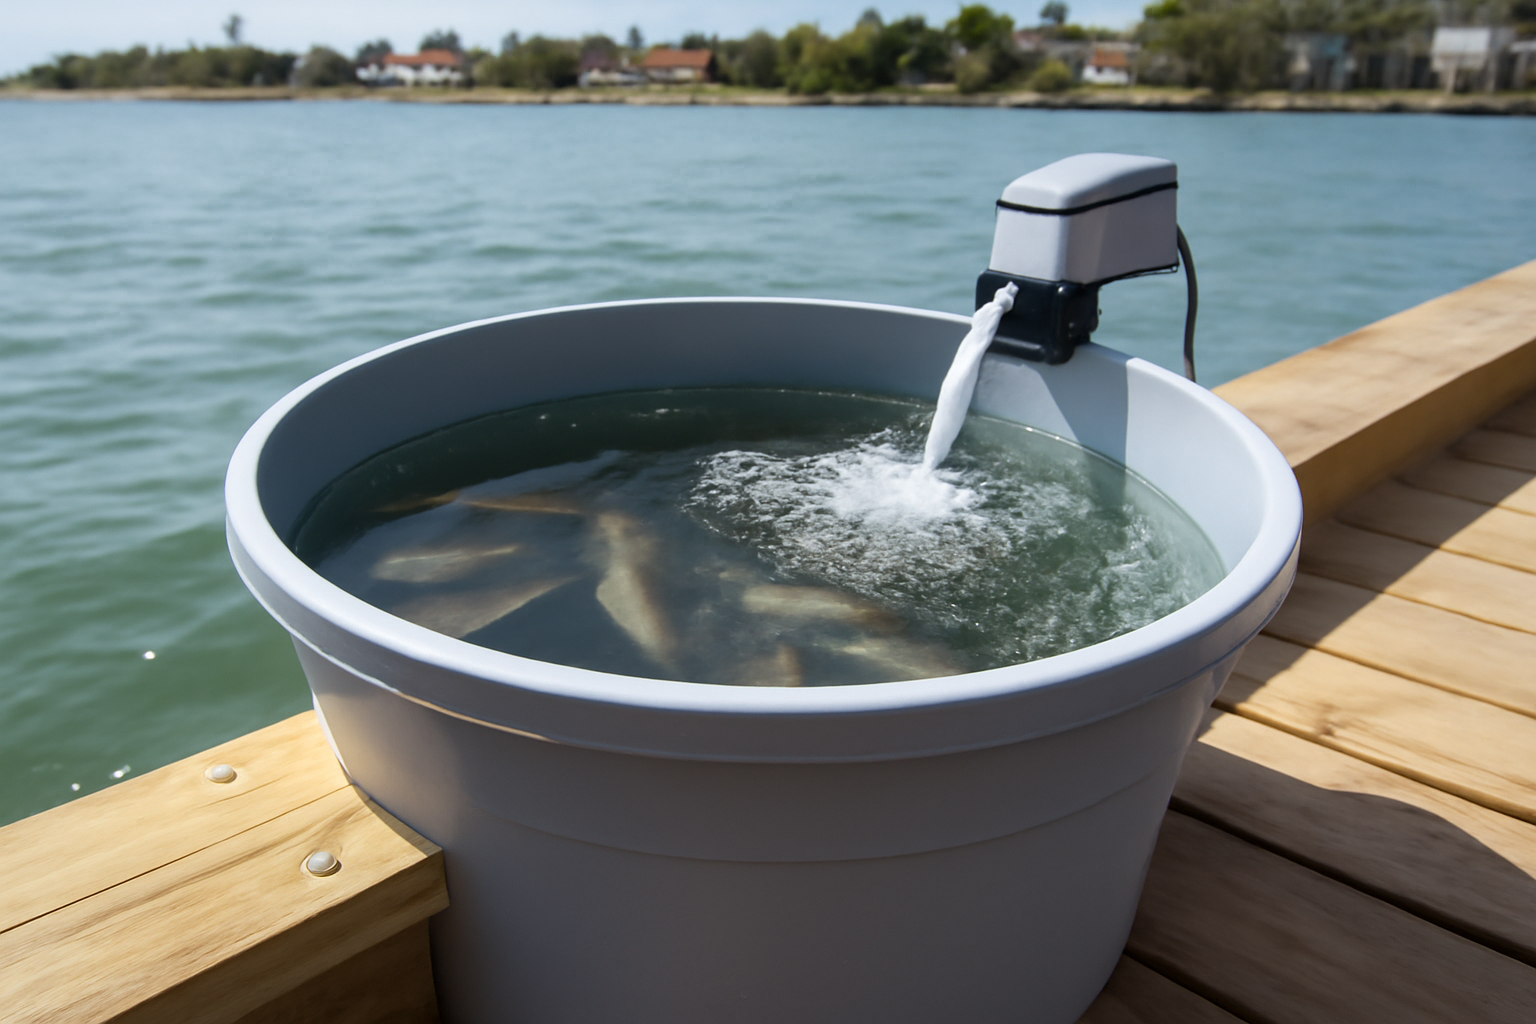
Down at the marina one summer, I watched a guy’s 12-pound redfish die in a borrowed cooler when the ice gave out before weigh-in. He’d had that fish alive an hour before. It’s one of those moments that stays with you. What he needed was a functional DIY dock-mounted livewell — the kind of setup that keeps bait fresh, preserves your catch without constant ice runs, and turns your dock into an actual working fishing station instead of just a mooring point.
A lot of folks believe that a dock livewell has to be either a nightmare to build or cost a fortune. From what I’ve seen, both assumptions fall apart if you approach it methodically. The real sticking point for most people is the pump-and-plumbing side — people tend to improvise when they should be measuring. I’m laying out the exact approach I use on my own jobs, the same explanation I’d give you while we’re standing there looking at your dock together.
Planning Your DIY Livewell Dock Build: Sizing and Placement
Lock in your tank capacity before you order anything else. Undersized livewells suffocate bait in hours. Oversized ones demand more power than most dock electrical systems can reliably supply. On the Gulf Coast, I typically recommend tanks in the 25- to 40-gallon window. That volume keeps roughly a dozen live shrimp or several bigger baitfish thriving for the entire day on a standard 1/500 HP aerator pump without overloading your infrastructure.
Where you put the tank is every bit as important as how big it is. You’ll want it positioned near your water source — typically between 6 and 8 feet from the dock edge — to cut down on pump pressure losses. I also keep livewells shaded whenever feasible. Water temperature is the enemy. Sit a 30-gallon tank in direct sun on a July afternoon along the Gulf, and it’ll hit 90°F in less than two hours. That’s catastrophic for bait. A shade structure or even a basic aluminum cover panel makes a tangible difference in survival rates.
Think about how water exits the system too. Your livewell requires an overflow drain that flows back into the water rather than across your deck — a 1-inch drain line fitted with a 90-degree elbow handles this. Before you start drilling, contact your local municipal authorities about whether you need a permit. Across Florida and most of the Gulf region, dock work may fall under Army Corps of Engineers Section 404/10 permitting depending on the waterway classification and work footprint.
Finding the Right Pump for Your Dock Livewell
Your pump is everything. Fail here and the rest of your system is worthless. I’ve watched people grab whatever bilge pump was on sale and then wonder why fish are dying. A bilge pump shifts water — sure — but it’s engineered for intermittent use and not calibrated to the flow requirements a livewell actually needs. What you want is a dedicated aerator or livewell pump built for round-the-clock operation.
For a 25- to 40-gallon capacity, target a pump that delivers between 360 and 500 gallons per hour when measured at zero head pressure. Once you factor in real-world dock conditions — lift heights of 4 to 6 feet plus 6 to 8 feet of horizontal runs — your effective output drops to roughly 200 to 300 GPH. That’s the right speed to recycle your entire tank volume every 6 to 10 minutes, keeping dissolved oxygen up without slamming your baitfish with excessive current.
Rule Marine and Attwood both produce dependable 12V livewell pumps in the $25 to $50 ballpark that have performed consistently in my work. For bigger tanks or serious saltwater bait operations, I’ll step up to a Johnson Pump. The critical detail: always buy a pump explicitly rated for saltwater environments — that means a stainless or composite impeller assembly, not raw aluminum. I learned this on my own dock in 2009. I’d installed a freshwater pump, and by spring the aluminum impeller housing was so corroded it failed completely. Swapped it out for a saltwater-certified Rule 1600, and that problem disappeared.
Strainer Baskets and Intake Line Protection
Never skip a strainer on your intake side. Broken shells, jellyfish pieces, and other Gulf debris will destroy a pump impeller in a hurry. I install a 3/4-inch inline strainer basket — costs roughly $10 from any marine retailer — mounted on the water-facing pump inlet. Give it a rinse every couple of outings. Thirty seconds of maintenance beats a $45 pump failure every time.
Building Your Livewell Plumbing: Hose, Fittings, and Current Management
My livewell plumbing runs 3/4-inch reinforced PVC hose for both the supply and return paths. You can use rigid Schedule 40 PVC where lines are permanent, but any section that needs to bend or navigate around dock structure should be reinforced hose. Vibration breaks rigid pipe, and UV turns unprotected plastic brittle within a few seasons of Gulf sun. Plan on $1.50 to $2.00 per linear foot for quality reinforced hose material.
Every joint gets two stainless steel hose clamps — there’s no exception to this rule in saltwater. Standard zinc-plated hardware corrodes to failure in a single season on the Gulf Coast. I’ve seen entire rigs lose their plumbing because someone used bargain-bin clamps. Switch to stainless — they run about $1.50 apiece and remain functional for years. It’s inexpensive insurance.
The water returning into your tank should enter at or slightly below the waterline inside the livewell. Pouring water in from above creates turbulence and frightens baitfish. I cut the return line at 45 degrees and angle it to establish a smooth circular flow pattern inside the tank. This maintains oxygen saturation and mimics natural swimming conditions for your bait. As for overflow drainage, use a basic bulkhead fitting through the tank wall at your target water elevation. Thread a 90-degree elbow on the outside and run 1-inch PVC downward through your dock structure and below the surface.
Integrating a Recirculation Loop
When clients want to reduce water consumption or dock location means compromised water quality, I wire in a Y-valve that toggles between intake from below the dock and internal circulation within the tank. A Perko 3-way valve works great for this purpose — roughly $20 — but if you’re recycling water, you absolutely need an aerator stone or venturi attachment to prevent oxygen collapse. Leaving this out is a recipe for dead bait.
Electrical Wiring and Power Supply: Safe Dock Installation
Dock electrical work demands attention. Electricity and saltwater don’t forgive carelessness. On livewell builds, I follow ABYC (American Boat and Yacht Council) E-11 standards — these dictate safe practices for DC electrical systems in marine settings. Even though your dock isn’t technically a boat, adhering to ABYC E-11 protects you and matters enormously if insurance ever enters the picture after an electrical incident.
Most livewell pumps operate on 12V direct current. I source mine from a dedicated marine battery housed in a ventilated, sealed enclosure positioned on the dock structure. Always buy marine-grade tinned copper wire instead of standard automotive cable. Standard wire corrodes at the strand level inside the humid saltwater environment and fails within 12 to 24 months. For a 1/500 HP pump drawing 3 to 4 amps, 16 AWG tinned wire is adequate for spans under 15 feet. For longer routes, bump up to 14 AWG to prevent voltage sag.
An inline fuse must sit within 7 inches of your battery terminal — this is an ABYC mandate and a practical safety requirement. A 10-amp marine-rated blade fuse carrier runs about $6 and takes less than five minutes to wire. Also fit a waterproof 10+ amp DC rocker switch to manage pump operation. Put it someplace sheltered from wind-driven rain. Last spring I serviced a client’s dock where the pump was connected through a standard residential light switch. The contacts had oxidized so severely it was arcing — a legitimate fire hazard.
Running AC Power from Shore
If you opt for a 120V AC aerator powered from shore, GFCI protection is mandatory — no exceptions anywhere water is present. NFPA 70’s Article 553 applies to floating structures, and most jurisdictions extend equivalent rules to fixed docks too. Hire a licensed electrician to install any new AC shore power infrastructure. This particular task is where I recommend bringing in a specialist, which I address more fully in the “Professional Contractor” portion below.
A Complete Fish Processing Dock Without Constant Ice Replacement
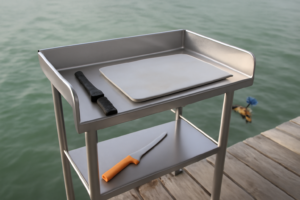
A livewell alone doesn’t handle the full picture—you’ll also need equipment to clean, bleed, and prepare fish directly on-site without damaging your aeration lines or stressing captured fish through rough handling. The Magma cleaning station closes that gap by providing a dedicated freshwater rinse zone and prep surface that works directly with your dock plumbing setup.
Advantages
- At 48 inches of length, the work surface provides genuine elbow room—I can process several fish without one overlapping another, and the recessed basin minimizes water spillover onto surrounding dock boards.
- Stainless steel body withstands both saltwater and repeated freshwater cleaning cycles without deterioration, and it bolts to most dock frames without requiring structural upgrades.
- Built-in faucet taps directly into your existing dock supply, so you’re not dividing your livewell flow or hauling water during preparation work.
Drawbacks
- Getting the station installed means running a new dedicated freshwater supply line—if your dock lacks plumbing already, you’re adding expense and labor beyond the unit cost.
- Drain disposal needs either a through-dock shutoff valve or a collection tank to handle fish processing residue responsibly; you’re prohibited from dumping directly into the water body.
I hesitated on this one because I thought I could get by with a portable table and a garden hose, but after my first summer of juggling fish, ice coolers, and dock space, I realized a permanent station saves time and keeps the catch in better condition. Check out the Magma Products T10-449B-HDP 48″ Tournament Series Dock Cleaning Station if you’re serious about keeping fish alive longer and processing them like a pro.
Frequently Asked Questions
What size livewell tank should I build on my Gulf Coast dock?
I typically recommend tanks in the 25- to 40-gallon window on the Gulf Coast. That volume keeps roughly a dozen live shrimp or several bigger baitfish thriving for the entire day on a standard 1/500 HP aerator pump without overloading your dock electrical system.
How many gallons per hour pump do I need for my livewell?
For a 25- to 40-gallon capacity, target a pump delivering between 360 and 500 gallons per hour at zero head pressure. After accounting for real-world dock conditions, your effective output drops to roughly 200 to 300 GPH, which recycles your entire tank volume every 6 to 10 minutes.
What gauge wire should I use for my livewell pump?
For a 1/500 HP pump drawing 3 to 4 amps, 16 AWG tinned copper wire is adequate for spans under 15 feet. For longer routes, bump up to 14 AWG to prevent voltage sag. Always use marine-grade tinned copper instead of standard automotive cable.
How far should my livewell tank sit from the dock edge?
Position your tank between 6 and 8 feet from the dock edge to cut down on pump pressure losses. This distance also helps you manage plumbing runs and keeps the tank accessible while maintaining adequate spacing from the water source.
Sources and further reading
About This Article

Written by Trent Hollis. Waterfront homeowner turned DIY obsessive. After two decades tinkering with my own dock, seawall, and boat lift on the Gulf Coast, I share everything I've learned about waterfront construction, boat lift maintenance, and coastal living projects. More about this site.
Scope and limits. Trent is a waterfront homeowner, not a licensed marine contractor. Structural, electrical, and lift work should go to a licensed marine contractor, and most in-water work needs a permit before you start.
Verify this against a primary source
Specifics change, and your situation may differ from the one described here. These are the authorities worth checking directly:
- ABYC — marine electrical and construction standards
- U.S. Army Corps of Engineers — permitting for work in navigable waters
- NOAA Tides & Currents — tidal range and water level data for your site