Most waterfront owners believe that cosmetic crack repair requires a contractor’s involvement — and that’s where the real money bleeds away. Let me flip that: many seawall cracks you see won’t fail structurally, and misconceptions about their severity push people toward six-figure replacements they don’t need. A concrete cap that’s cracked on the surface doesn’t mean the wall behind it is coming down.
Two decades on the Gulf Coast building and repairing everything from timber bulkheads to reinforced concrete seawalls has taught me one hard lesson: contractors sell replacements, but honest assessment saves homeowners their down payment. This breakdown covers how to handle seawall cracks yourself — what actually works, what doesn’t, and most importantly, when you’ve hit the limit of what a Saturday afternoon can fix.
First: Understand What Type of Crack You’re Actually Dealing With
The first mistake waterfront owners make is treating every crack the same. Diagnosis changes everything. I’ve grouped seawall cracks into three distinct categories based on cause and risk level, and choosing the wrong repair strategy for the wrong type can turn pocket change into a five-figure disaster.
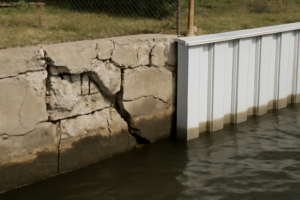
Hairline to 1/8-inch cracks that follow a reasonably straight path and show no step or offset between the concrete faces are shrinkage cracks. These happen when concrete loses moisture as it cures, and our intense Gulf heat makes the problem worse. From a structural standpoint, they’re the least worrisome — you seal them primarily to stop saltwater from finding pathways to the steel reinforcement underneath.
Settlement cracks present a different animal entirely. Soil moves or compacts behind the wall — I see this spike after every tropical system pushes water into the backfill — and when that happens, the concrete panels shift vertically. You’ll notice the edges don’t align anymore; one side steps up relative to the other. Anything over 1/4 inch with visible vertical displacement demands more scrutiny. Structural cracks, by contrast, usually run diagonally, cluster near corners, or appear alongside visible wall bulging or leaning. These indicate the concrete’s load-bearing capacity is already compromised and are not DIY territory.
Identifying Whether Water Is Moving Through the Crack
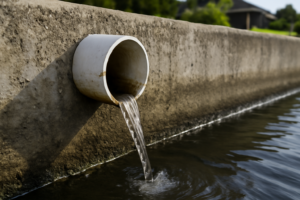
Place your palm against the crack at the lowest tide, then check it again when the water comes in. If you spot weeping, white mineral deposits (efflorescence), or staining that tracks water movement, the wall has active hydrostatic pressure pushing through. That single observation changes which product you reach for, because standard patching compounds will fail under water pressure. You’ll need something engineered to cure and harden in the presence of moisture.
Supplies and Equipment Required for the Job
This isn’t a complicated repair from a tool standpoint. Most of what belongs in your kit probably already hangs on your garage wall. Here’s what actually goes into a typical surface-level seawall patch.
- Diamond-blade angle grinder (necessary for opening and shaping the crack)
- Cold chisel and hammer (alternative to grinding for modest repairs)
- Stiff-bristled wire brush for surface preparation
- Shop vacuum or air compressor to evacuate loose material
- Mixing container and paddle (or a stiff margin trowel for smaller quantities)
- Pointing trowel and margin trowel for application
- Eye protection, heavy-duty gloves, and a P100 mask for dust control
- Spray bottle filled with fresh water
Materials typically fall in the $15–$30 range for a hairline fracture scenario under 1/4-inch wide and shorter than 3 feet. Wider cracks or situations involving water flow can push you toward $40–$80 depending on product quantity. If you don’t already own an angle grinder, equipment rental runs roughly $35–$50 daily through regional shops, so factor that in.
Seawall Crack Repair: The Complete Walkthrough
Back in 2006, my own dock became my schoolroom when I learned this lesson the painful way. I spotted a crack, wiped away the visible gunk, stuffed in some vinyl concrete patcher, and considered the job finished. Come spring, the entire patch separated and fell out. The concrete surface had retained too much algae growth, the bottom of the crack wasn’t mechanically locked, and I hadn’t given myself a fighting chance. That single mistake meant an afternoon of grinding and another $30 in materials. Prep work isn’t optional — it’s the foundation everything else rests on.
Step 1: Widen and Undercut the Crack to Form a Mechanical Bond
Your angle grinder or cold chisel should open the visible fissure to a minimum of 1/4 inch in width and depth. Angle your blade or chisel so the crack is wider at the base than at the surface — this inverted V shape (sometimes called a dovetail) provides mechanical interlock that prevents patch material from working loose. Under our constant tidal cycling and pressure variations, this detail separates temporary fixes from permanent ones.
Step 2: Scrub and Vacuum the Entire Opening
Scrub every surface inside the crack with your stiff wire brush, dislodging concrete dust, biological growth, salt crystallization, and mineral deposits. Follow immediately with compressed air or vacuum suction to pull debris out of the depths. The bond between new cement and old concrete depends on a completely clean interface. After brushing, spray fresh water along the crack to rinse remaining salts and bring it to a damp state. Hydraulic products perform best on a moist — not dry — substrate, which works in your favor on coastal walls where complete drying is nearly impossible anyway.
Step 3: Prepare, Blend, and Place Your Patching Compound
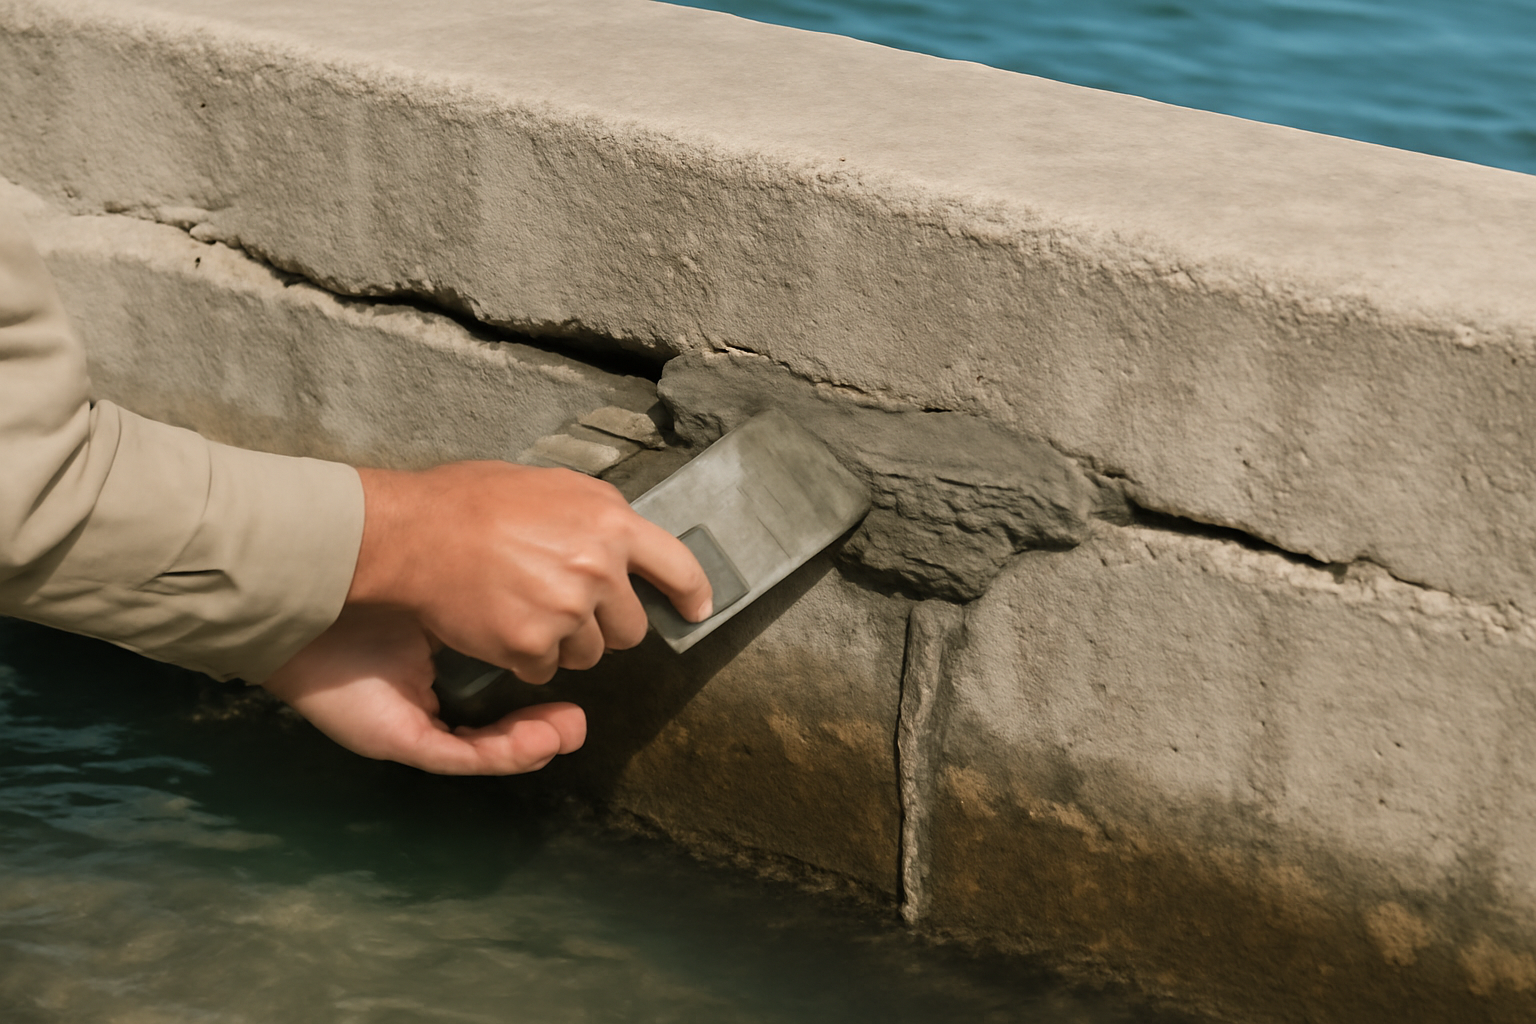
For cracks showing any moisture or active water seepage, I reach for DAP Quick Plug Hydraulic Cement (5 lb) every single time. I’ve used this product on dozens of Gulf Coast bulkhead jobs. The formula sets in 3–5 minutes and generates its own expansive pressure as it cures, which actually forces it tighter into the crack as water tries to push through. Mix it to a stiff putty consistency — thicker than you think you need — and pack it in firmly with a gloved hand or margin trowel. Hold steady pressure for the first 3–5 minutes while it sets.
This is where timing becomes your biggest concern. Batch only the volume you can realistically apply within a 2-minute window. I work in quarter-cup increments when handling hydraulic cement. For cracks actively weeping water, you can shape the wet paste into a cone, drive it directly into the opening, and hold pressure until the material’s chemical reaction creates mechanical lock. DAP Quick Plug carries a water-stopping certification, and across two decades of tidal walls, it’s delivered on that promise consistently.
Step 4: Strike the Surface Level and Protect During Early Curing
After the hydraulic cement achieves initial set, you have the option of smoothing it flush with the surrounding surface or applying a topcoat for aesthetics and protection. Mist the repair area frequently during the initial 60 minutes — wet curing boosts the final hardness and durability significantly. Gulf Coast sun exposure can cause surface checking and crazing if you let it dry out too quickly, so keep it damp. Wait a minimum of 24 hours before exposing the repair to tidal action.
Why DAP Quick Plug Is What Keeps Homeowners Out of Contractors’ Offices
Concrete seawalls demand a product that penetrates, seals, and holds under continuous moisture and pressure cycles. DAP Quick Plug Hydraulic Cement delivers on all three fronts, and it’s what allowed that homeowner on Perdido Bay to walk away with a $40 solution instead of a four-figure bill.
The advantages
- Hardens rapidly and develops full strength even submerged — essential when tidal fluctuations and constant seepage are the baseline conditions.
- Expands during curing, forcing itself into hairline fractures and voids that simple fill-and-level products can’t reach.
- Bonds to damp and even slightly saturated concrete without requiring the impossible condition of a bone-dry surface in a waterfront environment.
The limitations
- The pot life is tight — you’re working with a 10-minute window before the batch becomes unusable, forcing you to plan your approach and work efficiently.
- On cracks exceeding half an inch, this product manages the symptom but doesn’t address the root cause—wider fractures warrant professional analysis and structural intervention.
I’ll admit, the first time I mixed it, I panicked watching it set so fast—I thought I’d wasted five minutes prepping the crack for nothing. But that speed is exactly why it works in tidal zones where you can’t control moisture. Grab a DAP Quick Plug Hydraulic Cement (5 lb) and follow the surface-prep steps in the full guide below.
Concrete Seawall Repairs Beyond Simple Cracks
Cracks are the repair people search for, but they are one of three things that go wrong on a concrete seawall, and the other two need different products entirely. Diagnosing which one you have is most of the job.
Spalling: when the concrete face breaks away
Spalling looks like chunks of the wall face flaking or popping off, often with rusty staining and sometimes exposed steel underneath. It is not a surface problem. Saltwater has reached the rebar, the steel is rusting, and rust expands to several times its original volume — that expansion is what pushes the concrete off from the inside.
Patching over spalling without dealing with the steel is genuinely wasted money. The repair sequence is: chip back to sound concrete all the way around the damage, expose the corroded rebar completely, wire-wheel or sandblast it back to bright metal, coat it with a zinc-rich or epoxy rebar primer, then rebuild with a polymer-modified structural repair mortar. Skip the primer step and you will be doing it again in three years.
Epoxy injection: for structural cracks that go through
For cracks that pass through the wall rather than just scoring the surface, epoxy injection is the structural fix. Injection ports get bonded along the crack every 6–12 inches, the crack face is sealed between them, and a two-part structural epoxy is pumped in at low pressure from the lowest port upward until it appears at the next one.
The honest caveat: epoxy injection welds the crack back into a monolithic section, which is right for a one-time structural crack and wrong for a joint that moves. If the crack opens and closes seasonally, epoxy will simply crack again beside your repair. Moving joints want a flexible polyurethane sealant instead. Getting this backwards is the most common mistake I see.
Seawall cap repair
The cap is the horizontal concrete beam across the top, and it takes the worst of it — sun, foot traffic, mooring loads, and rain sitting on a flat surface. Cap damage usually shows as cracking along the length, spalling at the outer edge, or the cap separating from the panels below.
- Hairline surface cracks: clean and seal with a polyurethane or silane sealer. Low cost, do it every few years.
- Edge spalling: treat exactly like face spalling above — expose steel, prime, rebuild with repair mortar.
- Cap separating from the panels: stop. This means the wall is rotating or the backfill is moving, and re-bonding the cap treats the symptom while the cause keeps working. This one needs an engineer.
- Full cap replacement: forming and pouring a new cap runs roughly $60–$120 per linear foot depending on access, and it is a reasonable project if the panels underneath are sound.
The pattern worth internalizing: surface problems are cosmetic and cheap, steel problems are structural and moderate, and movement problems are geotechnical and expensive. Correctly telling them apart is worth more than any product recommendation I could give you.
Frequently Asked Questions
What product works best for seawall cracks that weep water?
DAP Quick Plug Hydraulic Cement (5 lb) is what I use for active water seepage. It sets in 3–5 minutes, expands during curing to force itself into fractures, and bonds to damp concrete without requiring a dry surface — essential conditions on the Gulf Coast where tidal fluctuations are constant.
How wide should I grind a seawall crack before patching?
Open the crack to a minimum of 1/4 inch in width and depth using an angle grinder or cold chisel. Angle your blade so the crack is wider at the base than at the surface, creating an inverted V shape that provides mechanical interlock and prevents the patch from working loose under tidal cycling.
How long do I wait before the repaired seawall crack handles water?
Wait a minimum of 24 hours before exposing the repair to tidal action. During the first 60 minutes after placement, mist the repair area frequently to boost hardness and durability, since Gulf Coast sun exposure can cause surface checking and crazing if you let it dry too quickly.
What’s the cost to repair a hairline seawall crack myself?
Materials typically run $15–$30 for a hairline fracture under 1/4-inch wide and shorter than 3 feet. Wider cracks or situations involving water flow can push toward $40–$80 depending on product quantity. If you need to rent an angle grinder, add roughly $35–$50 daily.
Sources and further reading
About This Article

Written by Trent Hollis. Waterfront homeowner turned DIY obsessive. After two decades tinkering with my own dock, seawall, and boat lift on the Gulf Coast, I share everything I've learned about waterfront construction, boat lift maintenance, and coastal living projects. More about this site.
Scope and limits. Trent is a waterfront homeowner, not a licensed marine contractor. Structural, electrical, and lift work should go to a licensed marine contractor, and most in-water work needs a permit before you start.
Verify this against a primary source
Specifics change, and your situation may differ from the one described here. These are the authorities worth checking directly:
- ABYC — marine electrical and construction standards
- U.S. Army Corps of Engineers — permitting for work in navigable waters
- NOAA Tides & Currents — tidal range and water level data for your site