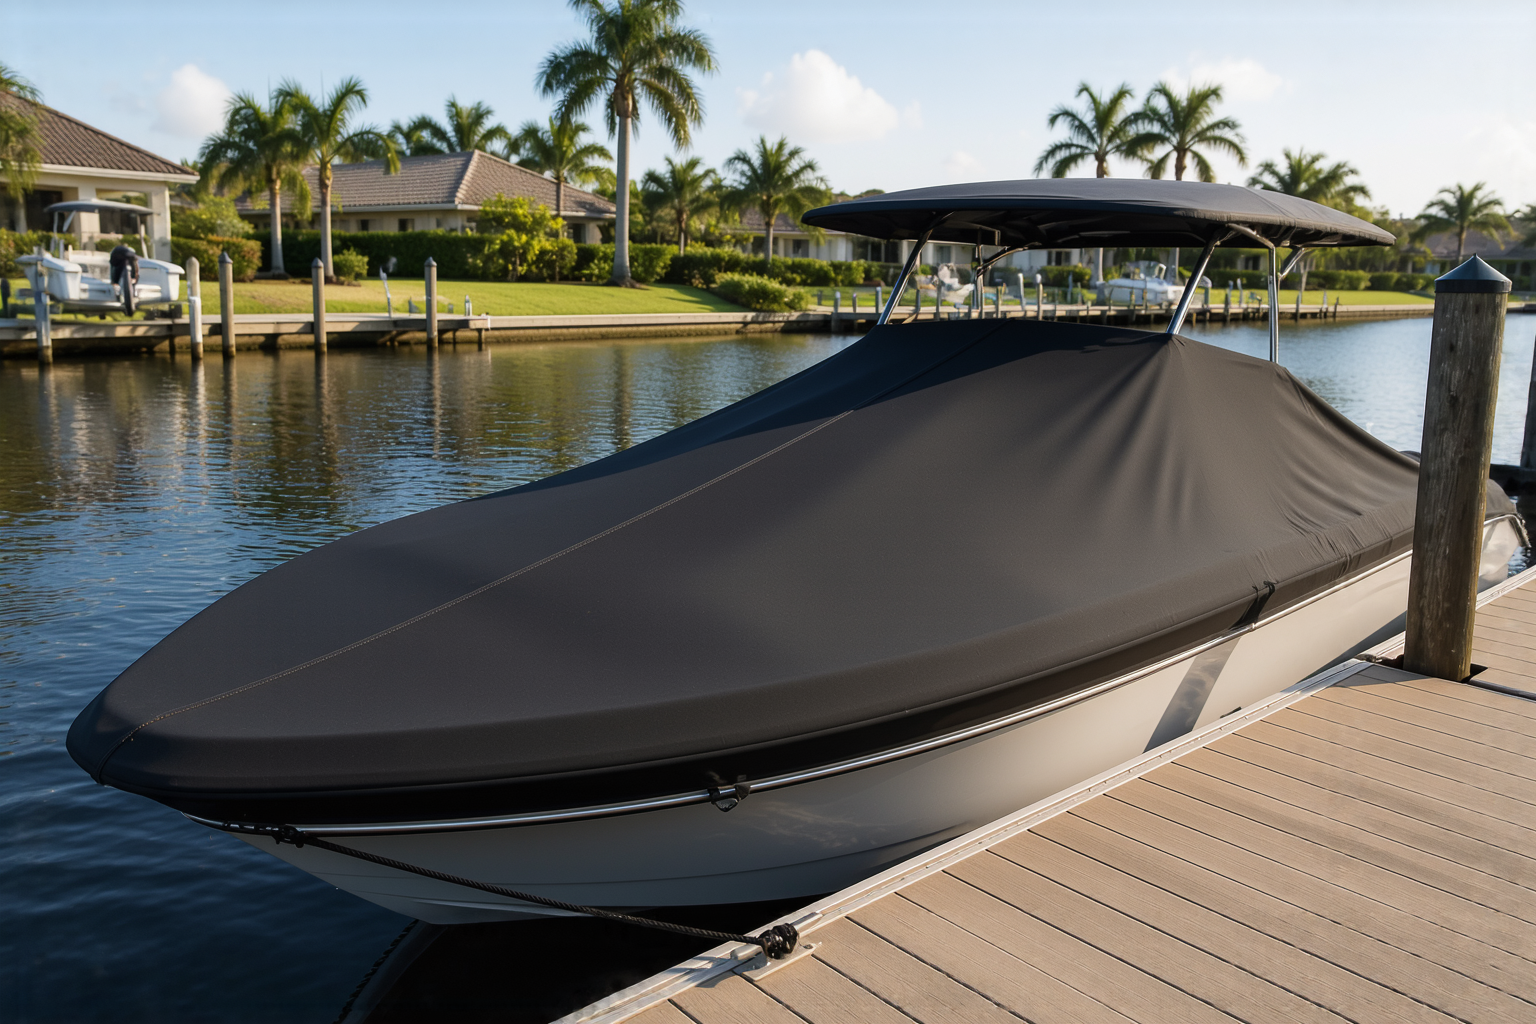
I’ve spent twenty years on Gulf Coast docks building, repairing, and protecting boats from salt spray, UV, and storm damage. One question I hear constantly is whether it’s worth building a homemade boat cover versus buying one ready-made. The honest answer? It depends on your boat’s shape, your budget, and how much time you want to invest. In this post, I’ll walk you through exactly how to build a homemade boat cover that actually fits—and I’ll tell you straight up when buying makes more sense than building.
Quick clarification first: This post is about a fitted weather and storage cover you drape over your boat while it sits docked or in dry storage. It’s not about the DIY boat canopy we covered in our shade structure guide—that’s something you sit under while actively boating. If you’re looking for a shade structure instead, check that post here. If you want to protect your boat from the elements when you’re not using it, keep reading.
Why Build Instead of Buy? (And When Not To)
Let me start with the real economics. A quality marine-grade boat cover for a mid-size jon boat runs $60 to $150. The Heavy Duty Jon Boat Cover for 14.1–17ft boats costs $62.99—and honestly, that’s solid value for something engineered to spec. I own one myself and use it on my 16-footer during hurricane season.
However, building a homemade boat cover makes financial sense if your boat has an unusual shape, you already have tarping materials on hand, or you want a custom fit nobody sells off-the-rack. I’ve built custom covers for catamarans, fishing boats with towers, and center-console rigs where standard covers either gapped at the edges or didn’t clear hardware.
Here’s what I’ve learned the hard way: a cheap, ill-fitting cover causes more damage than no cover at all. Water pools in low spots. Wind lifts edges and lets moisture underneath. Tarps that rub against hardware wear through in weeks. So before you commit to building, ask yourself: Is my boat a standard shape, or does it have custom features (T-top, tower, console shape) that would be better served by a fitted cover?
If your boat is basic—a jon boat, center console, or simple cabin—I’d spend $62.99 on that Heavy Duty Jon Boat Cover instead of your time. But if you’ve got a custom-built rig or enjoy the project, read on.
Materials You’ll Need for a Homemade Boat Cover
Building a homemade boat cover requires the right base material. Don’t cheap out here—I learned that in 2004 during Hurricane Ivan when I watched a $40 tarp disintegrate off a boat I’d covered.
You need marine-grade tarping material. Specifically:
- 14–18 oz. vinyl tarp or heavy-duty polyethylene (not standard 6–8 oz. contractor tarps)
- UV-stabilized finish to resist sun degradation over months, not weeks
- Grommeted edges or reinforced corners rated for load (not just decorative)
- Marine-grade thread if you’re sewing (Dacron or polyester, not cotton)
- Stainless steel hardware—carabiners, D-rings, or tie-down points (galvanized rust and stains tarps in saltwater environments)
- Elastic bungee cord or rope rated for outdoor use (minimum 3/16″ diameter)
Budget: A 20×20 ft. heavy-duty vinyl tarp runs $80–$140 depending on brand. Stainless grommets, cord, and hardware add another $40–$60. So a basic homemade boat cover project costs $120–$200 in materials alone before your labor.
Material Sourcing Tips
I source tarping materials from marine supply houses (not box stores) because they stock UV-stabilized, saltwater-rated products. Online, Westmarine and local maritime suppliers beat Amazon for tarp quality. As a former contractor, I can tell you: industrial tarps and marine tarps are not the same thing.
Step 1: Measure Your Boat Correctly (This Determines Everything)
I check measurements three times before cutting tarp material. One miscalculation wastes material and forces you to buy more. Here’s my field-tested process:
Measure bow to stern: From the tip of the bow to the very end of the transom. For a 16-foot jon boat, that’s typically 16.5–17 feet (accounting for slight curve). Note this as your length.
Measure beam (width) at widest point: Most jon boats are 7–8 feet wide. Measure across the rails or gunwales at the boat’s widest section. This is your width.
Measure height from waterline to highest point: For a jon boat with a T-top or tower, measure from the hull to the top of the highest hardware or frame. For an open boat, measure to the top of the windshield or gunwale plus 2 feet for drape. Call this height H.
Account for overlap and drape: A good cover needs 12–18 inches of overlap on each side that hangs below the gunwale. This prevents water and wind from getting underneath. Add 3 feet to your length (1.5 feet front and back for securing) and add 4 feet to your width (2 feet on each side for drape and securing).
Example math for a 16-ft jon boat:
- Length: 16.5 + 3 feet = 19.5 feet
- Width: 8 + 4 feet = 12 feet
- Height over center: 3.5 + 1.5 = 5 feet (with airflow clearance)
That means you need a tarp roughly 20 × 12 feet as a base. Buy the next size up (usually 20×15 ft. or larger) to account for seam allowances and shrinkage.
Step 2: Design the Panel Shape
Now comes the precision work. Your homemade boat cover needs a peaked shape to shed water—not a flat sheet. I sketch this on paper first.
For a simple peaked design:
- Lay out your tarp flat on a driveway or lawn (this takes space—call a friend).
- Mark the length and width boundaries with chalk or tape.
- Mark the peak line down the center, running the full length of the boat.
- Mark the slope from the peak to the gunwale edge, angling down at roughly 45 degrees to shed water efficiently.
If your boat has a tower or T-top, you’ll need to cut a reinforced opening around those fixtures. Measure the base of the fixture, add 2 inches of clearance on all sides, and mark a rectangular cutout. You’ll reinforce these edges with binding or heat-sealed seams to prevent tearing.
Step 3: Cut and Prepare the Material
I use a utility knife with a sharp blade and a straightedge—not scissors, which pinch vinyl and create weak spots. Cut slowly. Vinyl is forgiving if you’re deliberate; it tears if you rush.
Once cut, you have two options: sew the seams or heat-seal them.
Heat-sealing (my preferred method) requires a heat gun or soldering iron and takes practice. It creates a waterproof bond that doesn’t weaken with vibration. You run the heat source along the seam overlap (lay two pieces of vinyl edge-to-edge with 2 inches of overlap, then heat the overlap until it fuses). Aim for a slow pass without melting completely through. A messy seam still seals—it just looks rough.
Sewing (if you lack heat equipment) works with heavy marine-grade thread and a sewing machine rated for heavy fabrics. Use a zigzag stitch and reinforce with two passes. Seal the stitch line with flexible waterproof sealant afterward to prevent water from wicking through needle holes.
Step 4: Reinforce Corners and Attachment Points
This is where most homemade boat covers fail. Corners and tie-down points see wind load and constant movement. I reinforce by doubling the material at these spots.
For each corner, cut a 6×6 inch vinyl square. Heat-seal or sew it to the underside of the cover at the corner, creating a patch that extends the material’s thickness and distributes load. Once that patch is secure, install a stainless steel grommet through both layers. The grommet distributes force across the reinforced patch instead of tearing through a single layer.
For tower or fixture openings, install binding tape (vinyl or neoprene) around the cutout edges. This prevents fraying and reinforces the opening so it doesn’t rip under wind load. I use self-adhesive neoprene binding from marine suppliers—it bonds to vinyl without sewing and costs about $15 for a 20-foot roll.
Step 5: Install Fastening Hardware
A homemade boat cover is only as good as how you secure it. I install fastening points every 2–3 feet around the perimeter. This prevents wind from lifting edges or the cover shifting during storms.
Install stainless steel D-rings or carabiners at these points:
- Four corners of the cover (already reinforced with patches)
- Midpoint of each side (port and starboard)
- Bow and stern midpoints
- One on each side of any tower opening (to maintain tension)
Connect these points to corresponding tie-downs on your boat or dock using 3/16″ bungee cord or stainless cable with carabiners. Tension should be firm—you should not be able to lift the cover edge more than an inch—but not so tight that you’re straining when you secure it. Tight means stress during wind, which leads to tearing.
The Reality Check: When to Buy a Homemade Boat Cover Instead
I want to be direct: building a homemade boat cover takes 8–12 hours of work if you’re experienced and have the right tools. If you’re new to vinyl work, add another 4–6 hours for learning curve and mistakes. That’s a full weekend or two.
If your boat fits a standard size, buy instead. The Heavy Duty Jon Boat Cover for 14.1–17ft boats at $62.99 is engineered by professionals, comes with proper fastening systems already installed, and includes a warranty. That’s a no-brainer for most people.
The HAHASOLE Waterproof 17–19ft Boat Cover is another solid option if you’re in that size range and want even heavier-duty coverage. Both are under $100 and backed by manufacturer testing I can’t replicate in my driveway.
Build a homemade boat cover if you have a non-standard boat shape, enjoy the project, or want a cover for a custom fishing rig. Don’t build one to save money compared to buying a quality product—you’ll spend the same or more when you factor in your time and materials.
Maintenance and Long-Term Care of Your Homemade Boat Cover
Once your homemade boat cover is installed, it needs seasonal checks. Every spring and fall (before hurricane season in my region), I inspect for:
- Seam separation or visible cracks in vinyl
- Grommet corrosion (even stainless can discolor; replace if seized)
- Bungee cord wear or UV fading (replace if cracked)
- Pooled water indicating sagging (readjust tension or add a center support pole)
Clean the cover twice a year with fresh water and mild soap. Salt spray and algae growth accelerate vinyl degradation. A clean cover lasts 5–7 years; a neglected one fails in 2–3 years.
If you spot a small tear or puncture, repair it immediately with a vinyl patch kit (like those used for inflatable boats). A 2-inch tear left untouched becomes 12 inches within weeks under wind and water pressure.
Final Thoughts on Building a Homemade Boat Cover
After two decades working docks, I can tell you that boat protection boils down to one principle: a fitted, secure cover that sheds water and resists wind is worth whatever you invest in it. Whether that’s $63 for a quality store-bought cover or $150 in materials for a custom homemade boat cover you build yourself, the key is that it stays in place and does its job.
If you go the homemade route, measure three times, use marine-grade materials, reinforce your corners and fastening points, and inspect it regularly. If your boat is a standard size, save yourself the weekend and buy the Heavy Duty Jon Boat Cover—you’ll get a better result faster and support a manufacturer that specializes in this work.
Either way, your boat will be protected. That’s what matters out here on the water.
—Getting the Pitch Right (This Is What Fails)
A boat cover that fits perfectly and sheds nothing is a cover that will destroy itself in one season. Pitch — the slope you build into the cover so water runs off instead of collecting — matters more than the seams, the fabric weight, or the fit. A cover that ponds water is carrying a load it was never designed for: water weighs about 8.3 pounds per gallon, and a depression holding 20 gallons is 165 pounds pulling on your grommets and stretching the fabric permanently.
How much pitch you actually need
- Minimum usable slope: about 2 inches of fall per foot of run from the peak to the edge. Less than that and surface tension holds water on the fabric.
- Gulf Coast rain: aim for 3 inches per foot. Our rain arrives faster than it can run off a shallow slope.
- Anywhere with snow load: 4 inches per foot minimum, and plan to knock it off anyway. Fabric covers are not roofs.
- The test: hose the finished cover down for two minutes. Anywhere water stops moving is a spot that will fail. Fix it before you put the boat away for the season.
Support Poles and Frames That Actually Hold
Pitch comes from what is underneath the cover, not from the cover itself. This is the part people improvise and then regret.
Adjustable center support poles
The simplest approach is a telescoping support pole standing on the deck or a seat base, pushing up at the cover’s centerline. They run $25–$60, and the important features are a broad rubber base pad that will not punch through fiberglass, a padded top cap so the pole does not wear a hole through the fabric from underneath, and a positive locking collar rather than a friction fit. Friction-fit poles collapse in the middle of the night and you find out in the morning.
A ridge line for longer boats
For anything over about 18 feet, one center pole makes a tent with two long sagging valleys either side. Run a ridge instead: a line or a length of PVC or EMT conduit from bow eye to a stern anchor point, held up by two or three support poles along its length. This creates a continuous ridge and the fabric sheds along the whole run.
Cheap options I would skip
- A boat hook or a length of 2×2 wedged under the cover — no base pad, no top cap, and it will eventually wear through the fabric or punch the deck
- A pool noodle over a pole — it compresses when wet and the pitch disappears exactly when you need it
- Anything that relies on the cover’s own tension to stay upright — tension changes as the fabric wets and stretches
Build the pitch in, support it properly, and a homemade cover will last several seasons. Get the pitch wrong and the best-fitting cover you have ever cut will be stretched, stained, and torn at the grommets by spring.
Frequently Asked Questions
How much does it cost to build a homemade boat cover?
A basic homemade boat cover project costs $120–$200 in materials alone. A 20×20 ft. heavy-duty vinyl tarp runs $80–$140, and stainless grommets, cord, and hardware add another $40–$60. That’s before your labor, which takes 8–12 hours if experienced, or 12–18 hours if new to vinyl work.
What tarp material should I use for a boat cover?
Use 14–18 oz. vinyl tarp or heavy-duty polyethylene with UV-stabilized finish and grommeted edges rated for load. Avoid standard 6–8 oz. contractor tarps. Use stainless steel hardware and marine-grade thread like Dacron or polyester, not cotton, because galvanized rust stains tarps in saltwater.
How much pitch do I need to shed water off a boat cover?
Aim for 3 inches of fall per foot of run from the peak to the edge on the Gulf Coast, where rain arrives faster than it can run off shallow slopes. Minimum usable slope is about 2 inches per foot, but less than that and surface tension holds water on the fabric.
How often should I inspect my homemade boat cover?
Inspect every spring and fall, before hurricane season. Check for seam separation, grommet corrosion, bungee cord wear, and pooled water indicating sagging. Clean the cover twice a year with fresh water and mild soap. A clean cover lasts 5–7 years; a neglected one fails in 2–3 years.
Sources and further reading
About This Article

Written by Trent Hollis. Waterfront homeowner turned DIY obsessive. After two decades tinkering with my own dock, seawall, and boat lift on the Gulf Coast, I share everything I've learned about waterfront construction, boat lift maintenance, and coastal living projects. More about this site.
Scope and limits. Trent is a waterfront homeowner, not a licensed marine contractor. Structural, electrical, and lift work should go to a licensed marine contractor, and most in-water work needs a permit before you start.
Verify this against a primary source
Specifics change, and your situation may differ from the one described here. These are the authorities worth checking directly:
- ABYC — marine electrical and construction standards
- U.S. Army Corps of Engineers — permitting for work in navigable waters
- NOAA Tides & Currents — tidal range and water level data for your site