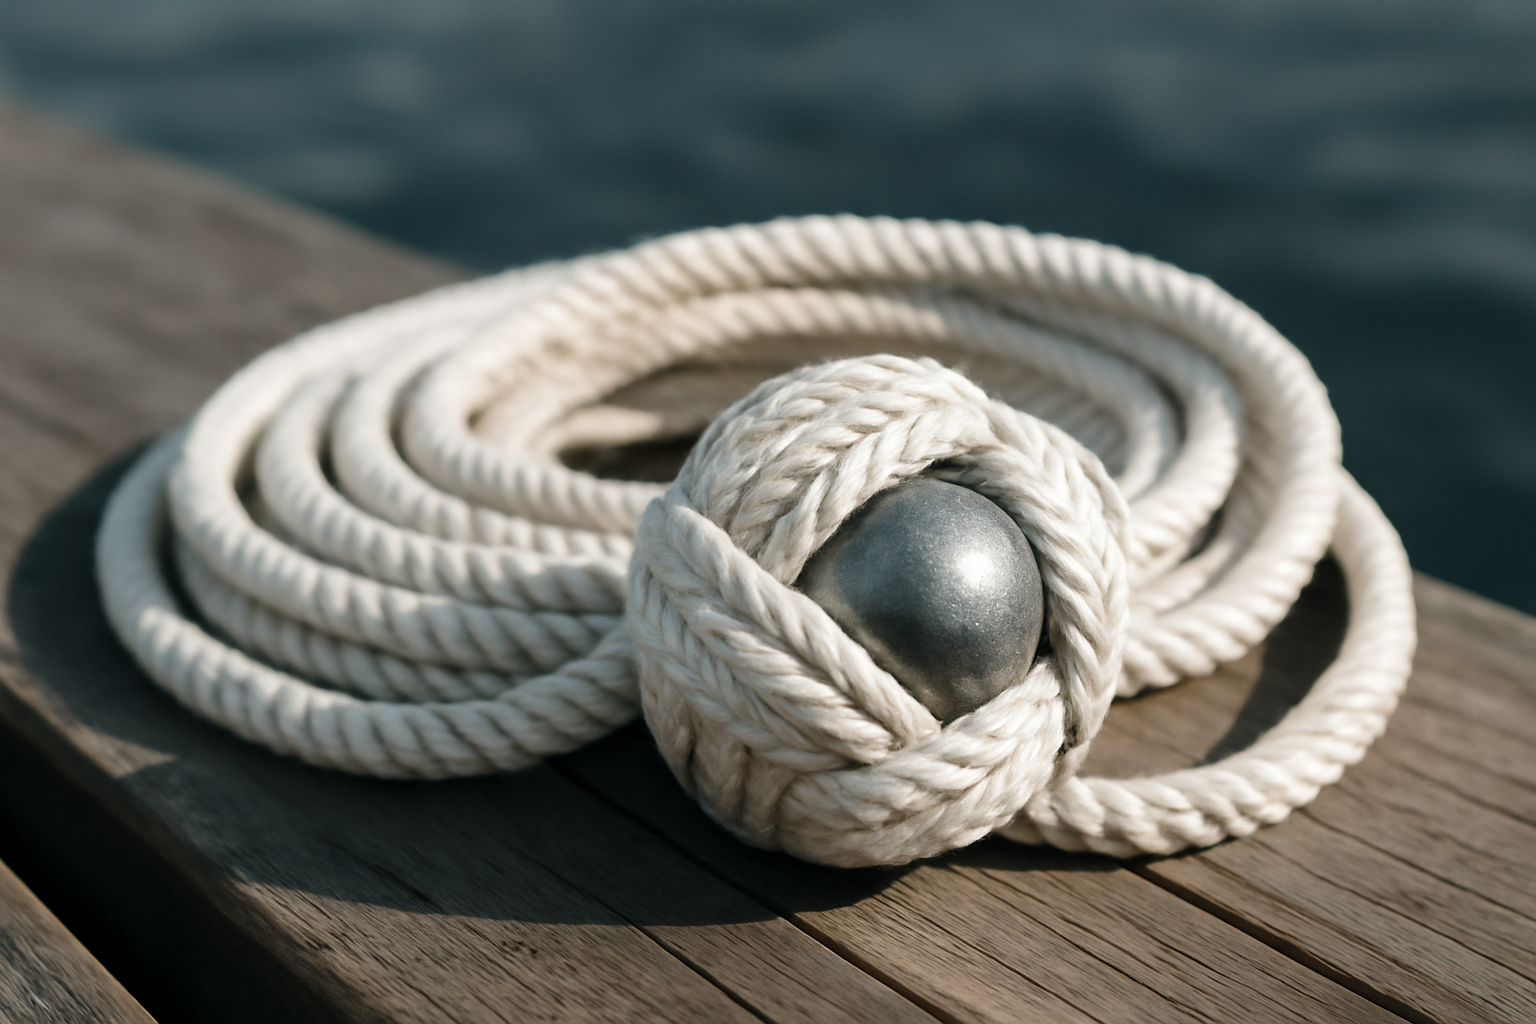
Plenty of waterfront owners assume that any knot you throw will work just fine — weight it, tie it, toss it, problem solved. That assumption costs them money and occasionally costs them boats. A poorly constructed heaving line doesn’t just miss its target; it can come apart mid-throw, leaving you with a useless pile of rope and a vessel drifting toward expensive contact with a piling or a neighbor’s hull. I’ve seen it happen enough times to know that what looks simple on the surface — lobbing a weighted knot across some open water — requires specific knowledge about rope construction, wrapping technique, and core weight to actually function under real conditions.
Several years back, I got called to a private slip where a retired couple had their beautiful 28-foot Grady-White and the dock hand on duty had botched a single-handed mooring attempt during an afternoon squall. The crew member tried throwing a plain rope end across maybe eight feet of choppy water. It fell short. Multiple times. By the time they finally got a line over, the boat had already nudged its starboard side against a piling hard enough to crack the gelcoat and damage the underlying fiberglass — a repair tab that ran north of $2,400. Had someone rigged a proper monkey fist, that line travels thirty feet in wind without issue, and the whole incident never happens.
What I’m laying out here covers the exact mechanics of building one of these knots, the rope specifications that actually matter, and the specific failures I’ve watched unfold when people cut corners. Everything here comes straight from the work itself, not from theory.
When to Use a Monkey Fist on Your Dock
A monkey fist is fundamentally a throwing knot — it puts a dense, compact weight on the end of a messenger line. That concentrated mass carries momentum and trajectory even when wind pushes against it. Remove that weight and you’re throwing rope into the breeze; the line collapses ten feet out and lands in the water. Add the fist and you can put that line thirty to forty feet away with reasonable accuracy once you’ve thrown a few times.
These are the genuine circumstances where having one stationed on your dock actually makes a practical difference:
- Solo docking maneuvers: One person operating a boat needs a line they can deploy independently and retrieve without waiting for crew coordination.
- Gusty waterway conditions: Once wind pushes above ten knots, any unweighted rope basically becomes unusable. The monkey fist stays on course.
- Vertical spacing between dock and vessel: Slips with floating platforms that move with water level changes can create gaps you can’t bridge with an ordinary throw.
- Water emergency situations: Getting a line to someone in trouble near the waterfront requires speed and precision — neither of which you have with a frayed rope end.
- Inter-boat line transfers: When two vessels need to exchange lines in a tight anchorage, a weighted messenger line cuts the coordination time significantly.
One essential detail: the monkey fist itself cannot support load. It doesn’t function as a load knot. It is exclusively a launcher — you pitch it, someone snags it, they pull your actual working line over. Attempting to use the monkey fist as your primary cleat hitch or mooring connection will fail spectacularly the moment a boat pulls against it.
Choosing Appropriate Rope for Your Heaving Line Assembly
The knot tying portion only succeeds if your underlying line material can handle the repeated stress and the corrosive environment. The wrong rope will either shed the monkey fist or become so stiff and kinked that throwing becomes nearly impossible.
The heaving line component needs to be 3/8-inch to 1/2-inch double-braid nylon rope. Double-braid construction runs a braided inner core under a braided outer sheath, creating a flexible and supple line that coils without memory and throws without binding. Standard twisted three-strand nylon will function but tends to spiral during flight and lands in an unpredictable tangle. Polypropylene floats well and resists water absorption but degrades under prolonged Gulf Coast UV exposure and resists clean knot formation. My standard choice for any heaving line that gets used repeatedly stays with double-braid nylon every time.
The object you’ll wrap inside the center of your monkey fist — the weighted core — can be a steel sphere (diameter between 1.5 and 2 inches), a regulation golf ball, or theoretically anything dense enough to provide throwing weight. A tightly wound rope bundle delivers inconsistent performance because the density varies. Steel ball bearings remain my preference for marine dock environments, particularly when throwing against wind conditions, as they maintain consistent density and won’t snag on the wraps. Verify your chosen core is smooth and won’t catch rope fibers as you cinch everything down.
How to Tie a Monkey Fist Heaving Line: Step-by-Step
The mechanics of this knot have remained unchanged for generations, and I’ve repeated them enough times — on the dock in blazing sun, in my shop during winter maintenance, once on a heaving work barge at two in the morning during an emergency parts recovery. What follows is precisely how I execute this knot and arrive at a functional result on the first attempt.
Supplies needed: a segment of 1/2-inch double-braid nylon (minimum six-foot working length), one steel ball or golf ball, and your two hands. No machinery required.
- Form the initial vertical wrap sequence. Grip the line using your non-dominant hand. Establish approximately eighteen inches of free working tail. Bring the working end around your four digits on three separate passes, positioning each circuit flush and parallel to the others. These vertical components establish the first structural plane. Maintain alignment and prevent crossing or twisting.
- Shift orientation and execute the horizontal wrapping phase. Keep the first arrangement of loops exactly as positioned on your fingers. Reorient your hand so those vertical loops now direct themselves outward. Take the working end and circle through all three captured vertical loops another three rotations, this time traveling horizontally. Every horizontal circuit sits flush against and perpendicular to the vertical construction already in place.
- Position your weight object inside the framework. Maneuver your steel ball or golf ball into the pocket formed between vertical and horizontal wrappings. Getting accurate placement matters significantly — offset or eccentric positioning will produce an asymmetrical finished product that throws unpredictably.
- Add the final wrapping layer. Route the working end through the uppermost vertical loop, then take the line around the exterior of the horizontal wrapping circuit another three cycles. These final rotations travel orthogonal to both prior sets and function as the locking mechanism for the entire structure. Thread deliberately through the loops, passing underneath rather than riding over top.
- Execute gradual, methodical tightening instead of aggressive pulling. This phase separates professional results from amateur disappointment. Starting back at the tail, increment slack sequentially out of every single wrap, progressing methodically around the full circumference. Extract small amounts from each loop, proceed to the adjacent loop, then return around. Repeat this cycle multiple rounds — typically three or four total passes — until the structure becomes uniformly compact and the ball interior is completely enclosed.
- Attach the working end to your primary heaving line using a bowline. The remaining tail at the fist exit needs secure connection to the running length of your heaving line by means of a properly tied bowline knot. This bowline junction carries all the functional load. Fashion the loop generously enough to encircle a dock cleat if circumstances require, while maintaining enough diameter that another person can grip it without slipping.
- Validate the completed assembly before deployment. Grasp the heaving line and rotate the monkey fist through a gentle horizontal motion. The finished fist should register as uniform and weighted. Movement or softness in the structure signals inadequate tension in your wrapping sequences. Return to the tightening procedure and extract additional slack before subjecting your setup to actual water use.
Seasoned perspective: Stick with an uneven count of wrapping circuits in each direction — three remains the traditional preference. Certain experienced riggers favor four rotations, but three provides adequate capture of the core mass while maintaining the flexibility characteristics essential for smooth throwing mechanics.
Common Mistakes That Cause the Monkey Fist to Fail
Certain of these lessons arrived through my own expensive trial and error, so let me transfer that painful knowledge directly to you — avoid both the humiliation and the preventable equipment damage.
Inconsistent Wrap Spacing
When your three wrap sequences don’t maintain uniform spacing throughout the assembly, the finished knot tightens unevenly and produces a lopsided fist that travels sideways in the air. Allocate the necessary thirty seconds ensuring each wrap lies directly flush against the circuit before it.
Rushing Through the Tightening Stage
This ranks among my most humbling early mistakes — yanking the working line straight through in one aggressive motion. The wraps jammed unevenly, the ball shifted laterally within the structure, and the outcome resembled a deflated fruit rather than a symmetrical throwing knot. The incremental, circular tightening approach outlined above represents the only reliable technique for achieving balanced geometry. Attempting to cheat the process guarantees subpar results.
Inappropriate Core Selection
Selecting insufficiently dense core material — crinkled paper, foam pieces — produces a fist with excellent flotation but barely sufficient momentum to cross a short dock gap. Conversely, packing in oversized lead fishing weights creates a dangerous projectile that carries uncontrolled kinetic energy toward whoever receives the throw. A 1.5-inch steel sphere or a conventional golf ball sits comfortably within the optimal performance envelope for typical waterfront mooring situations.
Omitting the Bowline Intermediary Connection
Directly fastening the monkey fist into the terminal end of your permanent dock line creates unnecessary stiffness and compromises throwability across the entire assembly. The superior configuration uses a separate lighter heaving line — perhaps 3/8-inch diameter — carrying the monkey fist at its terminus, with your heavier production-grade 1/2-inch dock line secured behind it via bowline. This arrangement permits the heaving line to fly cleanly while the primary line pays out unimpeded during the subsequent pull.
The Dock Line That Holds a Monkey Fist Without Fraying Apart
Executing the perfect knot-tying performance becomes irrelevant if your underlying rope material disintegrates or unravels under repeated deployment and exposure to salty Gulf humidity. The core needs an appropriately engineered double-braid foundation that remains intact even after multiple high-force throws and the corrosive environment surrounding saltwater installations.
What works
- Double-braid construction maintains structural stability through dozens of consecutive throws—the braided inner matrix and outer layer function interdependently so the knot remains consolidated and won’t gradually work free in mid-flight
- Twenty-foot total length supplies sufficient material for constructing a substantial monkey fist cluster (spanning three to four inches across) while maintaining working rope available for actual mooring applications
- Gold and white color contrast renders the rope clearly visible during its flight trajectory and simplifies recovery from the water surface if your catcher fails to connect with the throw
What doesn’t
- The half-inch thickness represents a substantial diameter relative to alternative heaving line specifications, demanding extended practice repetitions before your throws develop consistency if you’ve lacked prior experience
- Nylon fiber retains seawater moisture and requires extended hang-drying after saltwater contact—regular rinsing and air circulation between uses remain necessary to prevent bacterial and fungal deterioration
I had one season where I kept using whatever scrap line I could find, and twice the monkey fist came unraveled mid-throw—cost me time and embarrassed me in front of the boat owners waiting on the other side. That’s when I switched to quality, and the SEACHOICE Double-Braid Nylon Dock Line, 1/2″ x 20′, in Gold/White has been my go-to ever since.
Frequently Asked Questions
How far can you throw a monkey fist in wind?
A properly constructed monkey fist travels thirty to forty feet away with reasonable accuracy, even in gusty conditions above ten knots. An unweighted rope collapses ten feet out and lands in the water, so the concentrated weight makes the difference in performance and distance.
What size steel ball works best for a monkey fist?
A steel sphere with a diameter between 1.5 and 2 inches provides optimal throwing weight for typical waterfront mooring situations. A regulation golf ball also functions well. Steel ball bearings maintain consistent density and won’t snag on rope fibers as you cinch everything down.
How many wraps do you make tying a monkey fist?
Three vertical wraps around your fingers, three horizontal rotations through those loops, and three final exterior rotations that lock the structure. Three remains the traditional preference for adequate capture of the core mass while maintaining the flexibility essential for smooth throwing mechanics.
Can a monkey fist support boat mooring load?
No. The monkey fist is exclusively a launcher — you pitch it, someone snags it, they pull your actual working line over. Attempting to use the monkey fist as your primary cleat hitch or mooring connection will fail spectacularly the moment a boat pulls against it.
Sources and further reading
About This Article

Written by Trent Hollis. Waterfront homeowner turned DIY obsessive. After two decades tinkering with my own dock, seawall, and boat lift on the Gulf Coast, I share everything I've learned about waterfront construction, boat lift maintenance, and coastal living projects. More about this site.
Scope and limits. Trent is a waterfront homeowner, not a licensed marine contractor. Structural, electrical, and lift work should go to a licensed marine contractor, and most in-water work needs a permit before you start.
Verify this against a primary source
Specifics change, and your situation may differ from the one described here. These are the authorities worth checking directly:
- ABYC — marine electrical and construction standards
- U.S. Army Corps of Engineers — permitting for work in navigable waters
- NOAA Tides & Currents — tidal range and water level data for your site