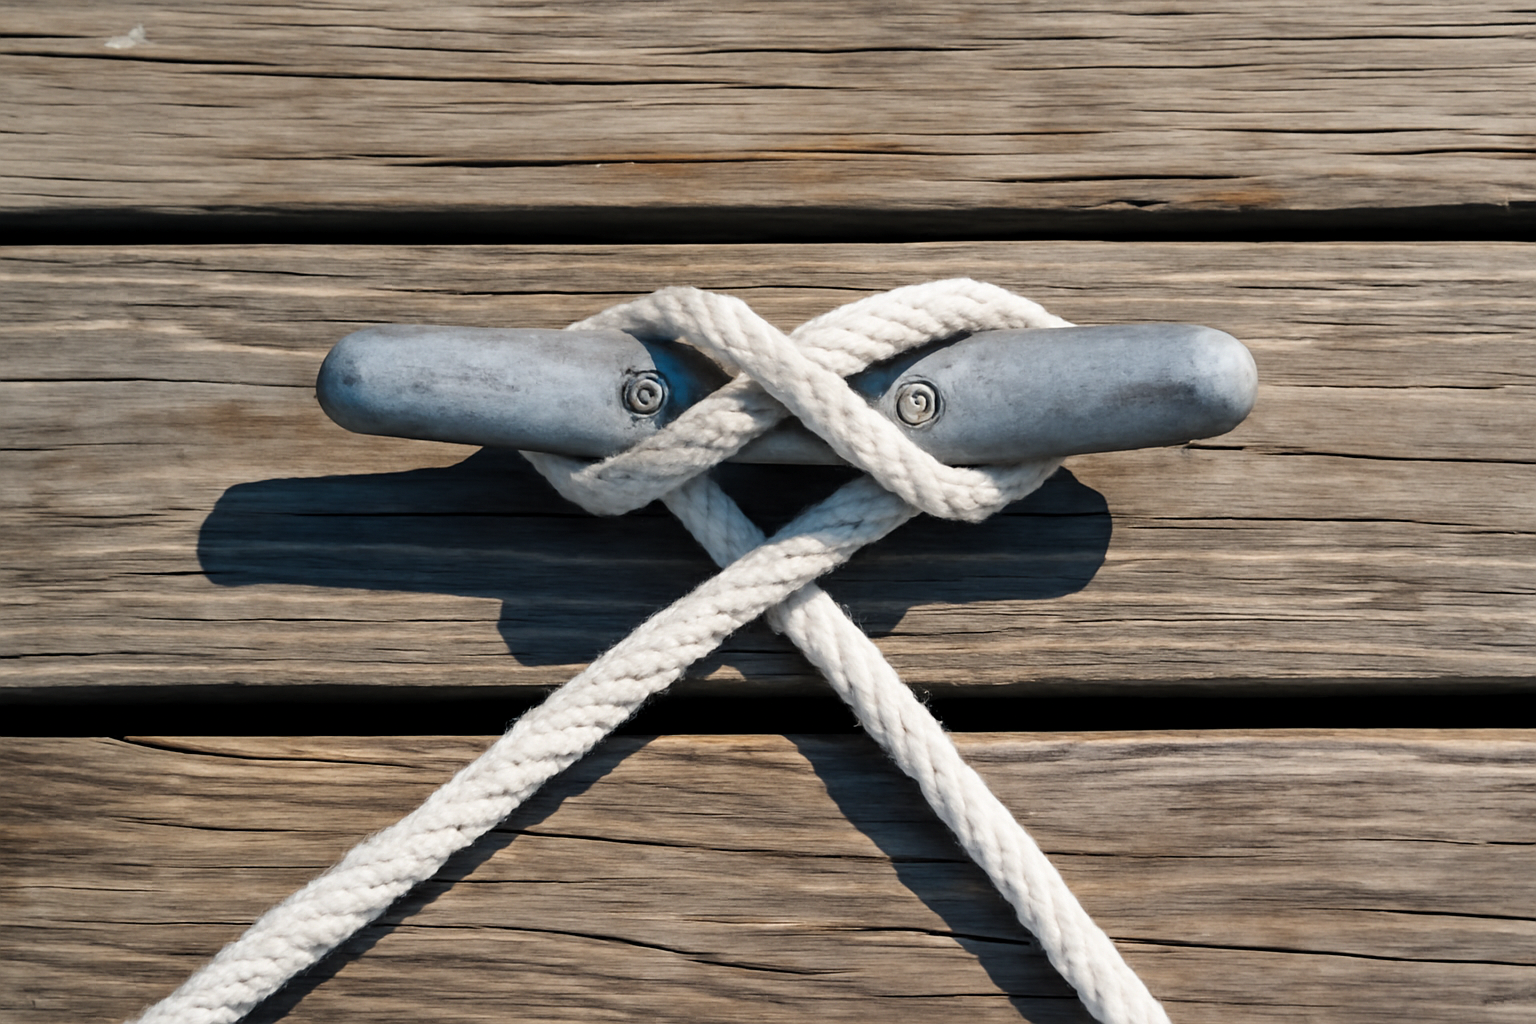
Down at a marina outside Galveston, I watched a 24-footer drift sideways into its neighbor because the owner had wrapped his dock line around the cleat twice and finished with nothing but a basic overhand knot. One passing trawler created enough surge to undo the whole setup within an hour. The repair bill to the neighbor’s gelcoat came to $1,400. That wreck taught me something I’ve carried through twenty years on the Gulf: the difference between a boat that stays put and one that becomes a liability comes down to a single knot — the cleat hitch — and whether you actually know how to tie it.
The cleat hitch isn’t flashy. It won’t win any contests for elegance. But it’s the knot that separates secure docking from disaster, and it’s the one skill every boat owner absolutely needs to understand before they ever leave the dock.
From Pensacola to Corpus Christi, I’ve spent twenty years watching how boats hold or break free. In that time, I’ve learned exactly which practices keep boats where they belong and which shortcuts end up costing money and causing damage. This guide walks you through the right way to do it — the way that works every single time.
When to Use a Cleat Hitch on a Dock
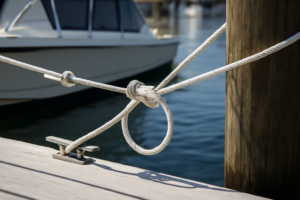
The cleat hitch exists for one very specific purpose: anchoring a line securely to a horn cleat. You see horn cleats everywhere on waterfront property — those T-shaped fittings, usually metal or nylon, with two horns sticking outward. The knot’s design — with its figure-eight pattern combined with a terminal locking hitch — spreads tension across both horns through mechanical friction. That’s precisely why it resists the pulling and movement created by boats surging in their slips when other approaches fail.
Deploy this hitch in these circumstances:
- Securing bow and stern lines when docking alongside a stationary pier or floating platform
- Controlling lengthwise motion with spring lines during fuel service or provisioning operations
- Temporary mooring at short-term locations such as fuel docks, restaurant landings, or waste pump facilities
- Any application demanding a fast, dependable, load-bearing knot that releases without excessive effort
The limitation here is important: a cleat hitch only works when you have a horn cleat available. Tying off to a bare piling requires different knots — a clove hitch delivers what you need, or wrap the line completely around and secure it with two half hitches. But when a horn cleat is sitting right there, nothing outperforms this hitch in terms of holding power, quickness of execution, and how easily you can untie it afterward — even when it’s been under strain for extended periods.
Rope Gauge and Working Load Analysis
The thickness of your dock line carries substantial weight in this equation. Most boat owners in the 18-to-30-foot bracket should reach for 1/2-inch double-braided nylon as their standard. This size carries a working load capacity somewhere between 1,600 and 1,800 pounds under normal conditions, contingent on the brand. For a typical day-cruising boat, this exceeds what surge pressure generates against the cleats by a comfortable margin. Smaller vessels, under 18 feet, often perform adequately with 3/8-inch lines. Anything longer than 30 feet warrants upgrading to 5/8-inch, especially in locations prone to tidal fluctuation or where larger vessels constantly generate wake.
Proper Cleat Hitch Technique: A Six-Step Breakdown
Two decades of working on water showed me the same pattern over and over: people miss crucial early steps or botch the final locking mechanism. Get every stage right, and your hands will execute this automatically within a handful of repetitions.
- Wrap toward the distant horn first. Take the line’s working end and circle it around the cleat’s base, aiming toward whichever horn sits farther away. This first rotation orients the load correctly and stops the line from sliding upward off the horn itself.
- Execute one complete circuit of the base. Pull the line entirely around the cleat’s bottom in a single continuous motion. Maintain contact with the lower portion of the cleat; resist the urge to let the rope climb higher up the horns. When wraps ride too high, friction diminishes and the knot becomes unreliable under pressure.
- Start the crossover pattern. Bring the working end upward and across to the closer horn, then beneath and back across to the far horn. You’re creating that characteristic X shape that distributes load. The geometry here is what builds exponential friction with each revolution — every new wrap compounds holding power rather than just adding to it.
- Finish at least one total crossover sequence. Complete the X pattern fully. One crossing cycle suffices in calm conditions. When storms approach or you’re in high-traffic zones with constant wake, I execute two complete crossing sequences before proceeding to the lock.
- Finish with a locking half hitch. Here’s where most people stumble. Fold the working end back over itself to form a loop, with the working end pointing away and the loop’s underside facing upward. Slide this loop down over the closer horn and cinch it downward firmly. This half hitch is what prevents unwinding during the repetitive tugging that surge produces — it’s the actual lock mechanism.
- Tighten and finalize everything. Pull the working end with deliberate force to flatten and compress the entire assembly. A correctly executed hitch settles flush to the cleat surface with no overlapping segments and no empty space. The working end should point parallel to the dock rather than extending upward.
Essential advice: Resist the temptation to stack multiple locking half hitches on top of one another. It may seem like added insurance. In practice, multiple layers become nearly impossible to undo after hours of tension — and a knot you cannot quickly release during a crisis is genuinely hazardous.
Why Cleat Hitches Fail: The Expensive Lessons
My third year at this taught me harsh lessons about shortcuts. I was securing a 28-footer ahead of incoming weather, and I assumed the figure-eight wrapping alone could handle the load without the final locking step. Around three hours later, the surge began loosening things incrementally. By nightfall, the boat was still in its slip but banging hard against the dock’s protective bumpers. That experience burned a permanent lesson into my brain.
The Major Problems That Cause Failure
- Beginning with the closer horn rather than the distant one. This inverts the mechanical orientation and destroys the friction advantage. Instead of the tension pulling the line deeper into engagement, it pulls the line outward and away from the cleat.
- Omitting the locking half hitch. The crossover pattern alone will gradually slip under the constant push-pull of surge activity. Without the terminal lock, your knot is essentially temporary. That lock is not supplementary — it’s mandatory.
- Positioning wraps too high on the horn structure. Lower wraps deliver superior contact friction. High wraps reduce the grip surface and allow the rope to oscillate, hastening the loosening process.
- Selecting the wrong material for your rope. Three-strand twisted nylon will function adequately in emergencies, but it doesn’t conform smoothly into a cleat hitch configuration like double-braided construction does. Polypropylene is the worst alternative — inflexible, vulnerable to UV damage, and produces minimal friction against metal surfaces. Stick with nylon every time.
One additional critical point: examine your cleats themselves. The ABYC standards call for cleats that pass through the mounting surface with backing plates sized to resist the expected load. Your 1/2-inch nylon line might be rated for 1,800 pounds, but that rating becomes meaningless if your cleat is fastened using just woodscrews into deteriorating pine. Many properly executed cleat hitches have failed because the cleat hardware itself tore free from the dock. Always validate the hardware before you trust your knot.
Quality Dock Line: Your Partner in Reliable Knots
A flawlessly executed cleat hitch depends on more than just your technique — the line itself carries equal responsibility. When your dock line is elastic, deteriorating, or too rigid to handle easily, even the best knot will behave unpredictably. Upgrading to quality double-braid nylon transforms the difference between marginal performance and genuine reliability.
Why this diameter and construction work
- At 1/2″, the rope sits comfortably in your grip while you’re forming the hitch — substantial enough that fingers don’t tire, yet still manageable. You’ll feel genuinely confident that this thickness won’t slip under the boat’s weight once loaded.
- Double-braided rope resists the degradation and cracking that single-layer construction suffers when exposed to sun, salt spray, and weathering. This becomes crucial during those stretches when your vessel sits unattended between outings.
- A 20-foot length provides genuine working distance between your cleat and whatever point you’re securing to — whether that’s a piling or an anchor bollard. You get real slack to manipulate without fighting tension, and without having to tension the line so much that it strains the cleats.
Where limitations occur
- Fresh nylon dock line has a slick surface finish that can make early attempts feel unsecure — the rope requires a few uses to develop proper friction and grip within the hitch mechanism.
- If your mooring point sits far from your cleat, or if your cleat placement is awkward relative to where you need the line to go, 20 feet may prove insufficient. Verify your actual distance requirements before ordering.
I remember the first time I realized my old quarter-inch line was stretching enough that I had to re-tighten my hitches halfway through the day — a sinking feeling that told me I’d been lucky, not skillful. Grab the SEACHOICE Double-Braid Nylon Dock Line 1/2″ x 20′ (Model 40241) and stop second-guessing whether your line is the weak point.
Frequently Asked Questions
What size dock line do I need for my boat?
For boats between 18 and 30 feet, use 1/2-inch double-braided nylon with a working load capacity of 1,600 to 1,800 pounds. Vessels under 18 feet work with 3/8-inch lines, while anything longer than 30 feet warrants upgrading to 5/8-inch, especially in areas prone to tidal fluctuation or constant wake from larger vessels.
Why did my cleat hitch come loose during surge?
The most common cause is omitting the locking half hitch at the finish. The crossover pattern alone gradually slips under constant push-pull from surge activity. Without that terminal lock, your knot is essentially temporary, no matter how well you execute the initial wrapping stages.
Can I use polypropylene rope for dock lines?
No. Polypropylene is inflexible, vulnerable to UV damage, and produces minimal friction against metal surfaces. Stick with nylon every time. Double-braided nylon resists the degradation and cracking that single-layer construction suffers when exposed to sun, salt spray, and weathering.
How many locking half hitches should I tie at the end?
Tie only one locking half hitch to finish. Resist the temptation to stack multiple locking half hitches on top of one another. Multiple layers become nearly impossible to undo after hours of tension, and a knot you cannot quickly release during a crisis is genuinely hazardous.
Sources and further reading
About This Article

Written by Trent Hollis. Waterfront homeowner turned DIY obsessive. After two decades tinkering with my own dock, seawall, and boat lift on the Gulf Coast, I share everything I've learned about waterfront construction, boat lift maintenance, and coastal living projects. More about this site.
Scope and limits. Trent is a waterfront homeowner, not a licensed marine contractor. Structural, electrical, and lift work should go to a licensed marine contractor, and most in-water work needs a permit before you start.
Verify this against a primary source
Specifics change, and your situation may differ from the one described here. These are the authorities worth checking directly:
- ABYC — marine electrical and construction standards
- U.S. Army Corps of Engineers — permitting for work in navigable waters
- NOAA Tides & Currents — tidal range and water level data for your site