Twenty years of finishing rope ends on the Gulf Coast taught me to wince whenever someone grabs a lighter to melt the tip of a braided line and declares the job finished. Heat-shrink gets synthetics through an emergency — I won’t argue that point — but it is not what a sailmaker’s whipping delivers. That thermal trick fails when conditions turn harsh. The real thing, tied properly, becomes the benchmark for rope-end durability: tight, clean, and structurally sound for years. Every serious dock builder, sailor, and marine contractor earns the right to know how to do this correctly.
Out in Pensacola, a property owner phoned me to his slip because his 3/8″ dock line had unraveled at the cleat. Factory heat-fusion held it for half a year before the Gulf’s sun and salt cracked the seal completely. The rope core splayed open like a flower, and pulling power vanished. A sailmaker’s whipping guards against exactly this failure mode — the end stays bound together for a decade or better. That call is the reason this post exists — not because the technique is hard, but because doing it right makes all the difference.
This guide will take you through the complete sailmaker’s whipping method, start to finish. You’ll learn which ropes benefit most, when to reach for this finish instead of alternatives, where I’ve watched people derail their own work, and which materials I trust on the water. Whether you’re outfitting new dock lines or salvaging an older line that’s starting to fray at the tip, this technique will hold.
When to Use a Sailmaker’s Whipping on Marine Lines
Three main whipping varieties exist in rope work: common whipping, West Country whipping, and the sailmaker’s version. The sailmaker’s approach surpasses the others in sheer holding power. The core difference is that it employs a needle and waxed thread to stitch directly into the rope’s strand structure itself. Those stitches anchor the whipping mechanically to the rope material, which means it will never roll off, regardless of friction, load cycling, or chafe.
Based on my experience, this particular finish makes sense when:
- You’re securing three-strand twisted nylon or polyester dock lines where the individual strands can be opened up for needle work
- The rope passes repeatedly through chocks, cleats, or fairleads and will experience grinding friction
- The line is rigged to a vessel where a whipping failure could trigger a safety emergency
- The rope is made of natural fibers or engineered synthetics that cannot tolerate heat without damage
- You intend to leave the same dock lines deployed from season to season without replacement
That said, double-braid and kernmantle ropes resist this technique. Their internal architecture lacks distinct separated strands suitable for stitching. For those rope types, reach instead for a conventional whipping with adhesive, or a heat-sealed end combined with a proper fid-finished splice. I’ll touch on that trade-off as we move forward.
Breaking Strength Data and When This Technique Becomes Non-Optional
The three-strand nylon I handle most often on Gulf docks comes in 1/2″ and 5/8″ diameters. A 1/2″ three-strand nylon line carries a working load somewhere between 1,700 and 2,200 pounds, depending on the manufacturer’s specs, with a failure point near 8,500 pounds. Subjected to that magnitude of pull, an inferior whipping unspools and slips backward off the end. The sailmaker’s version, locked into each strand via stitching, remains fixed because the mechanical anchor runs through the rope itself—wrapping alone cannot match that grip.
Step-by-Step: How to Tie a Sailmaker’s Whipping Rope End Finish
You need a sailmaker’s needle, waxed whipping twine (polyester suits saltwater environments best in my experience), a sharp pair of scissors, and a lighter reserved solely for the twine ends—not the rope. Your rope should be constructed from three separate strands. Begin at the very tip of the rope end, or trim it square with a knife before proceeding. Below is exactly how I execute this after two decades of Gulf Coast work.
- Unlay the strands. Peel apart the three strands of the rope approximately 1.5 inches from the cut tip. Avoid cutting them — simply untwist them gently to expose the space between them.
- Form a twine bight. Cut waxed whipping twine to a length about four times the rope’s diameter — for 1/2″ rope, approximately 24 inches will suffice. Double it over to create a bight (loop shape), and position that bight alongside one of the three strands, with the loop end directed toward the rope tip. The free end should extend beyond the rope tip itself.
- Re-lay the strands. Twist the strands back into alignment and over the bight of twine, compressing the bight between the strand layers. The loop must remain visible at the rope tip, and the free end must protrude from the middle of the lay.
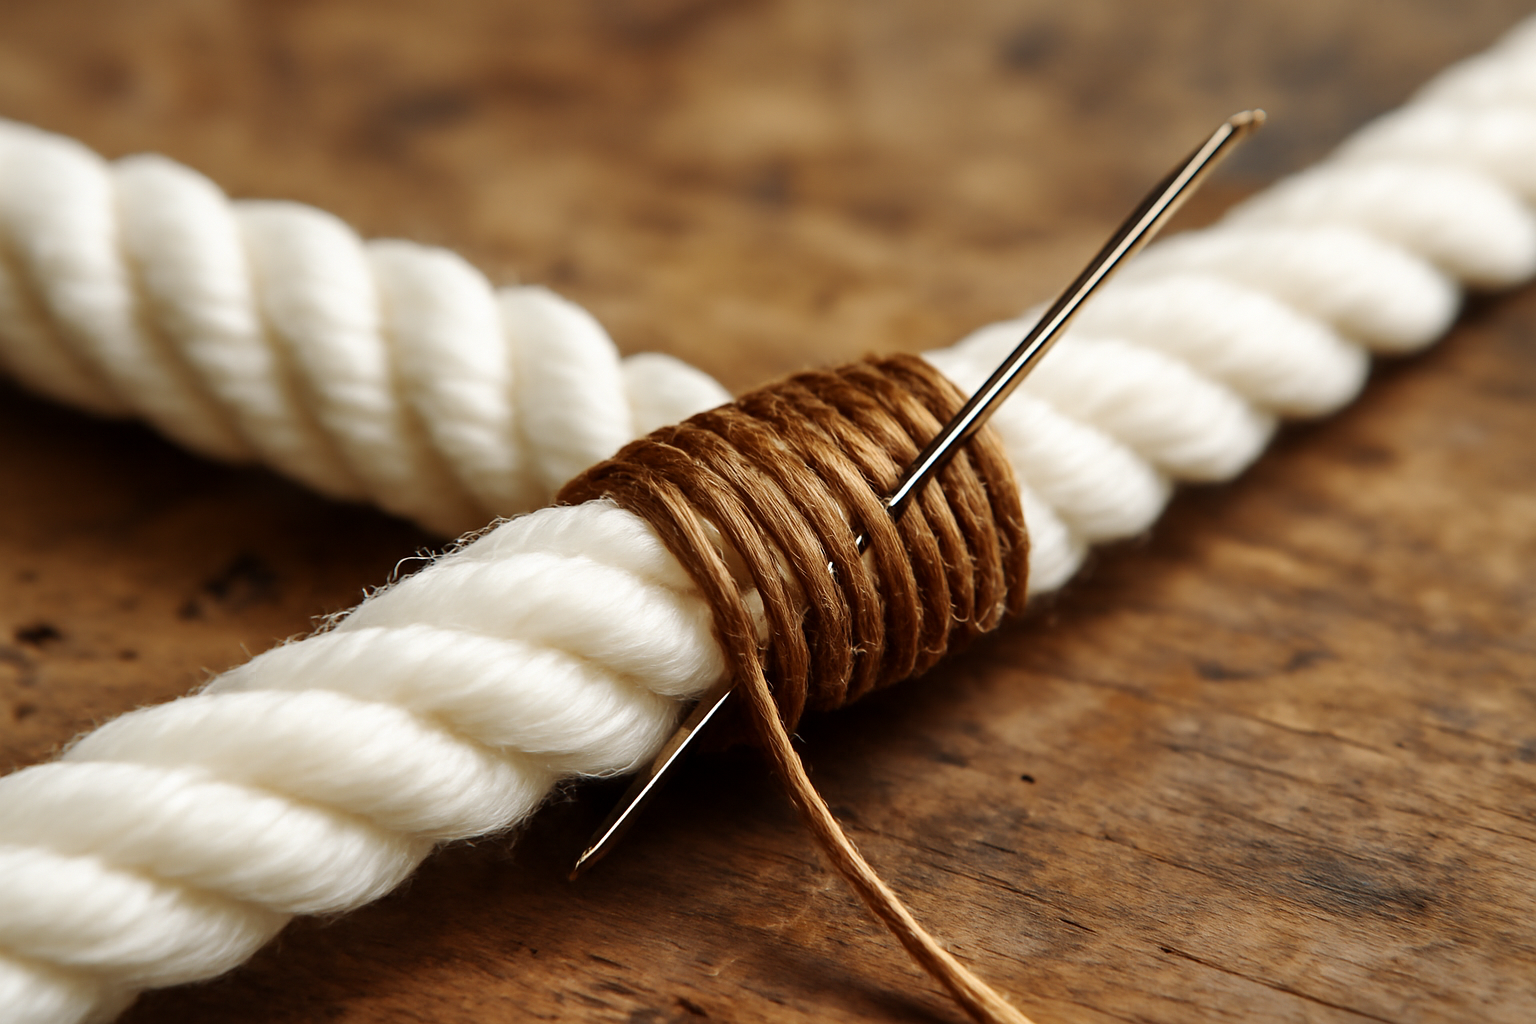
- Start the wrapping sequence. Thread your needle with the long twine end. Wrap the twine in tight circles around the rope, progressing away from the rope tip toward the main body of the rope. Each circle should seat flush against its neighbor. Continue for a distance equal to the rope’s diameter — roughly 1/2″ for a 1/2″ line. Maintain uniform tension throughout every wrap.
- Thread through the bight. Once wrapping reaches its target length, direct your needle through the visible bight loop at the rope tip and pull the needle all the way through.
- Follow the strand groove. Direct your needle along the natural groove created by the twist of one of the three strands, running diagonally from your finished wrapping back down toward the rope tip. Pass your needle under that strand, then draw the twine through. This produces a riding turn that mirrors the strand geometry.
- Cinch the bight tail. Pull the original bight tail with force and snap. This action draws the bight underneath the wrapping and secures everything through mechanical interference. Clip the tail off close to the wrapped section.
- Execute riding turns for the other two strands. Mirror the previous process — guide the twine along the groove of each remaining strand and pass underneath each one. You’ll end up with three riding turns total, positioned evenly around the whipping, one per strand groove.
- Bury the needle and lock the finish. On the final riding turn, pass your needle under and through several of the wrapping layers to hide the thread end. Draw it tight, then trim the excess thread short. Touch the very end of the thread to a flame to stop it from unraveling — do not allow the flame to contact the rope fiber.
Pro tip: Coat your twine thickly with wax before you begin. Waxed twine grips itself and rope material far more effectively than unwaxed thread. A block of beeswax sits permanently in my tool kit for this reason alone.
Common Mistakes That Make Whippings Fail
My first handful of whippings taught me that uneven wrap tension destroys the whole product. If some turns go tight while others sit loose, soft zones form in the whipping. Moisture and sand find their way into those loose spots, the strands absorb water and expand unevenly, and the structure opens up within a year. Every single wrap demands identical firm pressure — imagine wrapping electrical tape: steady, overlapping, and squeezed down. That discipline makes the difference between a whipping that holds for years and one that fails at the worst possible moment.
Other Failure Modes I’ve Seen on the Dock
These are the biggest mistakes I observe from people attempting this technique for the first time:
- Leaving out the riding turns. Wrapping alone produces a common whipping — not the sailmaker’s version. The riding turns — thread stitched through each strand’s groove — transform this into a mechanically locked whipping. Without them, the wrapped section can roll backward off the rope under sustained load.
- Selecting unwaxed or undersized twine. Twine that lacks wax or sits too thin will cut into the rope strands when load is applied instead of holding them. For 1/2″ rope, stick with #18 or #21 waxed polyester whipping twine.
- Positioning the whipping too near the very end. Leave at least 1/8″ of bare rope tip sticking out past the whipping. If you wrap right up to the cut edge, the end strands press backward into the wrapping and destabilize it.
- Neglecting to pull the bight tail tight. If Step 7 gets skipped and that bight tail stays slack, the riding turns become decoration. The mechanical lock is the entire purpose of choosing sailmaker’s method over others.
- Attempting this on double-braid or kernmantle rope. Those rope types lack distinct strand grooves for needle passage. Forcing a sailmaker’s whipping onto double-braid produces an unstable, unreliable result. Choose common whipping with glue or thermal sealing with a fid splice instead.
Even an imperfectly executed sailmaker’s whipping will outlast a heat-sealed end under actual marine conditions. UV radiation, saltwater, and friction degrade fused ends steadily. A properly stitched whipping using quality polyester twine survives five years or longer on an active dock line.
The Line That Holds the Whipping Without Slipping
Learning to bind a rope end requires line that actually cooperates—material with sufficient structure and surface texture so your wraps stay locked while you’re working them and hold their position for years afterward. Budget or overly smooth dock line will resist you at every step.
What works
- Double-braid nylon provides sufficient surface roughness that thread catches and stays anchored without constant tension adjustments
- The 1/2″ thickness allows you to see each wrap distinctly and feel when it’s properly seated, reducing frustration during the learning phase
- Gold and white tones let you visually follow your wrap sequence and count passes accurately—more useful than it sounds when you’re halfway through
What doesn’t
- 20 feet supplies enough material for initial attempts, but you’ll exhaust it faster than expected when redoing sections—account for practice waste
- Nylon resists bending more than certain premium synthetic alternatives, meaning your early attempts feel stiff until your hands develop the necessary feel
I nearly gave up on whipping when I started with cheap slippery line that refused to hold—every wrap felt like it was creeping loose the second I moved to the next one. That’s when I grabbed SEACHOICE Double-Braid Nylon Dock Line 1/2″ x 20′ (40241, Gold/White), and the difference was immediate and real.
Frequently Asked Questions
How long does a sailmaker’s whipping last on Gulf Coast dock lines?
A properly stitched sailmaker’s whipping using quality polyester twine survives five years or longer on an active dock line. I’ve seen them hold for a decade or better, whereas heat-sealed ends fail within half a year when exposed to the Gulf’s sun and salt.
What size waxed twine do I need for a 1/2 inch rope?
For 1/2″ rope, stick with #18 or #21 waxed polyester whipping twine. Cut the twine to a length about four times the rope’s diameter—for 1/2″ rope, approximately 24 inches will suffice.
Can I use a sailmaker’s whipping on double-braid dock line?
No. Double-braid and kernmantle ropes resist this technique because their internal architecture lacks distinct separated strands suitable for stitching. For those rope types, use a conventional whipping with adhesive or a heat-sealed end combined with a proper fid-finished splice instead.
Why did my heat-sealed rope end fail at the cleat?
Heat-fusion works for emergencies but fails under harsh Gulf conditions. The UV radiation, saltwater, and friction degrade fused ends steadily, which is why a factory heat-fusion I observed held only half a year before the seal cracked completely.
Sources and further reading
About This Article

Written by Trent Hollis. Waterfront homeowner turned DIY obsessive. After two decades tinkering with my own dock, seawall, and boat lift on the Gulf Coast, I share everything I've learned about waterfront construction, boat lift maintenance, and coastal living projects. More about this site.
Scope and limits. Trent is a waterfront homeowner, not a licensed marine contractor. Structural, electrical, and lift work should go to a licensed marine contractor, and most in-water work needs a permit before you start.
Verify this against a primary source
Specifics change, and your situation may differ from the one described here. These are the authorities worth checking directly:
- ABYC — marine electrical and construction standards
- U.S. Army Corps of Engineers — permitting for work in navigable waters
- NOAA Tides & Currents — tidal range and water level data for your site