When I walk out on a dock in the morning, the first thing I check is how the boats are sitting in their slips — specifically, whether the lines holding them are under even tension or if one side is slack while the other pulls tight. That imbalance tells you everything about what’s actually doing the work, and nine times out of ten, it points to a poorly joined line that’s starting to slip. After twenty years tying knots on the Gulf Coast, I learned that mismatched rope joins are often where people get careless, and that carelessness costs them.
Over twenty years on the water, I’ve encountered every conceivable variation of rope diameter and material on the water. I’ve worked through dead-flat mornings and through the kind of sudden Gulf squalls that materialize without much fanfare. The sheet bend knot might not win any style points or end up in boating forums and social media feeds, but when you’re faced with joining two lines that don’t match — different sizes, different rope types, different everything — nothing delivers the combination of speed, dependability, and ease that the sheet bend provides. This breakdown walks you through how to execute it correctly, where it belongs in your toolkit, and equally important, where you should not rely on it.
When to Use the Sheet Bend Knot to Join Two Ropes on a Boat
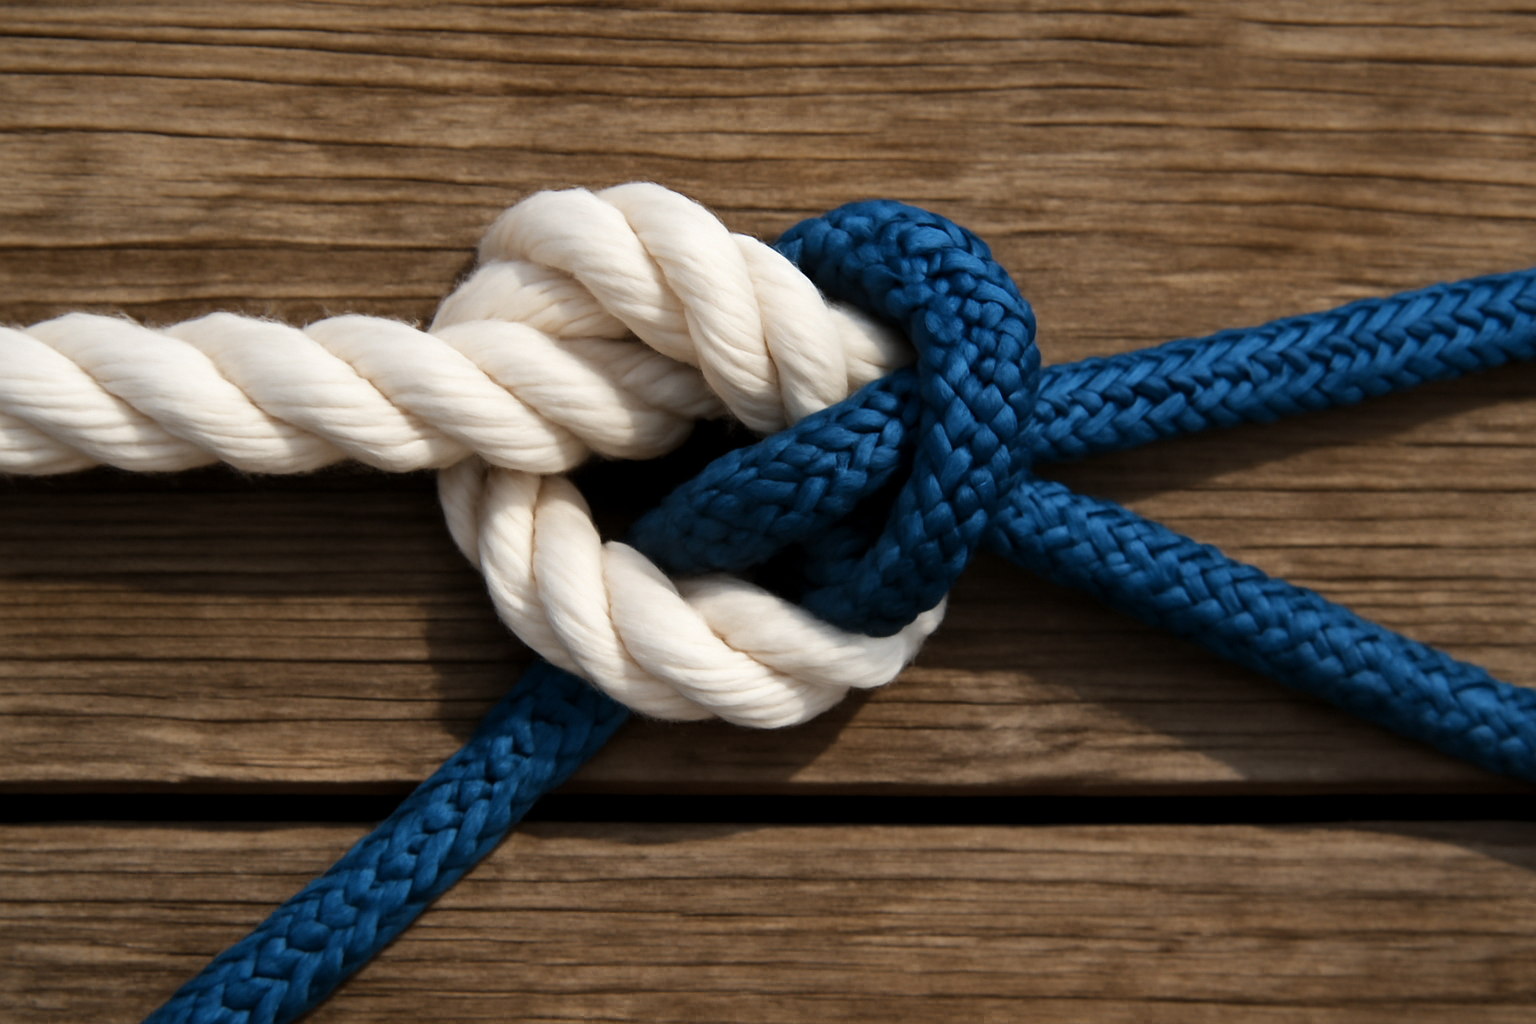
What makes the sheet bend genuinely special is its ability to bridge the gap between two mismatched lines. Most knots demand consistency — identical rope, identical diameter, identical structure. The sheet bend breaks that rule entirely. It’s built, in practical terms, to manage the size variations that cause other knots like the reef knot to fail.
Over the years, here’s where I’ve reached for the sheet bend without second-guessing myself:
- Lengthening a dock line when you find yourself short and the only backup line on hand is a different size
- Joining a 3/8-inch utility line to a 1/2-inch nylon dock line in circumstances requiring temporary boat securing
- Fastening a heavier mooring line to a lightweight heaving line (which typically runs 1/4-inch or smaller)
- Improvised repairs when you’re offshore and forced to work with whatever is stored aboard
- Quick fender-line attachment when you’ve run out of available cleats
However — and this matters — the sheet bend belongs in the category of temporary and situational solutions. It should never replace a professionally spliced dock line or replace a permanent mooring configuration. Under no circumstances would I leave a boat unattended for extended periods relying on this knot as a primary securing method, particularly in zones where tidal forces or shifting winds change load direction repeatedly. The ABYC and U.S. Coast Guard requirements are clear about using properly rated, purpose-designed lines for principal vessel securing — and that guidance is sound.
Which Ropes Work Well Here (and Which Ones Don’t)
The sheet bend performs reliably with three-strand nylon, double-braid nylon, and braided polyester products. These materials offer sufficient surface texture to generate the friction needed for the knot to remain stable and seated. From my experience, working with paired lines between 3/8-inch and 5/8-inch gets you the best results — the diameter difference is workable and the knot tightens without twisting or deforming.
Where performance suffers noticeably is with ultra-slippery synthetics such as polypropylene or UHMWPE (Dyneema-grade) cordage. The surface of these materials generates minimal friction, which means the sheet bend can gradually release itself when subjected to repetitive loading — exactly the kind of back-and-forth strain a boat generates while shifting in its slip. Put differently, if polypropylene is your line, you need either to modify your technique or switch to a different knot altogether. More on that coming up shortly.
Tying It Right: A Complete Walkthrough
I’ve shown this knot to countless people standing on a dock, and with straightforward guidance and a few minutes of repetition, most operators get comfortable with it quickly. Stick closely to each step — the details in steps 3 and 4 are typically where new tiers go off track.
For clarity, let’s designate the heavier or stiffer line as Rope A and the lighter or more pliable line as Rope B. The critical rule: always create your bight in the heavier rope. This choice isn’t arbitrary — it’s the mechanical foundation that enables the knot to manage unequal load distribution.
- Create a bight in Rope A. Double back the end of your thicker rope so it forms a U-shaped loop (the bight). Secure this bight in your non-working hand with the opening pointing upward. You want the bight depth around 6 inches — sufficient room to manipulate it without crowding yourself.
- Pass Rope B up and through the bight opening. Grab the working end of Rope B and drive it upward from below through the center of the bight. Leave yourself 8 to 10 inches of tail extending past — this extra material lets you finish the knot and maintain adequate safety margin.
- Wrap Rope B around the back side of both bight legs. Take the working end of Rope B and circle it around the rear of the bight — coming around from one side to the other (choose a direction and maintain it). This wrapping motion is the locking mechanism. Rope B must encircle both legs of the bight from the exterior, not slip between them.
- Cross Rope B over and thread it beneath its own part. Bring the working end of Rope B forward and across the face of the bight, then insert it underneath the line that passed through the bight in Step 2. This tuck point is essential. The working end must pass under its own standing line section, not underneath one of the bight’s legs.
- Cinch, shape, and finalize the knot. Before any load touches the lines, work the knot compact using hand pressure. Draw the standing part of Rope B outward and away from the bight while keeping the bight stationary. The shape should compress and tighten progressively. Keep a tail of at least 3 to 4 inches extending from Rope B past the final tuck — anything shorter introduces unacceptable failure risk.
- Validate the knot with a hard pull. Execute a forceful tug on the completed knot — quick and sharp, not gradual. If the tail starts sliding backward through the knot structure, your Step 4 tuck didn’t capture it correctly. Simply undo and execute the sequence again. Start to finish takes under a minute with practice.
Learned the hard way across two decades: Winter and wet conditions rob your hands of sensitivity and control. Get yourself to the point where you can execute this knot wearing heavy gloves. That lesson came during a particularly vicious January blow on Mobile Bay, and I carry that knowledge every time I tie now.
Where the Sheet Bend Typically Fails
Across my years working with this knot, wrong execution patterns emerge regularly. On occasion it’s trivial — a fender line comes loose. Other instances it’s serious — a boat drifts into the neighboring slip in darkness. Let me outline the actual failure scenarios I’ve documented on the water and how to prevent each one.
Creating the Bight in the Thinner Line by Mistake
The bight location should never be anywhere except the thicker or stiffer rope. Period. If someone reverses the process and creates the bight from the thinner line, the finished knot appears correct externally but carries significantly lower breaking strength. The mechanical reason is straightforward: a thicker rope’s bight generates a more robust loop architecture that opposes collapse when under load. Swap the setup, and that architecture falls apart. I learned this through trial and error on an early contract — I made the bight in a thin 3/8-inch line, the knot released overnight, and I had an unhappy boat owner to apologize to. That mistake shaped every knot I’ve tied since.
Insufficient Tail Length
When a moored boat experiences cyclical loading — the rhythmic tension and relaxation generated by wave movement — an undersized tail will gradually migrate through the knot. On 1/2-inch line, anything shorter than 3 inches becomes a vulnerability. When conditions are wet or when rope materials are inherently slippery, I go with 5 to 6 inches on purpose. It requires nothing from you except awareness, yet that buffer protects your boat.
Skipping the Dressing Step Before Load Is Applied
A knot that hasn’t been carefully tightened and seated prior to carrying load will cinch unevenly. This uneven tightening produces twists and gaps that permit the tail to escape. Always smooth and compress the knot with hand tension before anything pulls on it. This procedure takes five seconds and is absolutely mandatory in my book.
Applying the Knot to Slick Rope Without Adjustment
I noted earlier that polypropylene and next-generation ultra-low-friction lines create problems for standard sheet bends. If circumstances genuinely leave you without alternatives, switch to a double sheet bend by executing an additional wrap during Step 3. Making two passes around the bight instead of one increases friction and strengthens holding power substantially on slippery materials. Performance is still not optimal compared to traditional rope types, but the improvement over a single-wrap bend is measurable.
The Right Line When You’re Forced to Improvise With Mismatches
Situations arise when you’re joining two different dock lines in a pinch, and possessing at least one reliable, quality line with predictable characteristics is genuinely important. A quality double-braid nylon keeps the sheet bend intact and doesn’t creep under load — a reality that becomes very apparent when actual boat weight presses on that connection.
What performs reliably
- Double-braid construction grips the sheet bend substantially better compared to three-strand — multiple outer and inner braided layers establish friction that prevents the knot from shifting, particularly when joining lines of unequal thickness or material composition.
- The 1/2-inch size represents the optimum range for typical dock applications — substantial enough for serious vessel load without excessive stretch, manageable enough to tie neatly even when connecting dissimilar line sizes.
- Nylon’s natural elasticity absorbs sudden tension spikes from wakes and gusts — particularly valuable when you’re working with an improvised connection and lack the predictability of two matched lines handling stress together.
What has limitations
- Even at 20 feet, you might find yourself requiring a splice or secondary connection to reach full dock length — this remains a patch for immediate use, not a complete answer for every dock configuration or securing demand.
- Double-braid runs higher in price than three-strand alternatives, and when funds are constrained or you only need something short-term, that expenditure difference becomes noticeable.
I’ve had a moment of real doubt when the sheet bend first took the boat’s full weight — watching the knot tighten and hold, I realized I was betting everything on that single join. That’s when I knew I needed to keep quality double-braid on hand. Grab the SEACHOICE Double-Braid Nylon Dock Line 1/2″ x 20′ (40241, Gold/White) so you’re never caught in that position.
Frequently Asked Questions
Can I use a sheet bend to permanently secure my boat?
No. The sheet bend is strictly temporary and situational. I never leave a boat unattended for extended periods relying on this knot as a primary securing method, particularly in zones where tidal forces or shifting winds change load direction repeatedly. The ABYC and U.S. Coast Guard requirements are clear about using properly rated, purpose-designed lines for principal vessel securing.
What rope sizes work best for a sheet bend?
I get the best results pairing lines between 3/8-inch and 5/8-inch — the diameter difference is workable and the knot tightens without twisting or deforming. Three-strand nylon, double-braid nylon, and braided polyester all perform reliably. Ultra-slippery synthetics like polypropylene or UHMWPE generate minimal friction and the knot can gradually release under repetitive loading.
How long should the tail be on a sheet bend?
Keep at least 3 to 4 inches extending from the working end past the final tuck — anything shorter introduces unacceptable failure risk. In wet conditions or with inherently slippery rope materials, I go with 5 to 6 inches on purpose. That buffer protects your boat during cyclical loading.
Why does my sheet bend keep slipping on polypropylene line?
Polypropylene creates problems because it generates minimal friction. If you’re forced to use slippery materials without alternatives, switch to a double sheet bend by executing an additional wrap during Step 3. Making two passes around the bight instead of one increases friction and strengthens holding power substantially.
Sources and further reading
About This Article

Written by Trent Hollis. Waterfront homeowner turned DIY obsessive. After two decades tinkering with my own dock, seawall, and boat lift on the Gulf Coast, I share everything I've learned about waterfront construction, boat lift maintenance, and coastal living projects. More about this site.
Scope and limits. Trent is a waterfront homeowner, not a licensed marine contractor. Structural, electrical, and lift work should go to a licensed marine contractor, and most in-water work needs a permit before you start.
Verify this against a primary source
Specifics change, and your situation may differ from the one described here. These are the authorities worth checking directly:
- ABYC — marine electrical and construction standards
- U.S. Army Corps of Engineers — permitting for work in navigable waters
- NOAA Tides & Currents — tidal range and water level data for your site