Most waterfront property owners believe that a shackle pinned to their anchor chain will hold just fine, and most of the time they’re right — until the moment it isn’t. Out on the water, shock loads from wind gusts and boat surge can exceed what a simple shackle connection was ever designed to withstand. The real danger isn’t the shackle itself; it’s the assumption that fastening rope to chain is something you can phone in. I learned that lesson the hard way three miles offshore on flat bay water when my connection failed cleanly at the link, dropped my anchor, and sent my boat swinging into a sandbar. Twenty years of building, repairing, and testing rope-to-chain systems along the Gulf Coast has taught me that getting this one junction right separates boats that stay where their owners left them from boats that don’t. Everything I’ve learned through that work — the failures, the fixes, and the field tests — is what this guide covers.
Plenty of boaters and dock owners handle this the quick way: slap on hardware, maybe wrap a half hitch around a chain link, and move forward. In calm conditions, that approach works fine. However, when afternoon weather rolls in off the Gulf and your anchored boat starts pitching against that rope, “fine” becomes “complete failure” in seconds. The junction where rope meets chain experiences shock loads that can pull harder than the rope’s own breaking strength during a surge. This connection isn’t just another detail — it’s the fundamental reason your boat stays put and your anchor system functions as intended.
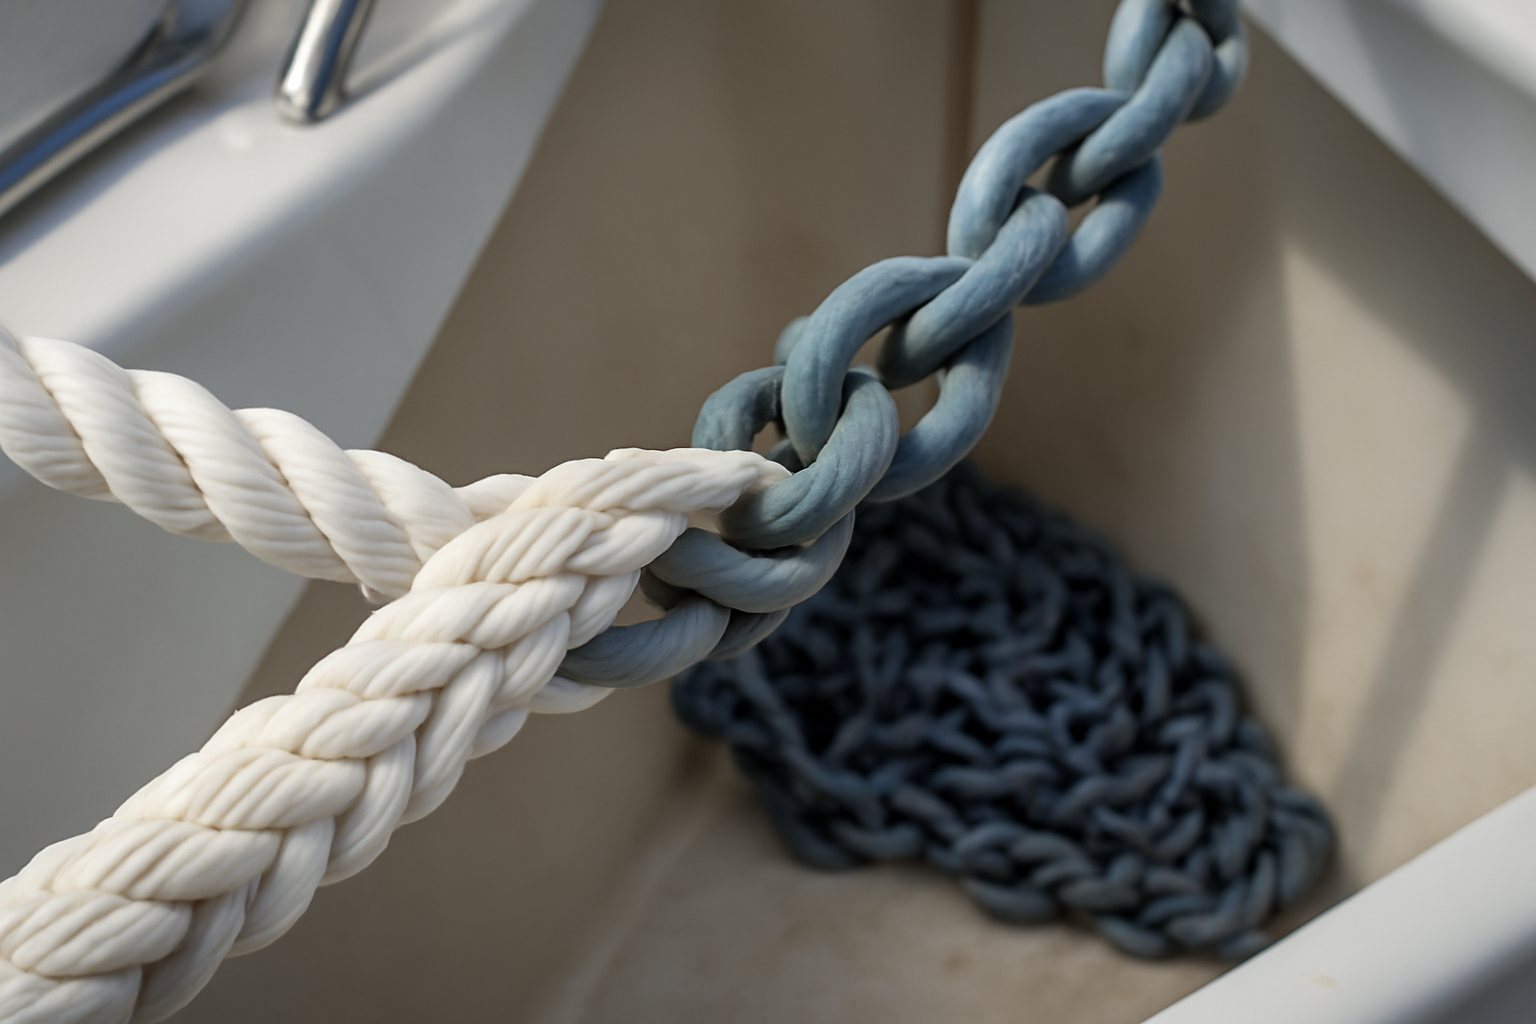
This post focuses on the chain splice method — specifically, the eye splice technique used to create a permanent, spliced loop that connects directly to your anchor chain. I’ll walk through every single step in enough detail that you can execute this at your dock without needing to watch a video. I’ll also cover which rope materials actually work, which ones will betray you, and the specific errors I’ve seen pull pilings from the seafloor and leave boats adrift.
When to Use a Chain Splice Rope to Anchor Chain Connection
To be blunt: a splice isn’t the answer for every situation. But when you need it, nothing performs better. The eye splice connecting rope to anchor chain is your best option when you require a permanent, load-bearing, streamlined junction that won’t catch on hardware, creep loose, or give way under sustained stress. Below are the actual marine scenarios where I turn to this technique without question.
- Anchor rode assembly: Joining nylon rope rode to an anchor chain leader. This remains the most frequent use case and the one that has kept me from repeating that sandbar mistake multiple times since.
- Mooring buoy connections: Permanent eye splices integrated into mooring pendants that route through chain links on a pickup buoy system.
- Dock anchor lines: Any stationary dock setup where rope terminates into a chain-based anchor system set or driven into the bottom substrate.
- Tidal applications: Gulf Coast tidal fluctuations create repetitive cyclic loads on anchor points. A splice withstands that fatigue pattern far more effectively than a knotted connection.
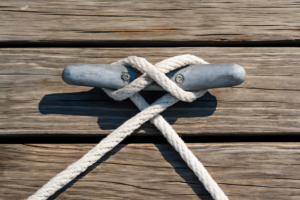
Conversely, a chain splice is the wrong technique when you need something you can release fast, when your setup is temporary, or when you’re connecting chain links to other chain links. In those contexts, a quality galvanized shackle with a moused pin does exactly what you need. Recognizing when a method doesn’t fit the job is as crucial as understanding when it does. I remind people constantly: choose the technique that solves your specific problem, not the other way around.
What Rope Types Work Best
Your choice of rope material is critical to splice success. From my experience, three-strand twisted nylon stands out as the most beginner-friendly splicing material and delivers solid performance for anchor rodes. The three strands separate cleanly and tuck reliably back into the standing line. For 1/2-inch three-strand nylon, you’re looking at approximately 5,400 lbs of breaking strength, with a serviceable working load around 1,080 lbs — plenty for recreational anchoring systems supporting vessels to about 30 feet.
Double-braid nylon outperforms in both strength and abrasion resistance, though splicing requires a fid and additional precision. It’s absolutely the better choice for anchor rode assemblies intended to be permanent. Never use polypropylene for this work — UV will degrade it, it’s inherently slippery, and it deteriorates rapidly when subjected to repeated cyclic stress. Braided polyester can work but lacks the stretch properties that make nylon excel at absorbing shock loads during anchoring. For chain splice applications, nylon in either three-strand or double-braid form is what you need, period.
Step-by-Step: How to Tie a Chain Splice
I’ll guide you through the eye splice using three-strand nylon, which is the most approachable for people new to splicing and retains 85–95% of the rope’s baseline breaking strength when executed properly. You’ll want the rope itself, some tape, a Swedish fid or marlinspike, and about 20 minutes on your first attempt. After you’ve done it once, you’ll complete it in roughly ten minutes.
Tools and Prep
- 1/2″ three-strand nylon rope (at least 20 feet minimum for a functional anchor rode setup)
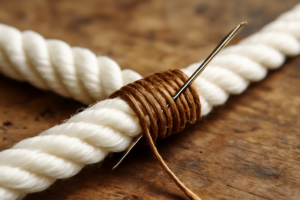
- Tape or waxed whipping twine to mark your reference point for tucking
- Swedish fid or marlinspike tool
- Anchor chain with an end link sized appropriately for threading through the splice eye
- Lighter or heat gun for melting and sealing rope strand ends
The Splice, Step by Step
- Unlay the rope end. Measure back from the end approximately 12 inches on 1/2-inch rope — essentially one inch per strand you’ll be tucking, plus extra buffer. Mark this spot with tape to prevent further rope separation. Carefully separate all three strands and tape each one individually at its end to keep it from fraying during your work.
- Thread through the chain link. Push the unlaid rope end through your anchor chain’s end link before you form the eye shape. This step gets overlooked more often than you’d think. Once your splice is finished and locked in, the chain link is trapped permanently inside the eye loop. Omit this step and you’ll have to cut apart a completed splice to add the chain — I’ve seen experienced people make this exact error.
- Form the eye. Fold the rope back toward itself to establish a loop that holds the chain link at the right tension. The eye should be sized so the chain link moves freely without rattling but isn’t so large that it slides unpredictably. Keep this configuration steady — cleat it off, use a dock cleat, or have someone help maintain the tension.
- Identify your three strands. Mentally name them Strand A (the working one you’ll start with), Strand B (the one in the middle position), and Strand C (positioned outside). The main body of rope has three grooves running between its three strands. Each working strand will go under one groove of the standing portion, moving against the rope’s natural twist direction.
- First tuck — Strand B. Use your fid to pry open the strand groove that faces you directly on the standing section. Thread Strand B underneath that opening and pull it tight. This first tuck anchors the entire splice structure. Always work against the lay — if the rope spirals one direction, your tucks go the opposite direction.
- First tuck — Strand A. Locate the groove to the left of where Strand B entered. Open it using the fid and pass Strand A through underneath. Draw it snug.
- First tuck — Strand C. Rotate the rope. Strand C passes under the final uncovered groove on the opposite side. Completing this first set of three tucks locks all strands into engagement with the standing part. Tighten all sections evenly and securely.
- Complete four more rounds of tucks. Keep moving each strand underneath the subsequent groove in order, progressing toward the rope’s end away from your eye. A splice for load-bearing requires a minimum of five full tuck cycles. ABYC standards and professional rigging best practices call for five tucks as minimum baseline; I personally execute six tucks on anything that will anchor a boat.
- Taper the final tucks (optional but professional). On your final two tuck sequences, you may divide each strand lengthwise and tuck just the thinner half each time. This produces a gradual taper to the finished splice that feeds more smoothly through fairleads and reduces stress concentration where the splice ends.
- Trim and seal. Cut working strand tails down to about 1/4 inch remaining. Use a lighter to carefully melt nylon endings to prevent them from unraveling. Roll the melted nylon tip across a smooth flat surface — do not use your skin — to create a smooth, flush seal. Let cool fully before you stress-load the splice.
- Dress and set the splice. Roll the completed splice firmly through your palms and load it against a solid anchor to stress-test and settle the tucks into position. A quality finished splice appears tight, even, and perfectly balanced. Any strand that looks slack or unevenly pulled indicates a tuck went against the lay instead of with it — identify these mistakes now, not when you’re offshore.
Common Mistakes That Cause Chain Splice Failures
Over my two decades I’ve had to reconstruct and salvage literally hundreds of failed rope-to-chain connections. The exact same problems resurface repeatedly, and the majority of these issues are entirely avoidable. Let me share the lessons I earned through costly experience offshore.
Tucking With the Lay Instead of Against It
This represents the single most frequent cause of splice breakdown. If your working strands follow the same rotation direction as the rope’s natural twist, the splice will appear secure and look completely normal when unstressed. The moment load applies, the tucks paradoxically loosen rather than engage tighter. The correct splice actually grips harder as stress increases — that’s the fundamental engineering behind it. Tuck against the lay. The insertion should feel like you’re forcing it slightly; you should encounter resistance. If a tuck slides in smoothly with minimal effort, you’ve gone the wrong direction.
Too Few Tucks
I discovered this mistake during a residential dock project near Pensacola when I disassembled an anchor connection and counted only three completed tuck cycles. Three tucks might survive static display conditions. They absolutely will not survive when a 28-foot hull surges against an anchor line during 3-foot choppy water. Five is your floor. Six if the rope exceeds 3/8 inch or any application involves abrupt shock loading. This isn’t a place to economize or rush.
Eye Too Large or Too Small
The eye diameter has real consequences for performance. When the eye is oversized, the chain link shifts within the loop, creating a concentrated stress point instead of distributing force evenly throughout. When undersized, the rope pinches the chain link, accelerating wear damage on both materials. Dimension your eye so the chain link sits comfortably without movement but not loosely, with load spreading uniformly across the complete circumference of the loop.
Forgetting to Thread the Chain Before Splicing
I covered this in the procedure above and I’ll repeat it here since I’ve witnessed skilled riggers mess this up. The chain link cannot be added once the splice is finished and seated — you’d have to destroy the splice to add it. Insert the chain before you form the eye loop. Put a physical note or Post-it on your workspace if you need the reminder. No embarrassment in a memory aid — only embarrassment in scrapping 45 minutes of completed work due to a preventable oversight costing nothing.
The Rope That Finally Made Me Trust My Chain Connection
The moment my anchor chain connection failed and I lost my anchor, I realized the rope component of your splice is equally as important as the splicing technique itself. Double-braid nylon anchor line delivers the combination of strength and reliability required when your splice is literally keeping your boat in one location.
What works
- Double-braid construction stabilizes the splice core and prevents creeping — field testing confirms the weave remains locked even following months of direct sun exposure.
- The 1/2″ diameter functions as the baseline standard for anchor systems on recreational boats up to 25 feet, meaning the rope pairs well with typical shackles and won’t need custom splicing modifications.
- 20 feet provides sufficient length for the splice itself, adequate anchor scope, and leftover working line — I’ve cut these in half and created two independent anchor configurations from a single line.
What doesn’t
- Nylon extends under shock conditions, which can feel uncomfortable during your first real load cycle — that behavior is intentional design, but trusting a stretching rope takes psychological adjustment.
- This material is denser and more rigid than single-braid types, making the splicing process physically demanding — you’ll need a fid and genuine effort, not a quick improvisation.
The first time I put real tension on my new splice, I found myself watching the connection like a hawk, half-convinced it would pull apart just like the last one. It didn’t — but that moment taught me I needed to see the rope itself, not just trust the knot. Grab a SEACHOICE Double-Braid Nylon Dock Line 1/2″ x 20′ (Model 40241, Gold/White) and do the splice right from the start.
Splicing 8-Strand and Double Braid to Chain
Everything above assumes three-strand laid rope, because that is what a traditional chain splice was designed around. But plenty of anchor rodes sold today are 8-strand plaited or double braid, and the question I get most often is some version of “can I splice my 5/8-inch 8-strand to 5/16-inch chain?” Yes — but not with the splice described above.
8-strand plait (also sold as 8-plait or brait)
8-strand is excellent anchor rode. It is more flexible than three-strand, it does not hockle, and it stows flat in a locker instead of coiling into a spring. It splices to chain beautifully, but it uses a different method: the rope is worked as four pairs rather than three single strands. You separate the eight strands into four pairs, pass two pairs through the end chain link in one direction and two pairs the other way, then tuck each pair against the lay, over-one-under-one, for at least five full tucks. Taper by dropping one strand from each pair on the last two tucks.
Match your sizes properly. 5/8-inch 8-strand to 5/16-inch chain is a standard, well-proportioned pairing — the pairs pass through a 5/16 link without crowding. If the link is too small for the strand pairs to pass without forcing, the splice will be lumpy and will not feed through a windlass gypsy. Test-fit before you commit.
Double braid
Double braid is the awkward one. It is a braided cover over a braided core, and a chain splice in double braid means burying the core and cover separately — a genuinely fussy job that needs a proper fid set and takes most people a few attempts. Double braid also has less stretch than three-strand or 8-plait, which is a real disadvantage in a rode where shock absorption is the whole point.
My honest recommendation: if you are buying rode specifically for anchoring, buy three-strand or 8-plait and skip double braid entirely. If you already own double braid and want it on chain, this is the one case where I would pay a rigger rather than learn on your own anchor.
When a Thimble and Shackle Beats a Splice
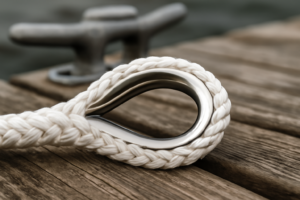
A chain splice is not always the right answer, and it is worth knowing when to skip it. The alternative is a spliced eye around a thimble, connected to the chain with a properly sized shackle and moused with seizing wire.
| Chain splice | Thimble and shackle | |
|---|---|---|
| Passes through a windlass | Yes — the main reason to splice | No — the shackle jams |
| Inspectable | Hard to see wear inside the tucks | Easy — you can see everything |
| Replaceable | Cut and redo the whole splice | Undo one shackle |
| Chafe | Rope bears directly on the link | Thimble takes the wear |
| Skill needed | Moderate to high | Low |
If you anchor off a windlass, splice it — you have no real choice. If you haul by hand, the thimble and shackle is genuinely the better engineering answer for most people: it chafes less, you can inspect it in two seconds, and you can swap the rode without re-splicing anything. Just size the shackle to the chain rather than the rope, and mouse the pin with wire, never with a zip tie.
Frequently Asked Questions
Why did my shackle connection fail on my anchor chain?
Shock loads from wind gusts and boat surge can exceed what a simple shackle connection was designed to withstand. The real danger isn’t the shackle itself—it’s assuming fastening rope to chain doesn’t need careful technique. A splice withstands those shock loads far better than hardware alone.
Can I use polypropylene rope for a chain splice?
No. Never use polypropylene for this work. UV will degrade it, it’s inherently slippery, and it deteriorates rapidly when subjected to repeated cyclic stress. Use nylon in either three-strand or double-braid form instead.
How many tucks does a chain splice need minimum?
A splice for load-bearing requires a minimum of five full tuck cycles. ABYC standards and professional rigging best practices call for five tucks as minimum baseline. I personally execute six tucks on anything that will anchor a boat.
What happens if I tuck with the lay instead of against it?
The splice will appear secure when unstressed, but the moment load applies, the tucks paradoxically loosen rather than engage tighter. A correct splice grips harder as stress increases—that’s the fundamental engineering behind it. Always tuck against the lay.
Sources and further reading
About This Article

Written by Trent Hollis. Waterfront homeowner turned DIY obsessive. After two decades tinkering with my own dock, seawall, and boat lift on the Gulf Coast, I share everything I've learned about waterfront construction, boat lift maintenance, and coastal living projects. More about this site.
Scope and limits. Trent is a waterfront homeowner, not a licensed marine contractor. Structural, electrical, and lift work should go to a licensed marine contractor, and most in-water work needs a permit before you start.
Verify this against a primary source
Specifics change, and your situation may differ from the one described here. These are the authorities worth checking directly:
- ABYC — marine electrical and construction standards
- U.S. Army Corps of Engineers — permitting for work in navigable waters
- NOAA Tides & Currents — tidal range and water level data for your site