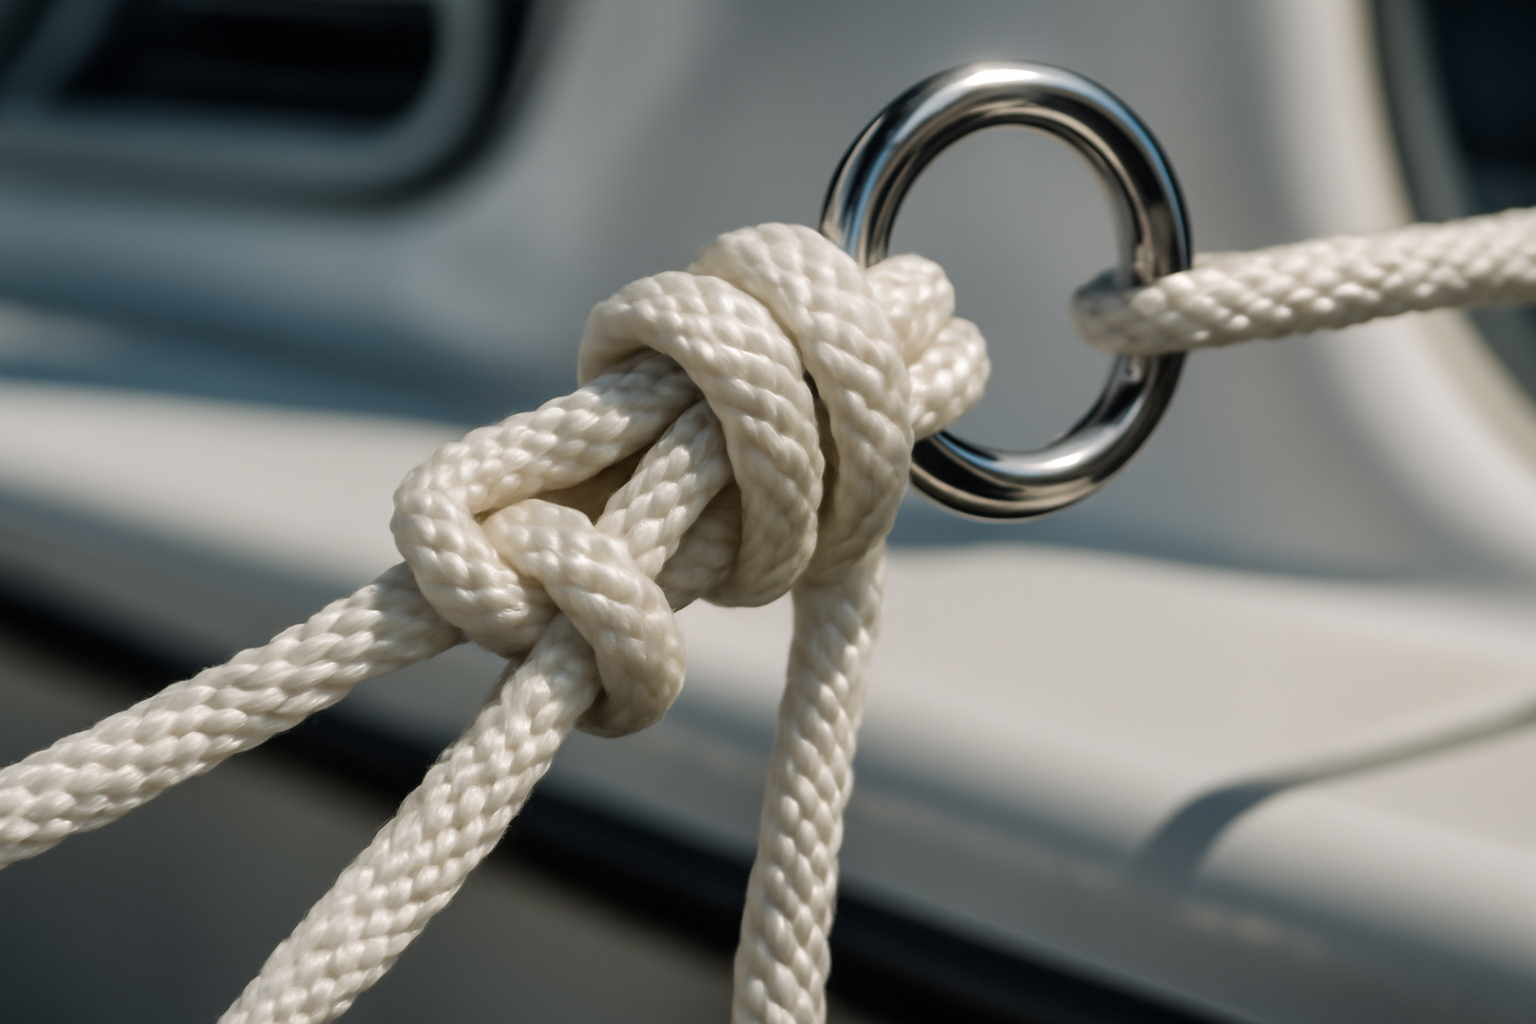
Boat slippage under load during a tidal swing will wreck your entire afternoon — and your insurance claim. Over two decades installing and repairing dock infrastructure from Pensacola to Port Aransas, the single most frequent question I field is: “Which adjustable knot should I be using when I tie off my boat?” My standard answer used to be the taut-line hitch. It works, everyone learns it in sailing class, and it gets the job done reliably. Then about three years back, I switched tactics entirely — and I’ve never regretted it. The midshipman’s hitch adjustable knot boat applications changed everything for me. Superior holding power under strain, maintains security even in variable conditions, and crucially—it still lets you slide and adjust when conditions demand it.
This knot isn’t exactly fresh off the boat. Sailors have been deploying it for hundreds of years, and the mechanical principles are bulletproof solid. What caught me off guard was discovering how many experienced boaters had zero exposure to it. When I began introducing it to clients during dock construction projects, the response was consistent across the board: once you master this knot, your old taut-line hitch ends up gathering dust in the memory bank. That’s a statement I don’t make lightly after spending twenty years neck-deep in marine construction work.
This guide covers the exact mechanics of tying the midshipman’s hitch, the scenarios where it excels, situations where you should pick something else, and which rope specifications deliver the best results. I’ll also recount the difficult lesson—learned through painful experience—about why that final wrapping turn matters so much.
When to Use the Midshipman’s Hitch Adjustable Knot on a Boat
The strength of the midshipman’s hitch shows up whenever you need a sliding loop that grabs hard the moment load gets applied. It genuinely shines when water conditions—tidal flux, moving current, passing boat traffic—produce changing stresses on your mooring lines. Here on the Gulf, we routinely see tidal elevation shift by nearly 24 inches inside a single afternoon cycle, which by itself justifies wanting a knot that repositions without losing its essential bite.
These are the situations where I reach for this knot before all others:
- Adjustable mooring lines: When water level swings force you to redistribute tension across a dock line without completely disassembling and re-securing it from the beginning.
- Trip line systems for anchors: Primarily when managing a subsurface retrieval line attached to a buried anchor that requires field adjustments without hauling the entire setup.
- Floating marker buoy connections: Situations where buoy position shifts with changing water depth and your line needs to maintain tension without creeping or releasing.
- Bumper line attachment: Using a midshipman’s hitch on your dock railing allows you to rapidly deploy or retract a bumper while keeping it firmly positioned when not being adjusted.
- Weather-cover line management: For boat covers on weather-protected slips, this knot handles tension changes on protective tarps without needing to walk the entire cleat line and restart the securing process.
However, this absolutely isn’t a universal solution. I actively avoid recommending it as your standard cleat hitch when cleats are accessible—a correct cleat hitch beats it for speed and dependability in those conditions. It also falls short with heavy-diameter lines exceeding 3/4-inch, where the wrapped sections don’t compress evenly. Based on my field experience, the performance sweet spot sits between 3/8-inch and 5/8-inch double-braid nylon cordage.
Tying the Midshipman’s Hitch: Complete Method
Begin with a section of rope that’s completely free from tangles or damage—no crimpings, no frayed strands at your working terminus. Minimum working length should be somewhere between 18 and 20 inches for a 1/2-inch rope diameter. Falls shorter than that make your final wrapping loop awkward and prevent proper locking action.
Materials Needed
- Rope stock from 3/8″ through 5/8″ diameter—braided or double-braid nylon construction
- An anchoring point to loop around (dock piling, attachment ring, cleat base, anchor line)
- Grip and dexterity—rope moisture is acceptable, but your palms need friction while you tension the wraps
Step-by-Step Process
- Build your loop structure. Position your working end alongside your standing line to establish a loop formation. Your working strand must travel over the standing strand, not underneath. This crossing direction is absolutely essential — reversing it represents the most widespread rookie mistake I witness on the dock.
- Execute two inside wraps. Circulate your working end around the standing line two complete times within your formed loop. Every rotation should align flush against its predecessor, building horizontally rather than piling vertically. Move in the direction of your loop’s sealed end with every wrap. These paired wraps create your locking mechanism — under strain they compress and hold.
- Execute one exterior wrap. Once your interior wraps are complete, circle your working end over the standing line one additional time on the exposed perimeter of your loop — the unfinished side. This singular wrap starts converting your rolling hitch configuration into true midshipman’s hitch geometry.
- Complete the locking wrap. Thread your working end back into the loop you established in step one, finalizing a locking wrap. Cinch it securely. That final locking wrap distinguishes the midshipman’s hitch from the rolling variant — it arrests the knot when violent jerking forces occur.
- Compress and seat all wraps. Tension both your standing line and working tail at the same moment to compress the wraps until they nestle against one another tightly. Your completed knot should register as compact and solid. Slide it along the standing line—motion should be fluid when there’s no load, then instantaneous locking once standing-line tension engages.
- Validate load behavior. Pull your standing section firmly in the direction where you expect actual load. Your knot must engage immediately without migration. Next, push the knot from its rear end—it should travel unimpeded. Excessive resistance during backward motion signals over-tensioned wraps during compression; loosen and recompress appropriately.
Don’t rush step five. Compressing a knot correctly isn’t perfectionism—it’s structural integrity. An improperly compressed midshipman’s hitch may migrate gradually under repeated loading patterns, precisely matching the cyclical forces from boat wake transmission and surge from tidal activity.
Where This Knot Goes Wrong: Failure Patterns I’ve Experienced
During my earliest independent contracting season, I discovered this lesson through expensive trial. Setting up a temporary mooring connection on a 26-footer—center console, Perdido Bay location. I fastened what appeared to be a flawless midshipman’s hitch to a floating dock attachment point, but I shortcut the compression process. My wraps didn’t compress together completely. When I returned to the slip after six hours, the vessel had shifted roughly twelve feet along a fully extended line—my knot had gradually shifted under ripple and wake action until it was functioning as nothing more than a loose loop. Fortunately nobody sustained injury, but the boat’s rubbing edge came perilously close to dock piling contact. That day’s experience became permanent wisdom for me.
Failures I Regularly Witness
- Abandoning the final locking wrap: Excluding it leaves you with a rolling hitch—respectable as standalone knots go, but it migrates unpredictably during shock situations. For watercraft, that final wrap is absolutely mandatory.
- Reversing your initial crossing pattern: When your working strand moves underneath the standing strand in the opening step, your wraps orient inversely. Visually the knot appears acceptable yet hemorrhages 30 to 50 percent holding strength.
- Selecting rope with excessive stiffness: Three-strand polypropylene and rigid polyester braid resist seating uniformly. Wraps never compress completely. Double-braid nylon proves superior consistently, in my field observation.
- Failure to compress wraps: Incompletely seated wraps rearrange themselves once load starts acting, shrinking your holding surface area. Always compress before applying load.
- Inadequate tail length: Maintain six to eight inches of remaining tail past your final wrap. Shortage here permits the remaining strand to escape the loop under extreme tension, instantly neutralizing everything you’ve built.
One additional caution merits attention: both the ABYC standards and Coast Guard publications stress continuous monitoring of mooring lines and their knots during active conditions. Even correctly tied knots in premium rope break down progressively from solar degradation, constant movement friction, and repetitive strain cycles. Inspect your mooring arrangement and refresh your knot-work a minimum of yearly—quarterly or more frequently under demanding conditions.
The Right Rope Transforms the Midshipman’s Hitch From Good Into Bulletproof
Even perfectly executed knot-work fails when the fiber underneath it deteriorates. During one particularly turbulent marine weather event, a degraded dock line—brittle from UV damage—nearly resulted in a client’s boat liberation when my midshipman’s hitch, though flawlessly tied, couldn’t overcome the rope’s structural breakdown. Premium double-braid nylon line with proper stress characteristics is non-optional when you’re depending on this knot system under operational conditions.
Advantages
- Double-braid structure produces grip on the midshipman’s hitch that stays locked even under sustained wind loading and tidal pull variations—I’ve experienced single-weave construction creep more situations than I’d prefer to remember.
- 1/2″ diameter provides adequate strength for holding knots without migration and remains manageable during rapid repositioning when you need to adjust at tide change or respond to unexpected conditions.
- Nylon’s longevity against sun damage and resilience in frigid conditions prevent the brittleness or micro-damage that damages budget dock lines after enduring a single harsh season.
Limitations
- Nylon construction adds significant weight and resistance to movement in comparison to contemporary synthetic braids, creating fatigue when coiling or feeding through tight dock spaces—less convenient when you’re changing lines multiple times hourly.
- A single 20′ section provides insufficient length for larger-beam vessels or extended spring-line configurations; most setups benefit from maintaining two or three additional lines in your mooring inventory.
I almost talked myself out of upgrading my line stock one season because the cost felt steep, but the first time my midshipman’s hitch held a 32-footer steady against a rising afternoon chop, I knew it was money well spent. Grab the SEACHOICE Double-Braid Nylon Dock Line 1/2″ x 20′ (40241, Gold/White) and build a dock line collection you can actually trust.
Frequently Asked Questions
What rope size works best for the midshipman’s hitch?
The performance sweet spot sits between 3/8-inch and 5/8-inch double-braid nylon cordage. I use SEACHOICE Double-Braid Nylon Dock Line 1/2″ x 20′ for my own midshipman’s hitch at the dock. The knot falls short with heavy-diameter lines exceeding 3/4-inch, where wrapped sections don’t compress evenly.
How much working rope length do I need to tie this knot?
Minimum working length should be somewhere between 18 and 20 inches for a 1/2-inch rope diameter. Falls shorter than that make your final wrapping loop awkward and prevent proper locking action. Maintain six to eight inches of remaining tail past your final wrap.
Why did my midshipman’s hitch slip on my boat?
The most common failures are abandoning the final locking wrap, reversing your initial crossing pattern, or failing to compress wraps completely before applying load. Incompletely seated wraps rearrange themselves once load starts acting. I once shortened the compression process and my 26-footer shifted roughly twelve feet along a fully extended line under ripple and wake action.
How often should I replace or inspect my mooring lines?
Inspect your mooring arrangement and refresh your knot-work a minimum of yearly—quarterly or more frequently under demanding conditions. Mooring lines break down progressively from solar degradation, constant movement friction, and repetitive strain cycles, even when knots are correctly tied in premium rope.
Sources and further reading
About This Article

Written by Trent Hollis. Waterfront homeowner turned DIY obsessive. After two decades tinkering with my own dock, seawall, and boat lift on the Gulf Coast, I share everything I've learned about waterfront construction, boat lift maintenance, and coastal living projects. More about this site.
Scope and limits. Trent is a waterfront homeowner, not a licensed marine contractor. Structural, electrical, and lift work should go to a licensed marine contractor, and most in-water work needs a permit before you start.
Verify this against a primary source
Specifics change, and your situation may differ from the one described here. These are the authorities worth checking directly:
- ABYC — marine electrical and construction standards
- U.S. Army Corps of Engineers — permitting for work in navigable waters
- NOAA Tides & Currents — tidal range and water level data for your site