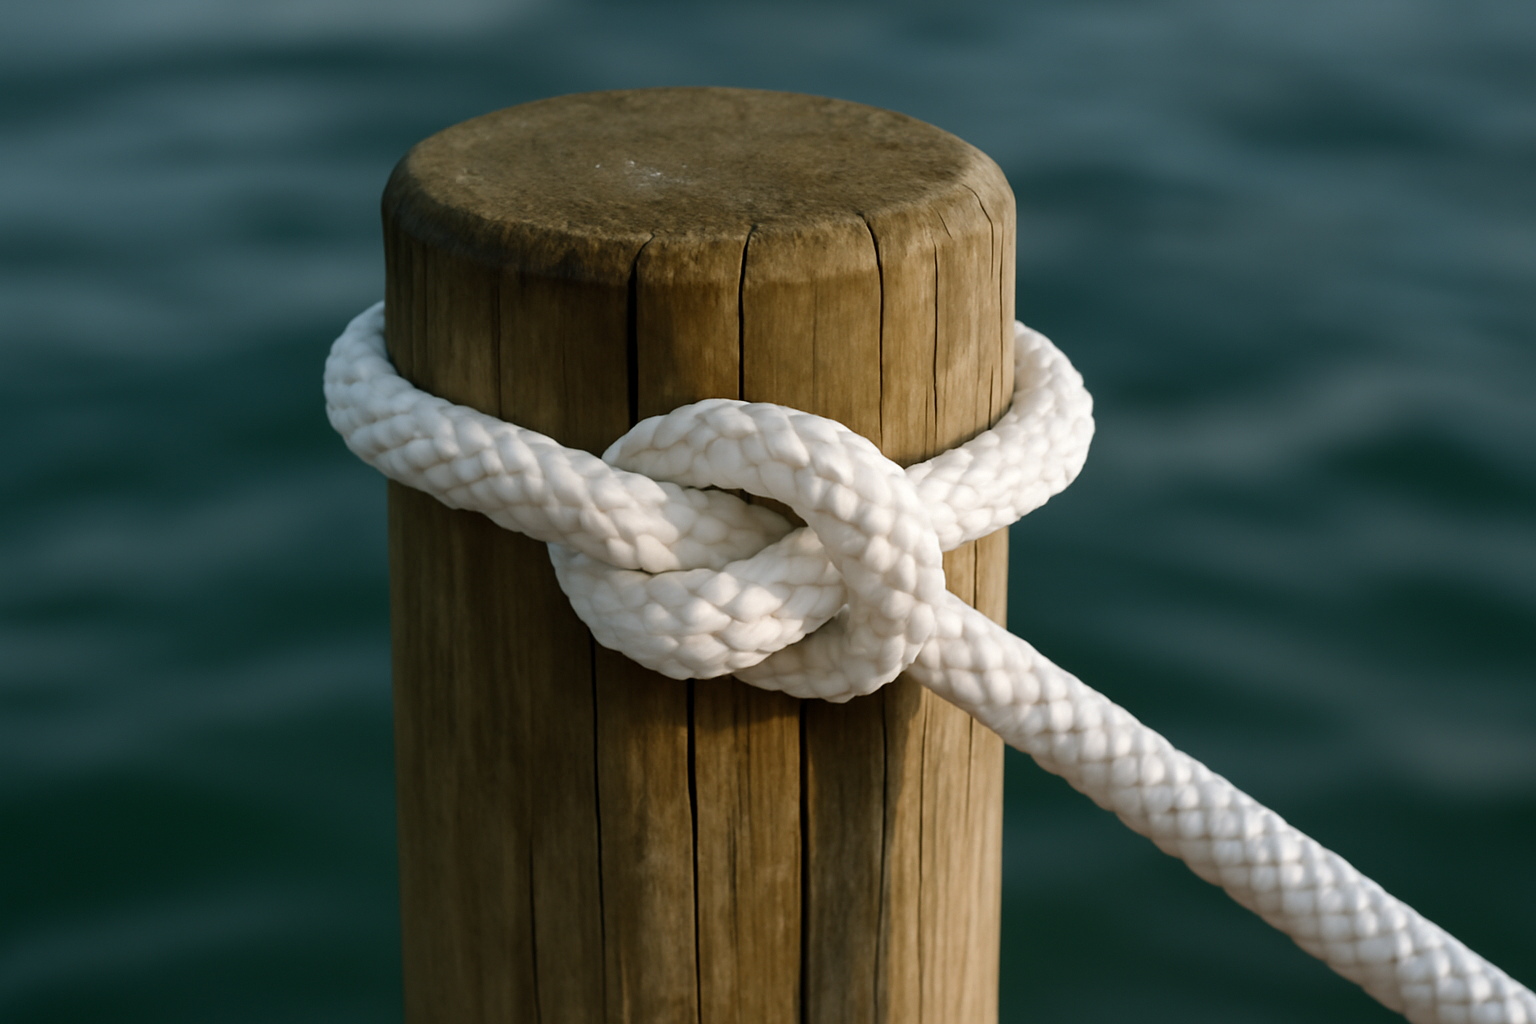
Between 316 stainless and hot-dip galvanized hardware, stainless wins for saltwater durability every time — but the clove hitch beats both of them when you need a knot that works right now, on any cylindrical surface, in conditions that would jam a mechanical fastener. The clove hitch is one of those essential skills every waterfront person should own before the boat leaves the slip.
My name is Trent Hollis. I spent two decades building and repairing docks, seawalls, and boat lifts along the Gulf Coast — from Pensacola down to Corpus Christi. Today I run Dockside DIY because I believe the knowledge I gathered on the water should be available to everyone, not locked behind contractor fees. The clove hitch was one of my earliest lessons on the job, and it still solves problems for me every single week.
What twenty years of waterfront work taught me: dock incidents rarely stem from a wrongly chosen knot. They happen because nobody tied anything at all, or someone rushed through it and knotted it loose. The clove hitch lacks glamour. What it does have is speed, dependability, and adjustability — on a working dock, that trio outweighs fancy gear.
When to Use a Clove Hitch on a Boat or Dock
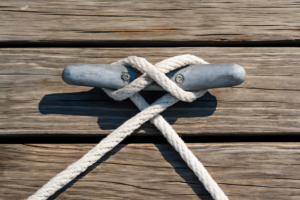
The clove hitch sits in that “temporary hold” classification for marine knots. That’s not dismissal — that’s exactly what it does best. When you need to lock a line fast to something round — a piling, a dock column, a rail stanchion, or a cleat without horns — this is your knot. It grips hardest when tension pulls at roughly ninety degrees to the post.
I grab this knot for these exact scenarios:
- Quick temporary hold on a boat at a piling while examining structural problems or setting up a work zone
- Rapid attachment of fender lines to stanchions or rail posts before pulling in to dock
- Holding down treated wood, PVC pipe, or electrical conduit to dock structure during repairs
- Setting up a temporary guide line across a dock section that’s being rebuilt
- Securing a safety line to a post when you’re working above water
The clove hitch does have genuine shortcomings, though. It’s not suitable for overnight mooring or extended periods when the boat sits unattended. When load direction changes — which happens with tide, swell, and boat traffic — the knot can work loose and gradually slip down a smooth piling. I’ve witnessed it. The failures section goes deeper into this.
Which Rope Materials Give You the Best Grip
Material selection carries more weight than most realize. The clove hitch depends on contact friction between rope coils and the post itself. For this reason, double-braid nylon or three-strand laid nylon in the 3/8″ through 5/8″ range performs best. These fibers create enough surface traction to lock the wraps in place without crushing or warping the rope.
Slippery materials sabotage this knot. Polypropylene — that bargain-bin line at hardware stores — fails badly with clove hitches because the slick finish lets the wraps migrate under tension. Single-braid Dyneema or Spectra are even more problematic; too rigid and too smooth to build adequate friction. Stick with nylon braid for any dock application. The inherent elasticity absorbs shock loads, and the weave texture maintains grip.
How to Tie a Clove Hitch Boat-Side: Step-by-Step Instructions
Two distinct approaches exist for tying this knot, depending on access to the post’s top — or working on the side of an already-standing piling. Both are covered below. Option one moves faster when you can feed line across the top of the post, which is what I do roughly ninety percent of the time on typical dock pilings.
Method 1: Over-the-Post Clove Hitch (Fastest)
- Make two matching loops. Grip the rope with both palms facing yourself, leaving roughly 18 inches of working end available. Rotate your right hand downward and outward so the working end travels across the standing line. Replicate this same motion with your left hand to create a second, identical loop.
- Nest the loops together. Bring your left loop behind your right loop until they overlap. The center should display an X where the two loops intersect.
- Slide both loops down the post. Place the nested loops onto the post top as a single bundle. Let gravity settle them naturally into position.
- Cinch by pulling both directions. Grab the working end in one hand and the standing line in your other. Draw them apart with steady pressure until the knot grips the post firmly. You’re aiming for solid contact — controlled tension, not straining muscles.
- Align the wraps. Verify that both loops sit side-by-side and lie flat against the post surface. If they’re twisted or crossing, holding power drops. Straighten everything before you finish tightening.
Pro tip: Rough-textured pilings — aged pressure-treated wood or encrusted concrete — create substantially more friction than smooth ones like painted steel or galvanized posts. For smooth surfaces, add a backup half-hitch after tightening. Takes barely longer than brewing coffee and eliminates creep.
Method 2: Around-the-Post Clove Hitch (When Top Access Isn’t Available)
- Wrap the working end around the post. Route the rope around the post from left to right, finishing with the working end pulled back toward your body and crossing over the standing part to form a diagonal X.
- Wrap a second time, staying parallel. Bring the working end back around the post in the same rotational direction. The second wrap must track directly alongside the first wrap — above it or below it, but never crossing it.
- Feed the working end under the second loop. After your second wrap, thread the working end under the second loop before pulling tight. Most learners miss this step. This tuck prevents the entire knot from unraveling.
- Tighten by pulling the standing line steady and the working end hard. The standing part stays stationary while you yank the working end. Both wraps compress together against the post.
- Check for flatness and alignment. Wraps must be smooth, parallel, and compressed on the post. Any gapping or rotation signals a poorly dressed knot — untie and tie it again.
Method 2 gets used constantly when I’m securing fender line to a mid-stanchion on someone else’s boat. It solves the problem perfectly when the top is unreachable. However, executing this version cleanly under real-world pressure takes repetition, so practice until muscle memory kicks in before conditions demand it.
Common Mistakes That Cause a Clove Hitch to Fail
Experience taught me this lesson painfully early on. A neighbor needed a 22-foot center console secured to a treated pine piling while we replaced sections of dock. I wrapped a casual clove hitch around a slick, painted post and skipped any follow-up hitch for insurance. Partway through our lunch break, a barge wake churned past — and that knot slid a full eight inches down the piling. The boat drifted sideways into the adjacent slip’s dock box. No injuries, but that accident made me permanently religious about backup hitches on glossy posts.
These are the failures I encounter most regularly — and how to prevent them:
- Crossing wraps: When the wraps overlap rather than align side-by-side, holding friction plummets. Always straighten the knot’s geometry before you finish pulling tight.
- Forgetting the tuck (Method 2 specifically): Omitting the working-end tuck gives you two half-hitches, which can unroll when loads cycle back and forth.
- Relying on it alone on slippery surfaces: Painted steel, PVC, or galvanized posts let the knot migrate downward gradually. Stack a half-hitch or two on top of the clove hitch when working on slick material.
- Mismatched rope and post dimensions: A 1/4″ line wrapped on a 10-inch post doesn’t angle sharply enough for adequate bite. Right-size your rope to the post — 1/2″ double-braid is my baseline for standard dock situations.
- Counting on it for unattended boats: This knot does temporary work only. Tide, wind, and wake action shift the load direction repeatedly, and the knot walks loose. Reach for a bowline or cleat hitch if you’re leaving the boat unsupervised.
The Rope That Won’t Slip When Your Clove Hitch Really Needs to Hold
Your knot is only as reliable as the line you’re using. Budget-grade, slippery rope creeps under pressure or when saturated — specifically the scenarios where you need that knot rock-solid.
What works
- Double-braid construction locks a clove hitch down without slipping, even under cross-currents and lateral boat movement
- Contrasting white and gold striping makes spotting the knot easy from your slip, letting you visually verify security without walking the whole length
- Half-inch diameter provides substance for hand-tying speed without fumbling, yet remains compact enough for tight-quarters deck maneuvers
What doesn’t
- Twenty-foot length means needing two separate lines for most end-to-end mooring setups, requiring advance planning of your dock line supply
- Nylon elongates significantly under sustained heavy loading, so a clove hitch alone shouldn’t handle the sole responsibility of securing an overnight boat
I learned the hard way that a slippery line can undo a perfect knot in seconds — I once watched a clove hitch creep loose on some cheap synthetic line during a rain squall because the wet surface had zero tooth. Get the SEACHOICE Double-Braid Nylon Dock Line 1/2″ x 20′ (Gold/White) and stop worrying about whether your knot will actually stay tied.
Frequently Asked Questions
Can I use a clove hitch to moor my boat overnight?
No. The clove hitch is a temporary hold only, not suitable for overnight mooring or extended periods when the boat sits unattended. When load direction changes with tide, swell, and boat traffic, the knot can work loose and gradually slip down a smooth piling.
What size rope works best for a clove hitch?
Double-braid nylon or three-strand laid nylon in the 3/8″ through 5/8″ range performs best. I use 1/2″ double-braid as my baseline for standard dock situations. These fibers create enough surface traction to lock the wraps in place without crushing the rope.
Why did my clove hitch slip down the piling?
Slippery surfaces like painted steel, PVC, or galvanized posts let the knot migrate downward. For smooth surfaces, add a backup half-hitch after tightening. Rough-textured pilings like aged pressure-treated wood create substantially more friction and hold better.
What’s the most common clove hitch mistake I’m making?
Crossing wraps instead of aligning them side-by-side causes holding friction to plummet. Always straighten the knot’s geometry before you finish pulling tight. Also, forgetting the working-end tuck in the around-the-post method can let the entire knot unravel under load cycling.
Sources and further reading
About This Article

Written by Trent Hollis. Waterfront homeowner turned DIY obsessive. After two decades tinkering with my own dock, seawall, and boat lift on the Gulf Coast, I share everything I've learned about waterfront construction, boat lift maintenance, and coastal living projects. More about this site.
Scope and limits. Trent is a waterfront homeowner, not a licensed marine contractor. Structural, electrical, and lift work should go to a licensed marine contractor, and most in-water work needs a permit before you start.
Verify this against a primary source
Specifics change, and your situation may differ from the one described here. These are the authorities worth checking directly:
- ABYC — marine electrical and construction standards
- U.S. Army Corps of Engineers — permitting for work in navigable waters
- NOAA Tides & Currents — tidal range and water level data for your site