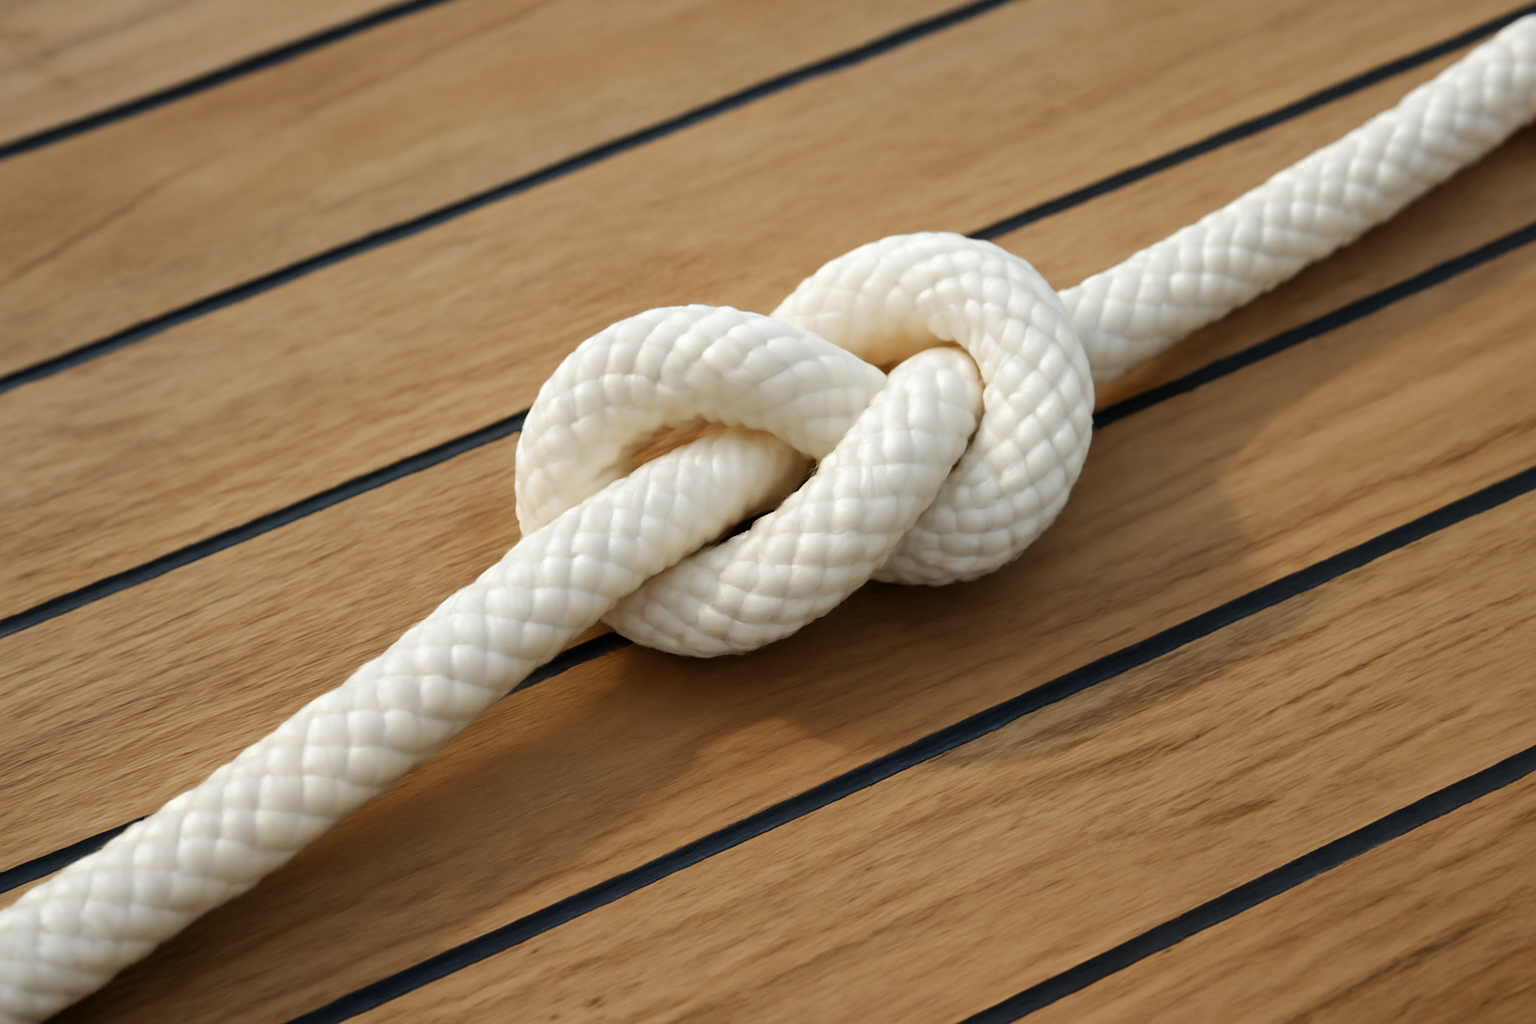
Right now, I’m standing over a corroded cleat where somebody wrapped a bow line three weeks ago, except the rope slipped straight through the fairlead and let a 22-foot center console drift into its neighbor’s slip. Clean gouge down the hull. The bitter end had nothing on it — no stopper, no knot, nothing. That boat should never have gotten loose. A figure eight knot, the kind commercial fishermen and blue-water sailors have thrown thousands of times, would have caught and held. One knot. That simple. Yet I still walk docks and find boaters who’ve never learned to tie one correctly, and it costs them.
Over the last twenty years building and fixing marine infrastructure up and down this coast, I’ve thrown this knot at every condition the Gulf throws back. Hurricane prep lines, summer squalls while standing on a ladder, rigging in the dark — tied correctly, the figure eight does not fail. It sounds fussy to harp on a single knot, but when you’ve watched what happens to boats and docks when people skip this detail, you understand why I do.
What I’m laying out here is the complete picture: how to tie it, where it belongs in your work, what goes wrong, and honestly, which rope materials make it bulletproof versus which ones need help. Master this, and you stop losing boats to preventable drift.
When to Use the Figure Eight Knot in Marine Settings
A figure eight serves one core job: it acts as a mechanical barrier. Prevent the rope end from passing back through a block, fairlead, or cleat fitting. On a sailboat, if your jib sheet runs free through its block during a tack, you lose the entire sail. A properly tied figure eight at the bitter end makes that impossible. Sailors depend on this knot every time they’re underway.
On the dock side of my world, I deploy it with slightly different intent but equal frequency. I use it to keep dock lines from unreeling through hardware during setup, to anchor halyard tails before I finish a permanent connection, as a grab point when I need to arrest a working line, and as final insurance on fender attachments. It is not the primary knot for securing a boat — that duty belongs to the cleat hitch — but it absolutely belongs in your finishing arsenal and as a last-line safety measure.
Where This Knot Proves Its Worth on the Water
- Blocking jib and spinnaker sheets at their bitter ends to prevent uncontrolled run-through during sail handling
- Anchoring dock lines to stop them from sliding through fairleads when you are setting up mooring configuration
- Finishing halyard tails before you execute a final fixed connection point
- Providing a temporary grip zone on a live line during dock repair or new construction phases
- Securing fender attachment lines to prevent complete separation if the primary connection fails
What this knot cannot do matters just as much. It is not suitable for joining two separate lines together, it cannot be released once it’s under heavy load, and rope thicker than 3/4 inch becomes difficult to work with for this particular knot. Knowing the boundary is what separates confident rope handlers from people who blame the rope when the real problem was tool selection.
Tying the Figure Eight Knot: The Complete Sequence
Once your hands understand the sequence, this knot takes roughly four seconds from start to finish. Go slow through your first few practice rounds — by the time you’ve done it twenty times at the dock, your hands will own the motion and your eyes will do the watching.
- Grip the standing line in your non-dominant hand, leaving roughly 10 inches of free working end. For typical 1/2-inch dock line, ten inches provides adequate length to produce a visibly clean knot with sufficient tail for verification. Keep the standing part secure and stationary.
- Cross the working end over and across the standing part to establish your initial loop. The working end goes overtop, not underneath — this specific direction prevents the most common beginner reversal. The crossing itself determines everything that follows.
- Rotate the working end underneath and completely around the standing part. You are establishing a full 360-degree spiral at this stage. The emerging pattern should already suggest the outline of the numeral 8. Keep tension loose enough to work with during this phase.
- Pass the working end back upward and through the original loop you established in Step 2. The tail enters the loop from underneath and emerges upward. The resulting profile should unmistakably resemble a figure 8 at this point.
- Grab both the standing portion and the working tail, then apply firm opposing tension. Pull steadily until the knot compresses into a uniform, symmetrical eight-shaped form. If the result appears uneven or simply resembles a basic overhand, you likely skipped or rushed the spiral in Step 3 and should try again.
- Work the knot by methodically removing all slack and ensuring fair lay before any load is applied. A dressed knot is one that is fully seated and ready for work. Pass your fingers carefully through the entire figure 8 pattern and confirm the rope transitions smoothly with no hidden twists or kinks.
Complete. The entire process requires inspection and proper dressing before you trust the knot. Undressed, sloppy figure eights can slip unexpectedly under sudden shock, particularly on slippery double-braid constructions. Invest those extra few seconds in dressing work — it is time well spent against preventable failure.
Which Rope Materials Make This Knot Reliable — and Which Ones Don’t
The figure eight locks in beautifully with three-strand nylon and double-braid nylon, the workhorse lines you find securing most dock installations and sheet systems. These constructions grip the knot geometry securely. Double-braid polyester used for halyard applications also accommodates the figure eight very well.
The exception is high-modulus synthetics — Dyneema, Spectra, and similar ultra-low-friction UHMWPE materials. These super-slick fibers are becoming standard on performance-oriented vessels, and here is the critical point: a figure eight can actually slide straight through a block opening on these materials under sustained load. I found this out during a 2017 halyard rigging assignment when a Dyneema tail simply pulled free from what I thought was a solid figure eight knot. Nobody was injured, but it was expensive and unnecessary. If you are working with these materials, either tie a secondary overhand knot on the tail for backup, or select an entirely different stopper configuration. Match your knot type to your rope type — this detail is nonnegotiable for safety.
Why This Knot Fails: The Most Prevalent Causes
Twenty years observing rigging mistakes on the water has shown me that most knot failures follow predictable, repeatable patterns. Rope doesn’t randomly fail — people tie it wrong in consistent ways.
Confusing It with an Overhand Knot
This occurs more frequently than I’d prefer. An overhand knot mimics the figure eight at first glance but lacks the second internal crossing that delivers the bulk and holding power. Under stress, an overhand slips through openings where a figure eight stays put. Always verify you have two distinct crossing zones in the finished knot before you apply any load.
Omitting the Dressing and Seating Process
An unsecured, loose-lying figure eight subjected to shock loading — like a sail whipping in a sudden gust — can invert internally and either slip clear or seize into a form that resists untying. I always seat my knots completely before they go into service. Spending thirty extra seconds on the dressing phase eliminates this entire failure mode.
Leaving Insufficient Tail Length Beyond the Knot
A tail measuring less than three rope diameters past the knot body creates a hazard. On 1/2-inch line, this translates to a minimum of 1.5 inches of exposed tail. I personally always retain four to six inches to allow for confident visual inspection and as a margin against unexpected stretch or slippage. Short tails are the first red flag I search for when examining someone else’s rig work.
Selecting Incompatible Rope Constructions for the Application
As noted earlier, knot security hinges directly on the rope composition you are tying it into. Deploying a figure eight as a stopper on slippery synthetic materials absent a backup knot represents a material safety gap. The American Boat and Yacht Council along with international offshore sailing organizations explicitly advise complete inspection of all stopper knots and attachment points before any passage. This guidance exists because people have lost equipment and worse by ignoring this distinction.
The Rope That Works Even When You Rush the Knot
A figure eight is only as dependable as the rope carrying it. If your dock line is thin, stiff, or exhibits slipping behavior under pressure, even a flawlessly executed stopper can fail — and you’ll be swimming after your boat instead of standing on the dock watching it.
What works
- Double-braid nylon construction grips the figure eight securely and resists sliding behavior under pressure, even during heavy conditions or excessive cleat loading
- The 1/2″ cross-section means the finished knot protrudes visibly from the block — immediate recognition from the dock or wheelhouse that the stopper is positioned and functional
- Gold and white color contrast delivers visibility of the knot from a distance, particularly during early-morning or late-afternoon operations when visibility is marginal
What doesn’t
- The 20-foot length is insufficient if your procedure involves multiple wraps around the cleat or if you require extended distance to a remote piling connection
- Double-braid nylon retains water and takes longer to dry compared to alternative synthetics, meaning it remains heavier and less responsive to handle during early-morning operations
I’ll admit I second-guessed myself the first time I trusted a new line with my own boat—old habits die hard. But after tying a figure eight in this rope and loading it down with a 28-footer in a cross-chop, I finally stopped worrying about knots slipping through blocks. Grab a SEACHOICE Double-Braid Nylon Dock Line 1/2″ x 20′ (model 40241, Gold/White) and tie your first stopper knot with real confidence.
Frequently Asked Questions
How much working end do I need for a figure eight knot?
I leave roughly 10 inches of free working end for typical 1/2-inch dock line. This provides adequate length to produce a visibly clean knot with sufficient tail for verification. I personally retain four to six inches of exposed tail beyond the knot body to allow for confident visual inspection and as a margin against unexpected stretch or slippage.
Will a figure eight knot work with Dyneema or Spectra rope?
No — a figure eight can slide straight through a block opening on high-modulus synthetics like Dyneema and Spectra under sustained load. If you’re working with these ultra-slick materials, either tie a secondary overhand knot on the tail for backup, or select an entirely different stopper configuration.
Can I use a figure eight knot to join two separate lines?
No. A figure eight is designed only as a mechanical barrier to prevent rope ends from passing through blocks, fairleads, or cleats. It is not suitable for joining two separate lines together, and it cannot be released once it’s under heavy load.
What’s the difference between a figure eight and an overhand knot?
An overhand knot lacks the second internal crossing that delivers the bulk and holding power of a figure eight. Under stress, an overhand slips through openings where a figure eight stays put. Always verify you have two distinct crossing zones in the finished knot before applying any load.
Sources and further reading
About This Article

Written by Trent Hollis. Waterfront homeowner turned DIY obsessive. After two decades tinkering with my own dock, seawall, and boat lift on the Gulf Coast, I share everything I've learned about waterfront construction, boat lift maintenance, and coastal living projects. More about this site.
Scope and limits. Trent is a waterfront homeowner, not a licensed marine contractor. Structural, electrical, and lift work should go to a licensed marine contractor, and most in-water work needs a permit before you start.
Verify this against a primary source
Specifics change, and your situation may differ from the one described here. These are the authorities worth checking directly:
- ABYC — marine electrical and construction standards
- U.S. Army Corps of Engineers — permitting for work in navigable waters
- NOAA Tides & Currents — tidal range and water level data for your site