Walk down a waterfront neighborhood and you’ll spot the difference immediately. One dock shows soft, splintering boards and hardware that’s oxidized to orange-brown crust — the result of corner-cutting from three or four years back. Two slips over sits a dock with tight fasteners, clean composite decking, and stainless hardware that catches the light. That second one will still be standing in twenty years. The first one won’t make it to ten. I’ve watched this contrast play out hundreds of times along the Gulf, and it always comes down to one thing: decisions made before the first nail went in. This guide is about making the right ones.
My own entry into dock building came at twenty-three on a tidal bayou outside Pensacola, where I was tasked with a 40-foot fixed pier and armed with almost nothing except teenage overconfidence. I selected fasteners nobody should have trusted near salt water, neglected to analyze soil conditions beforehand, and watched a minor storm surge claim a section the following year. The lessons that dock handed me — purchased at real cost — are what I’m distilling here for you now.
You’re either constructing from the ground up or trying to salvage something that’s weathered decades of neglect. Either way, you need a coherent roadmap. What follows covers material selection, the regulatory maze, the actual building sequence, and the rhythms of long-term upkeep. It includes real numbers, honest timelines, and the caliber of guidance you’d expect from someone standing next to you, not someone trying to sell you something. Let’s proceed.
| Grade | Minimum Retention | Primary Use | Lifespan If Submerged |
|---|---|---|---|
| UC4B | 0.40 PCF CCA or ACQ | Primary framing | 20-30 years with maintenance |
| UC4C | 0.40 PCF CCA or ACQ | Pilings wholly interred in marine substrate | 20-30 years with maintenance |
| UC3B | Below 0.40 PCF | Not recommended for dock use | 3-5 years |
Understanding Dock Types and Design Basics
Before you commit to any materials purchase, you must establish which dock configuration serves your circumstances. Making the wrong structural choice before breaking ground consumes both dollars and months of your life, frequently resulting in a permit denial. From what I’ve observed, the water environment itself — not the builder — is what dictates the constraints.
Fixed vs. Floating Docks
Pilings anchored deep into the seafloor or lakebed support fixed docks. They deliver stability and reduced upkeep over decades, making them excellent choices where water depth remains constant year-round. They become impractical, however, in locations where tidal movement or seasonal variation exceeds 3 feet — your boat access becomes unreliable as water elevations swing.
Floating structures respond to water level fluctuations by rising and sinking with the water column. They perform admirably on tidal rivers, coastal inlets, and storage reservoirs subject to seasonal elevation shifts. The exchange is heightened vigilance — the anchoring systems and buoyancy chambers demand regular inspection and maintenance. On the Gulf Coast and across freshwater lake regions, I typically advocate for a mixed design: a fixed primary structure extending to deeper water, then a floating modular section where boats actually moor.
Sizing Your Dock Correctly
Width carries disproportionate importance. Four feet approximates a narrow footpath. Six feet accommodates two people moving past one another without contact. Eight feet permits simultaneous kayak stowage, seating, and equipment maintenance. For recreational boating with a moored vessel, anything narrower than 6 feet by 20 feet feels cramped; I rarely recommend it. Safe boat maneuvering in a slip typically demands 1.5 times your hull’s beam measured on either side.
Diagram your approach before any physical work commences. Factor in which direction receives sunlight throughout the day, which way wind typically moves across the water, and your arrival angle from the channel. A dock oriented to face the prevailing breeze transforms tying up into genuine misery during wind-driven afternoons.
Permits, Regulations, and What Happens If You Skip Them
This is where most DIYers develop selective hearing. Don’t. Unauthorized docks get demolished by government order — and you absorb the demolition bill. I witnessed this unfold multiple times. An Escambia County resident constructed an eye-catching pressure-treated structure without submitting a single permit application. Six months passed, then the county showed up with removal machinery. Eight thousand dollars, completely lost.
Federal, State, and Local Jurisdiction
Dock authorization flows through concurrent regulatory channels. Nationally, the Army Corps of Engineers (USACE) maintains authority over navigable waterways pursuant to Section 10 of the Rivers and Harbors Act and Section 404 of the Clean Water Act. Most residential docks qualify for Nationwide Permit 36, which moves faster but remains mandatory. Your state’s environmental office adds oversight — the FDEP manages Florida, the TCEQ handles Texas, and so on.
County and municipal authorities introduce yet another approval tier, addressing setback distances, maximum allowable heights, and adjacent-property-owner notification protocols. In my experience, local permit departments represent your project’s slowest bottleneck. Anticipate 6 to 16 weeks for complete authorization depending on location and staff capacity. Some jurisdictions move expeditiously; others operate at bureaucratic molasses speed.
What You’ll Typically Need to Submit
- A scaled survey drawing showing ownership boundaries, proposed dock positioning, and measurements to the active navigation corridor
- Engineering documentation or certification from a PE if piling installation is involved
- Environmental assessment paperwork if your location sits adjacent to wetlands, seagrass flats, or marshland
- Documentation proving your property entitlement or formal written authorization from relevant water authority
- Filing fees ranging from approximately $150 up to $600 contingent on location and build scope
[INTERNAL LINK: dock permits by state — a state-by-state breakdown of dock permit requirements]
Choosing the Right Dock Materials
Your selections at the material stage establish whether your dock survives ten years or thirty. They also establish whether your bank account survives the project. A breakdown of your principal material categories, evaluated from a practitioner’s lens:
Pressure-Treated Lumber
PT lumber dominates residential dock construction across North America. For submerged or in-ground applications, specification demands UC4B minimum (0.40 PCF CCA or ACQ). Dropping below this threshold guarantees accelerated decomposition. I mandate UC4B for primary framing, UC4C for pilings wholly interred in marine substrate. Material cost runs roughly $1.50 to $3.50 per linear foot for 2×10 framing stock — economical and universally obtainable through standard suppliers.
ACQ-treated material necessitates exclusively stainless or HDG fastening — no compromises. Standard zinc fasteners corrode catastrophically in contact with ACQ lumber. My 2009 Mobile Bay job used ordinary joist connectors with PT framing. By month eighteen, disintegration was extensive. Specify 316 stainless steel exclusively for saltwater proximity.
Composite Decking
Composite materials — engineered wood-plastic hybrids — resist decay, splinter formation, and photodegradation substantially better than lumber products. Upfront expense climbs significantly, hovering between $4.00 and $9.00 per linear foot, but lifespan extends to 25 to 30 years with nominal upkeep. For human-foot contact surfaces where barefoot walking is anticipated, composite represents the superior choice over pressure-treated alternatives. It maintains lower surface temperatures in southern sun, a meaningful benefit during sweltering coastal summers.
Aluminum and Steel Framing
Aluminum dock assemblies have expanded their market share for floating applications. They offer minimal weight, inherent corrosion resistance, and modular snap-together assembly suited to owner installation. They’re unsuitable, however, for piling-braced fixed configurations in typical circumstances — they simply cannot handle the gravitational and lateral loads that wood framing accepts. Steel exhibits tremendous strength yet demands rigorous surface protection and constant anti-corrosion vigilance, particularly in marine saltwater. The ongoing maintenance tax on steel makes it uneconomical for most owner-builders.
[INTERNAL LINK: composite vs. pressure-treated decking — a full material comparison for dock builders]
Step-by-Step Dock Construction Overview
Site-specific variables preclude a universal engineering blueprint within a single article — every location presents distinct challenges. I can, however, outline the construction sequence so you grasp the work’s scope and logistics. A standard residential fixed dock demands 3 to 7 working days with a two-person crew, excluding permit processing windows and supply chain delays.
Phase 1 — Site Preparation and Piling Installation
Pilings constitute the entire system’s skeleton. Everything built above them stands or fails based on their verticality, spacing integrity, and penetration depth. On most Gulf applications with soft substrate, I specify 8-inch or 10-inch CCA-treated round stock. Embedding depth hinges on soil composition — I target a minimum of 8 feet into the bottom, often exceeding that on loose sand or unconsolidated muck layers.
Specialized barge-mounted or land-based hydraulic/vibratory pile-driving rigs install pilings. For owner-builders without that machinery, regional piling specialists will drive timber for you and leave the superstructure assembly to your crew. This split-responsibility method represents smart economics — it places the most critical structural task in professional hands while preserving your cost control elsewhere. Per-piling installation fees generally run $150 to $350 accounting for depth and site accessibility.
Phase 2 — Framing the Substructure
After pilings reach their final position, you install primary stringers (the lengthwise beams) and secondary cross-beams (oriented transversely). Standard residential bay intervals are 8 feet apart, with 2×10 or 2×12 joists spaced at 16-inch intervals. All structural connections employ engineered joist brackets and through-bolted fastening at piling contacts — minimum ½-inch diameter galvanized or stainless carriage bolts throughout.
Verify plumb and square orientation on all elements prior to final fastening. A framing square and quality laser transit prevent countless headaches. Specifically, measure diagonal distances across each framing rectangle — equal diagonals indicate square geometry. If measurements diverge, apply corrective force to the frame before permanent installation.
Phase 3 — Decking Installation
Orient decking boards at 90 degrees to the structural joists, maintaining uniform spacing for drainage — a 16-penny nail works as a gap spacer, yielding approximately 1/8-inch clearance between planks. Anchor each board with dual fasteners per joist contact point. Composite decking demands pre-drilling to prevent fracturing during screw insertion. For PT decking, ring-groove stainless fasteners or ACQ-rated deck screws are necessary.
Border each deck’s perimeter with a frame-and-reveal trim set, finishing the exposed ends cleanly while sheltering the end-grain against moisture penetration. This single architectural gesture separates contractor-quality builds from amateur undertakings.
Your Complete Guide to Building and Maintaining Dock Safety Features
Safety isn’t a regulatory box-check. It’s not optional equipment you append after construction. It’s the foundational feature that keeps occupants and guests uninjured during their time on your waterfront property. Incorporate protective systems into the original design — retrofitting them afterward becomes costlier and never achieves the integration of thoughtful planning.
Railings and Edge Protection
The International Residential Code mandate: guardrails on any walking platform exceeding 30 inches vertically above grade or water surface. Most waterfront docks meet this criterion. Build railings to 36 inches minimum with vertical baluster spacing of no more than 4 inches. Aluminum railing assemblies suit docks exceptionally well — they resist rot, eliminate painting obligations, and withstand saltwater environments admirably.
Even on low-elevation docks where codes permit railing omission, I advocate installation in any scenario involving children. Slip-and-fall consequences — striking a boat hull or timber piling — generate injuries that shouldn’t happen. Protecting against this scenario is worth the $400 to $600 material outlay.
Required Safety Equipment on Your Dock
- Minimum one USCG Type IV buoyant throw device, positioned for immediate access
- A rescue implement — pole or curved hook — measuring no less than 12 feet for reaching someone from the dock edge
- Surface treatment preventing slips on walking areas, particularly ramp sections vulnerable to moisture and algae
- Nighttime visibility through solar lighting or low-voltage LED installation
- Conspicuous warning signage reading “No Diving” if water depth measures under 9 feet
Safety note: Electric shock drowning (ESD) poses a concealed but genuine threat where docks feature shore-power infrastructure. Any electrical service to a dock must be installed by a qualified marine electrician adhering to NFPA 303 specifications. Owner installation of dock electrical is simply unacceptable. This represents my single non-negotiable position.
Dock Maintenance Schedule: What to Do and When
Consistent upkeep yields 20 to 30 years of service life. Irregular or absent maintenance reduces serviceability to 8 to 12 years. The materials don’t determine the outcome — deliberate attention does. The schedule I employ personally and advise to every property owner I consult:
Monthly Tasks
- Traverse the complete decking surface searching for motion in fasteners, board-edge elevation, or areas yielding underfoot
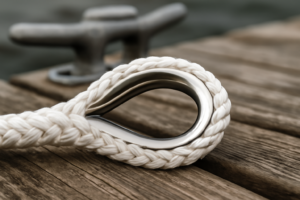
- Examine each cleat, bollard, and tie-off bracket for movement or visible corrosion products
- Eliminate accumulated plant matter from beneath the dock structure — trapped vegetation creates moisture and accelerates wood degradation
- Assess dock securing lines for fiber separation and substitute any that display beyond 10% material loss
Annual Spring Inspection
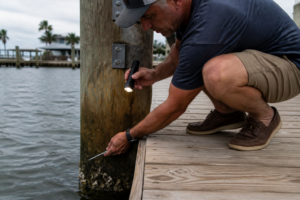
Each spring — before peak utilization arrives — I conduct exhaustive structural evaluation. This necessitates entering the water or paddling underneath to examine all submerged piling sections. Look for evidence of borers (wood texture becoming spongy, pinhole marks), surface checking (small radial cracks), and piling deflection exceeding reasonable tolerance. Pilings exhibiting more than 2 inches of crown deflection at the cap warrant prompt engineering review.
Inspect all fastening points: connecting hardware, through-bolts, bearing brackets. Tighten fasteners showing movement and swap corroded attachment components for new stainless or galvanized equivalents. A thorough spring evaluation on a standard 30-foot dock requires approximately 2 hours and prevents the emergence of problems requiring $3,000 to $10,000 intervention if ignored through another season.
Every 2 to 3 Years
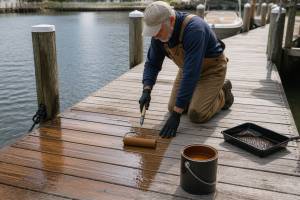
- Clean all deck surfaces using high-pressure spray and apply water-resistant coating to PT lumber
- Examine rail post bases for wood softening or color change — this juncture represents the typical failure origin
- Install fresh protective wrap or anti-fouling tape on the lower piling portions within the zone of regular wave action
- Check the exposed edges of deck boards for radial checking and seal open cracks using marine-grade sealant
[INTERNAL LINK: dock inspection checklist — a printable annual dock inspection guide]
Seasonal Dock Care: Storms, Freezes, and Drawdowns
Your climate zone determines which seasonal concerns demand response. Gulf residents manage hurricanes and tropical systems. Upper-latitude lake owners contend with frozen water and ice expansion. Reservoir owners navigate scheduled water-level reductions. Each circumstance requires distinct preparation.
Hurricane and Storm Preparation
When a named cyclone approaches, remove all detachable items: boxes, seating, climbing racks, life-safety equipment, and miscellaneous gear. Objects left behind become airborne missiles. For floating sections, deploy supplemental securing lines or detach and remove buoyancy chambers if Category 2 or above conditions threaten.
Fixed piling docks demand minimal pre-storm reinforcement beyond removing portable items and creating documentation. Photograph your dock prior to every hurricane season for insurance substantiation. I cannot overstate this — claim adjusters require baseline imagery to process payment.
Winterizing in Cold Climates
Frozen water generates phenomenal forces — estimates exceed 40,000 pounds per square foot during severe cold snaps. Floating dock platforms demand removal from the water column before ice formation commences. Leaving sections in place invites obliterated connecting hardware, bent frames, and compromised flotation chambers. Stationary piling docks derive benefit from positioning de-icing equipment (water circulating devices) around each piling base, maintaining liquid conditions and preventing ice bonding to timber surfaces.
Seasonal drawdowns on regulated freshwater reservoirs warrant advance notice acquisition. Numerous managed reservoirs experience drops of 3 to 10 feet in cold months. Contacting the lake authority provides advance warning — I’ve encountered floating docks abandoned high on exposed bottom because owners neglected this reconnaissance.
Common Dock Building Mistakes — and How to Avoid Them
Two decades of waterfront work reveals recurring errors in owner-builder undertakings. Below are the most frequent lapses, along with prevention strategies.
Mistake 1: Using the Wrong Lumber Treatment Grade
Selecting UC3B material where UC4B specification is required represents one of the most widespread and financially devastating errors I encounter. The shelf appearance is nearly indistinguishable. However, the chemical retention percentage differs substantially — and UC3B fails dramatically within 3 to 5 years when submerged or buried. Always inspect the lumber grade stamp on each piece prior to checkout.
Mistake 2: Skipping the Soil Test
Bottom substrate varies extensively throughout even a confined water body. Sand, organic sludge, consolidated clay, and limestone bedrock each present distinct load-bearing characteristics. Omitting soil evaluation amounts to guessing at required piling penetration depth. Competent marine contractors conduct simple hand-auger investigations affordably. For substantial projects, engaging a geotechnical specialist delivers worth exceeding its cost.
Mistake 3: Underestimating Total Project Cost
Owner-built fixed dock expenses range from $30 to $60 per square foot in material costs, shifting upward with decking selection and hardware specifications. A 6-foot-wide by 30-foot-long platform — 180 square feet — carries material expenses between $5,400 and $10,800, not accounting for permits, tool rental, or contracted piling services. Reserve 20% contingency atop material budgets. Waterfront projects consistently surface unanticipated complications.
Mistake 4: Building Without Thinking About Access for Repairs
Future maintenance will require beneath-deck access. Establish this reality now. Install removable decking sections positioned over principal junction points. Maintain clearance between the structure and shoreline so you retain working room from land. On floating platforms, engineer hardware accessibility without full disassembly. Anticipated maintenance becomes manageable; deferred consideration creates genuine hardship.
Mistake 5: Assuming All Waterfront Properties Have the Same Rights
Riparian entitlements — the legally-recognized authority to develop and utilize shoreline immediately adjoining your parcel — fluctuate widely by jurisdiction and waterbody type. Certain reservoirs sit wholly on public submerged property. Construction without government consent constitutes trespassing regardless of deed language asserting waterfront access. Contact your state environmental or lands division before commencing any work.
Final Thoughts: Your Complete Guide to Building and Maintaining a Dock
This comprehensive guide spanning dock construction and stewardship progresses from regulatory application through decades of cyclical maintenance. It represents substantial material intentionally — waterfront projects reward conscientious upfront research. The water is spectacular and merciless simultaneously, and every procedural compromise during planning or assembly eventually demands repayment with interest.
Permit the scope to discourage nothing. Innumerable homeowners successfully construct and maintain docks without engineering backgrounds or professional credentials. The competencies are learnable; the methodology remains straightforward. The satisfaction — stepping onto a structure built entirely through your effort, observing sunset illumination across the water column — delivers profound fulfillment seldom encountered elsewhere. I’ve yet to meet a dock proprietor expressing regret about the decision.
Begin your permitting research first. Proceed to design conceptualization. Then assemble your materials inventory. Approach the project in discrete, manageable phases and you’ll reach completion. Deeper content addressing every topic introduced throughout this article awaits — follow the internal links to expand your competency incrementally. Questions not addressed here? Comment sections exist for precisely that reason. I personally review submissions and respond accordingly.
The Dock Building Checklist, Phase by Phase
Everything above is the reasoning. This is the sequence — the checklist I wish someone had handed me before my first build, in the order the work actually has to happen. Skipping ahead is how people end up with a permit problem after the pilings are already in the water.
Phase 1 — Before you spend a dollar
- Confirm you actually own or control the riparian/littoral rights to the water frontage
- Call your county or city waterfront permitting desk and ask what they require — write down the name of who you spoke to and the date
- Ask whether your water body falls under state submerged-lands leasing
- Ask whether a U.S. Army Corps of Engineers authorization applies (Section 404 / Section 10 waters)
- Check your HOA or deed restrictions — these catch more people than the county does
- Check the setback distance from your neighbors’ property lines projected into the water
- Photograph the existing shoreline from several angles before anything changes
Phase 2 — Site and design
- Measure water depth at mean low water at the dock head, not at high tide
- Record the tidal range, or for lakes, the seasonal drawdown range
- Identify bottom composition — sand, mud, clay, or rock changes your piling depth and method
- Decide fixed vs floating based on that depth and range, not on price
- Determine prevailing wind and wave fetch direction
- Check for submerged grasses or protected habitat — this can redirect your whole layout
- Sketch the layout with dimensions, and confirm it against the size limits in your permit
Phase 3 — Permits in hand
- Submit drawings with dimensions, materials, and water depths
- Budget 2–12 weeks for review depending on jurisdiction and whether the Corps is involved
- Do not order materials until the permit is issued — approved plans change
- Post the permit on site if your county requires it
Phase 4 — Materials and staging
- Pilings sized and treated for your water — marine-grade treatment retention matters more than diameter alone
- Framing lumber and decking chosen and ordered with lead time built in
- All fasteners in 316 stainless or hot-dip galvanized — never mix metals
- Hardware: joist hangers, carriage bolts, washers, bracket stock
- Cleats, bumpers, ladder, and any electrical roughed into the plan now, not later
- Confirm delivery access — getting 20-foot pilings to the water is its own problem
Phase 5 — Build sequence
- Set and drive pilings to design depth, checking plumb continuously
- Cut pilings to a consistent elevation using a water level or laser
- Install stringers and cross bracing, bolting rather than nailing at every structural connection
- Frame the decking substructure, confirming diagonal measurements stay square
- Lay decking with consistent gapping for drainage and expansion
- Install cleats, bumpers, ladder, and safety equipment
- Run electrical last, with GFCI protection, and have it inspected
Phase 6 — Before you call it done
- Torque-check every structural bolt
- Confirm no fastener heads sit proud of the walking surface
- Seal cut ends of treated lumber — this is the step everyone skips
- Photograph the finished structure from every angle for insurance and future permits
- File the approved permit, drawings, receipts, and photos somewhere you will find them in ten years
- Set a calendar reminder for your first annual inspection
Print it, cross things off, and do them in order. The single most expensive mistake in dock building is not a material choice — it is doing Phase 4 before Phase 3.
Frequently Asked Questions
What lumber treatment grade do I need for dock pilings?
For submerged or in-ground applications on Gulf docks, specify UC4B minimum with 0.40 PCF CCA or ACQ retention. I mandate UC4B for primary framing and UC4C for pilings wholly interred in marine substrate. UC3B fails dramatically within 3 to 5 years when submerged, making it a costly mistake to skip the proper grade.
How deep should I drive dock pilings into the bottom?
I target a minimum of 8 feet into the bottom on most Gulf applications with soft substrate, often exceeding that on loose sand or unconsolidated muck layers. Embedding depth hinges on soil composition, which is why conducting a simple hand-auger investigation beforehand prevents guessing at required penetration.
Can I install electrical service to my dock myself?
No. Any electrical service to a dock must be installed by a qualified marine electrician adhering to NFPA 303 specifications. Owner installation of dock electrical is unacceptable, and this represents my single non-negotiable position on waterfront projects.
How long does a dock typically last with proper maintenance?
Consistent upkeep yields 20 to 30 years of service life. Irregular or absent maintenance reduces serviceability to 8 to 12 years. The materials don’t determine the outcome—deliberate attention does, as demonstrated by examining docks along the Gulf that fail within ten years versus those standing after twenty.
Sources and further reading
About This Article

Written by Trent Hollis. Waterfront homeowner turned DIY obsessive. After two decades tinkering with my own dock, seawall, and boat lift on the Gulf Coast, I share everything I've learned about waterfront construction, boat lift maintenance, and coastal living projects. More about this site.
Scope and limits. Trent is a waterfront homeowner, not a licensed marine contractor. Structural, electrical, and lift work should go to a licensed marine contractor, and most in-water work needs a permit before you start.
Verify this against a primary source
Specifics change, and your situation may differ from the one described here. These are the authorities worth checking directly:
- ABYC — marine electrical and construction standards
- U.S. Army Corps of Engineers — permitting for work in navigable waters
- NOAA Tides & Currents — tidal range and water level data for your site