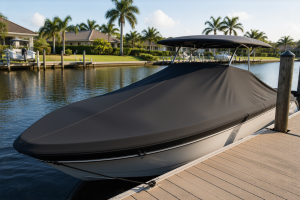
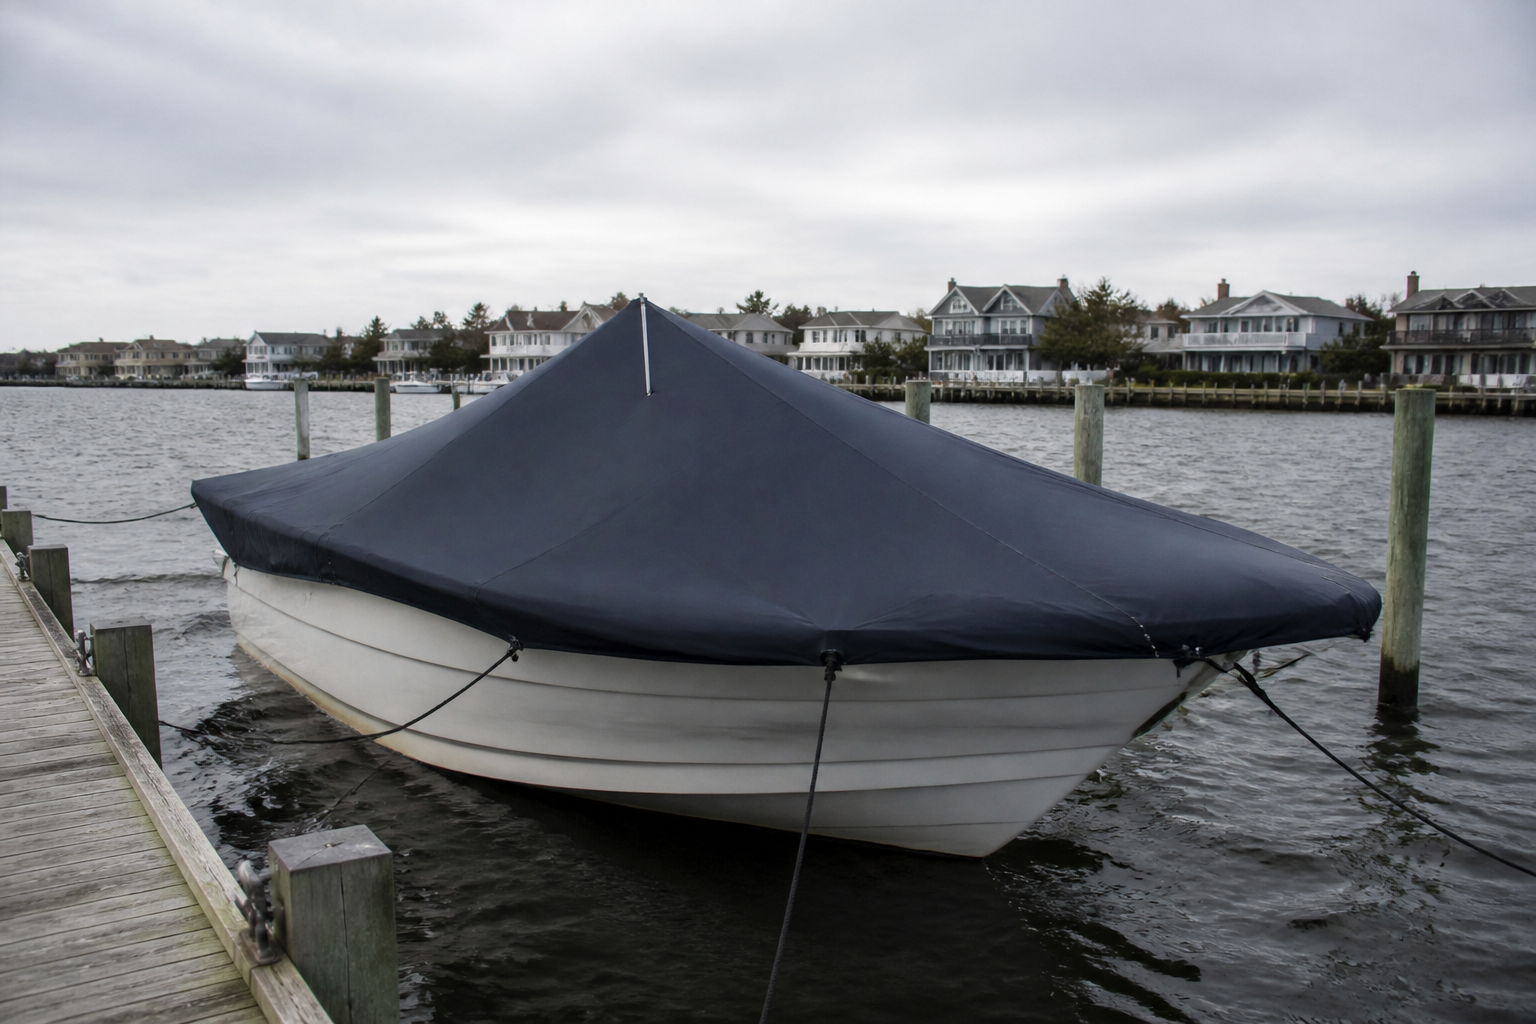
If you want to know how to cover a boat in the water, you have already hit the problem most guides skip. Your boat is not sitting still on a trailer in the driveway. It floats, it moves, and it sits in the same wind that will try to tear the cover off. I have spent two decades on the Gulf Coast working on my own dock, seawall, and boat lift. The covers I tried early on taught me more than any manual did, and most of those lessons cost me money.
Three Covers, Three Different Jobs
Three posts on this site cover related ground, so let me separate them clearly. How to Build a Homemade Boat Cover That Actually Fits is about measuring and sewing a fitted cover for a boat you can walk all the way around. I reference that guide for pattern-making and cutting, and I will not repeat it here. My DIY boat canopy project is a shade structure you sit under. This post covers the case neither one solves, which is the boat that stays in the water all season.
Why a Floating Boat Breaks Every Land Rule
On a trailer, a cover sits still. In a slip, everything moves. Before I design anything for my own boat, I check how it will behave on the water. That one question changes almost every decision that follows.
The Boat Rises, Falls, and Swings
Tide on most Gulf Coast days moves the water a foot or two. Wind-driven surge can add much more. The boat rides up and down on its lines, and it swings with the breeze. Anything tied to the dock and the boat at the same time will eventually saw through itself. I learned this when a fixed strap between the bow and a dock post chafed through in a single season. The fix was simple. I stopped tying the cover to the dock at all.
You Can Only Reach Two Sides
You cannot walk around a hull in the water. Fitting happens from the dock, from a dinghy, or from the water itself. That means you reach the near side easily and the far side with difficulty. Plan every fastening point from the side you can reach. Then test each one before you commit to the next.
Wind Uplift Is the Real Enemy
Rain is a nuisance. Wind is the failure. A cover acts like a sail. When wind gets under the leading edge, it lifts, fills, and pulls every fastener at once. Wind pressure rises with the square of wind speed, which is why small increases matter so much. At 20 mph, the push on a flat surface is roughly 1 pound per square foot. At 30 mph, it climbs to about 2.3 pounds. Across a 150 square foot cover, a 30 mph gust can put several hundred pounds on your attachment points. That is a back-of-the-envelope figure, not an engineering calculation. It still explains why the cover always goes first.
Water Pooling and Pitch
Water that pools on a cover stretches the fabric, collects grime, and eventually drags the material down. Fabric needs slope to shed water. I aim for at least 2 inches of rise per 12 inches of run on any flat-looking panel. I also want the ridge to drain toward the sides, not the middle. A flat tarp on a boat always sags. A sagging tarp is a bathtub waiting to happen.
Chafe Where Fabric Meets Hardware
Rub rails, windshield frames, outriggers, rod holders, and bimini hardware all cut fabric. Every spot where the cover touches metal needs padding. I use 1/8 inch closed-cell foam tape or a UV-stable fabric sleeve sewn over the contact edge. Check these spots every month. Chafe starts small and finishes big.
Where Tie-Downs Should Actually Land
Tie-downs belong to the boat, not the dock. The boat’s own cleats, its bow and stern eyes, and rub-rail attachment points with backing plates are the right anchors. Dock cleats move on a different rhythm than the hull. That mismatch creates the chafe that ends most covers I have seen fail.
Use Stainless and Backing Plates
Use 316 stainless hardware for every attachment. Through-bolt wherever you can. Pair each bolt with a backing plate, a washer at least 1 inch across, and a locking nut. A screw driven into thin fiberglass or old gelcoat will pull out in the first serious blow. Where you cannot through-bolt, use a rated deck fitting rather than a wood screw. Your fastener is only as strong as the surface behind it.
Build in Stretch Between Boat and Cover
I run 3/8 inch or 1/2 inch braided line on each leg, with 12 to 18 inches of shock cord or bungee section built in. The stretch absorbs the rise and fall of the hull. Without it, the cover tries to follow the boat through every wave. It then takes the hit at its weakest seam. Snubbers are cheap insurance. Replace the shock cord every season, because UV breaks it down faster than you expect.
Option One: A Slip Cover on the Boat
This is the lightest option. It is a fitted or semi-fitted cover that stays on the boat, sheds water, and drapes over the rails. For most 18- to 24-foot runabouts, I would recommend it first. It has the lowest wind profile of the three options, and it costs the least to build.
Fabric Weights That Hold Up
- 8 to 10 oz solution-dyed acrylic: strong UV resistance, breathes well, and in my experience lasts three to five years in full sun.
- 14 to 18 oz coated polyester: heavier, stiffer, and more wind-resistant, but less breathable and more prone to trapping moisture.
Solution-dyed acrylic keeps its color because the pigment runs through the fiber, not just across the surface. Coated polyester handles abrasion better. However, it needs deliberate venting or it turns into a humid bag over your boat. For a slip cover I usually pick the acrylic and add grommeted vents.
Cost and Time
Materials for a 20-foot boat run about $250 to $500, including fabric, foam, thread, grommets, shock cord, and stainless hardware. Expect a full weekend of cutting and seaming if you have a sewing machine that handles heavy thread. Ready-made slip covers from boat cover shops often run $400 to $900. Budget a full day on the dock to fit one correctly, because rushing that step causes most of the problems I see later.
Option Two: A Full Enclosure on the Boat’s Frame
A full enclosure wraps the cockpit, and sometimes the helm, in a sealed shell. It gives the best protection from rain, sun, and spray. It also gives wind the most surface to grab. Think of it as the tradeoff you accept in exchange for dry seats.
What the Frame Needs
The frame usually uses 1 inch or 1.25 inch aluminum tubing. It bolts to the boat’s existing rails or bimini bases, so the hardware must match the boat’s structure. Aluminum tubing in those sizes costs roughly $2 to $4 per foot. A set of hoops and cross members for a 20-foot boat runs $300 to $600 in material. Measure the boat’s beam and height twice before you cut anything, because a hoop that fits on the dock may not clear the T-top once everything is bolted down.
The Wind Trade-Off
Here is the honest trade. A full enclosure reduces chafe and keeps the cockpit dry. It also turns the boat into a sail. I have seen enclosures survive on boat lifts, and I have seen others ripped off their frames. I would not put a full enclosure on a boat in an exposed slip without a storm-removal plan. Total cost for a DIY enclosure ranges from $800 to $1,800, depending on fabric weight and hardware quality.
Option Three: A Dock-Mounted Shelter Frame
This is the option I built for my own slip after a rough season. The frame stands on the dock, over the boat, and the cover attaches to the frame instead of the hull. The boat never carries the cover’s load. That single change alters the whole failure picture. The boat moves freely, and the frame stays put.
Frame Height and Layout
Clear height matters. For a typical 20-foot boat with a tower or T-top, I set the top rail about 10 to 11 feet above the dock deck. Measure to the highest point on the boat, then add at least 2 feet for tide, wind, and fabric sag. Check the ridge height against your slip’s overhead clearance and any lines or wires above. Use 4×4 pressure-treated posts or 2-inch square aluminum tube. Fasten them through the dock’s structural framing, not just the decking boards.
Attaching to the Dock Safely
A shelter frame adds live load to a dock that was built for people walking across it. Before I bolted anything, I looked closely at my stringers, pile caps, and connections. I am a homeowner and a DIY builder, not a marine contractor or engineer. If your dock is old, soft, rotted, or built on floats, hire a qualified marine contractor to assess it first. Do not guess on that point. Confirm any permanent structure over water with your harbor authority or local building office before you install it.
Cost and Wind Exposure
- Pressure-treated 4×4 posts and 2×6 beams for a 10 by 12 foot span: $400 to $800.
- Hardware, turnbuckles, and diagonal bracing: $150 to $300.
- Fabric, grommets, and roll-up hardware: $200 to $400.
All in, expect $750 to $1,500 for a frame like mine. Wind exposure on the boat drops sharply, but the frame now carries the load. That makes the frame’s design and its dock connections the critical items. I built mine with a roll-up fabric panel, so I can drop the cover before a named storm arrives. Pull the fabric before the wind shows up, not after.
Fitting and Fastening From the Dock and the Water
Pick a calm morning. Wind under 10 mph makes the job easier and safer. Work from the dock first, then move to a dinghy for the far side. Never lean across the gap between dock and hull with an armful of loose fabric. That is how people end up in the water with a cover wrapped around them.
A Safe Working Sequence
- Secure the boat and check every spring line before you touch the cover.
- Feed the cover over the bow from the dock end, then center it along the hull.
- Attach the leading edge first, at the bow eyes, before anything else.
- Work aft, fastening one side at a time from the dock.
- Use a dinghy to reach the far side, tying off only to the boat’s own cleats.
- Check each snubber for even tension, then tighten the grommet lines.
Wear a personal flotation device whenever you work from a dinghy or near open water. Keep a throw bag and a knife within reach on the dock. For the full list of gear I keep on hand, read the safety kit I keep on every dock.
I Learned This the Hard Way
One spring I fastened a cover’s leading edge to a dock cleat because it was easier from the dock. A squall rolled in at dusk. The cover lifted, the dock cleat held, and the boat’s rub rail took the rest of the force. I lost a section of canvas and nearly cracked a stanchion base. Since then, I tie every leading edge to the boat, never the dock. The extra ten minutes of rigging has never cost me a cover.
Ventilation and Mildew in a Cover That Never Dries
A cover on a boat in the water sits in humid, salty air, often for months. Moisture gets trapped between the fabric and the hull. Mildew follows within a season if you let it. Ventilation is not a luxury here. It is the difference between a cover that lasts and one you throw away.
Build in Airflow
Install at least four mesh vent grommets, roughly 2 to 3 inches across, on the upper panels. Add one low vent on each side so moist air has a path out. Keep the bow and stern open enough for air to move through the cover. In my experience, well-placed vents do more for mildew control than switching to heavier fabric.
A Cleaning and Drying Schedule
Every six weeks during summer, I rinse the cover with fresh water and mild soap. I scrub mildew spots with a soft brush and let everything dry fully before the next rain. Never fold the cover wet. Wet fabric stuffed into a bag becomes a mildew factory overnight. Dry it first, even if that means waiting an extra day.
Winter Covers: Snow Load and Shrink Wrap
Winter searches come in fast, and two questions dominate them. How much snow can a cover over water carry? And is shrink wrap a good idea? Here are my honest answers, based on my own slip and the seasons I have spent on it.
Snow Load Over Water
Snow weighs far more than most people expect. Wet snow runs roughly 15 to 20 pounds per cubic foot. Four inches of wet snow on a 150 square foot cover works out to about 50 cubic feet, which means 750 to 1,000 pounds of added load. Dry powder weighs much less. However, a heavy wet snow on a cold, windy day is the one that breaks frames. Pitch the cover so snow slides off. Clear it after each storm. Design the frame for the heaviest snow your area realistically sees.
If a hard freeze is in the forecast, pull anything that can trap ice or freeze and crack. What to Remove From Your Dock Before a Hard Freeze walks through the rest of that prep, and I follow it every winter.
Why Shrink Wrap Is a Bad Idea in an Occupied Slip
Shrink wrap seals the boat in plastic. That traps humidity, and condensation forms under the film with every temperature swing. The wrap cannot breathe, so moisture has nowhere to go. In a slip, it also becomes a sail the first time wind picks up. Once wrap tears, it often shreds into strips that foul props, dock lines, and intake openings. For most owners with a boat in a wet slip, I say skip it. If your marina requires wrap, follow their rules and confirm the details with them directly.
What I Do Instead
I use a breathable winter cover on a frame, with the same venting plan I use in summer. I keep the bilge pump tested and the drain openings clear. I also winterize the dock’s electrical and water lines before the cold arrives. My full routine is in my annual dock winterizing checklist.
How to Cover a Boat in the Water Without Losing It to the Next Blow
Now you know how to cover a boat in the water without fighting it all season. Start by matching the cover to your exposure and your budget. A slip cover suits a sheltered slip and a modest budget. A full enclosure suits a protected lift. A dock-mounted frame suits an exposed slip where the boat needs real protection. Each choice carries its own wind and maintenance trade-off, and you should choose with those trade-offs in mind.
Keep these rules in front of you every time you cover a boat in the water:
- Tie every leading edge and tension point to the boat, not the dock.
- Build in snubbers so the cover can rise and fall with the hull.
- Pitch every panel so water and snow slide off instead of pooling.
- Vent the cover at least four places, and dry it before storing.
- Pull the cover before a named storm, not after it arrives.
Hire someone when your dock’s structure is questionable, when the slip sits in a heavily exposed spot, or when a frame needs skills you do not have. Hire a qualified marine contractor for any dock-mounted structure on an old or floating dock. Confirm local rules with your harbor authority or building office before you install anything permanent over the water. That one phone call can save you a removal order and a rebuild.
About This Article

Written by Trent Hollis. Waterfront homeowner turned DIY obsessive. After two decades tinkering with my own dock, seawall, and boat lift on the Gulf Coast, I share everything I've learned about waterfront construction, boat lift maintenance, and coastal living projects. More about this site.
Scope and limits. Trent is a waterfront homeowner, not a licensed marine contractor. Structural, electrical, and lift work should go to a licensed marine contractor, and most in-water work needs a permit before you start.
Verify this against a primary source
Specifics change, and your situation may differ from the one described here. These are the authorities worth checking directly:
- ABYC — marine electrical and construction standards
- U.S. Army Corps of Engineers — permitting for work in navigable waters
- NOAA Tides & Currents — tidal range and water level data for your site